
Outpaint Mask Editor
Outpaint mask editor node: drag a frame around an image to build an outpaint mask.
ComfyUI Outpaint Mask
Custom ComfyUI node for creating outpaint masks interactively.
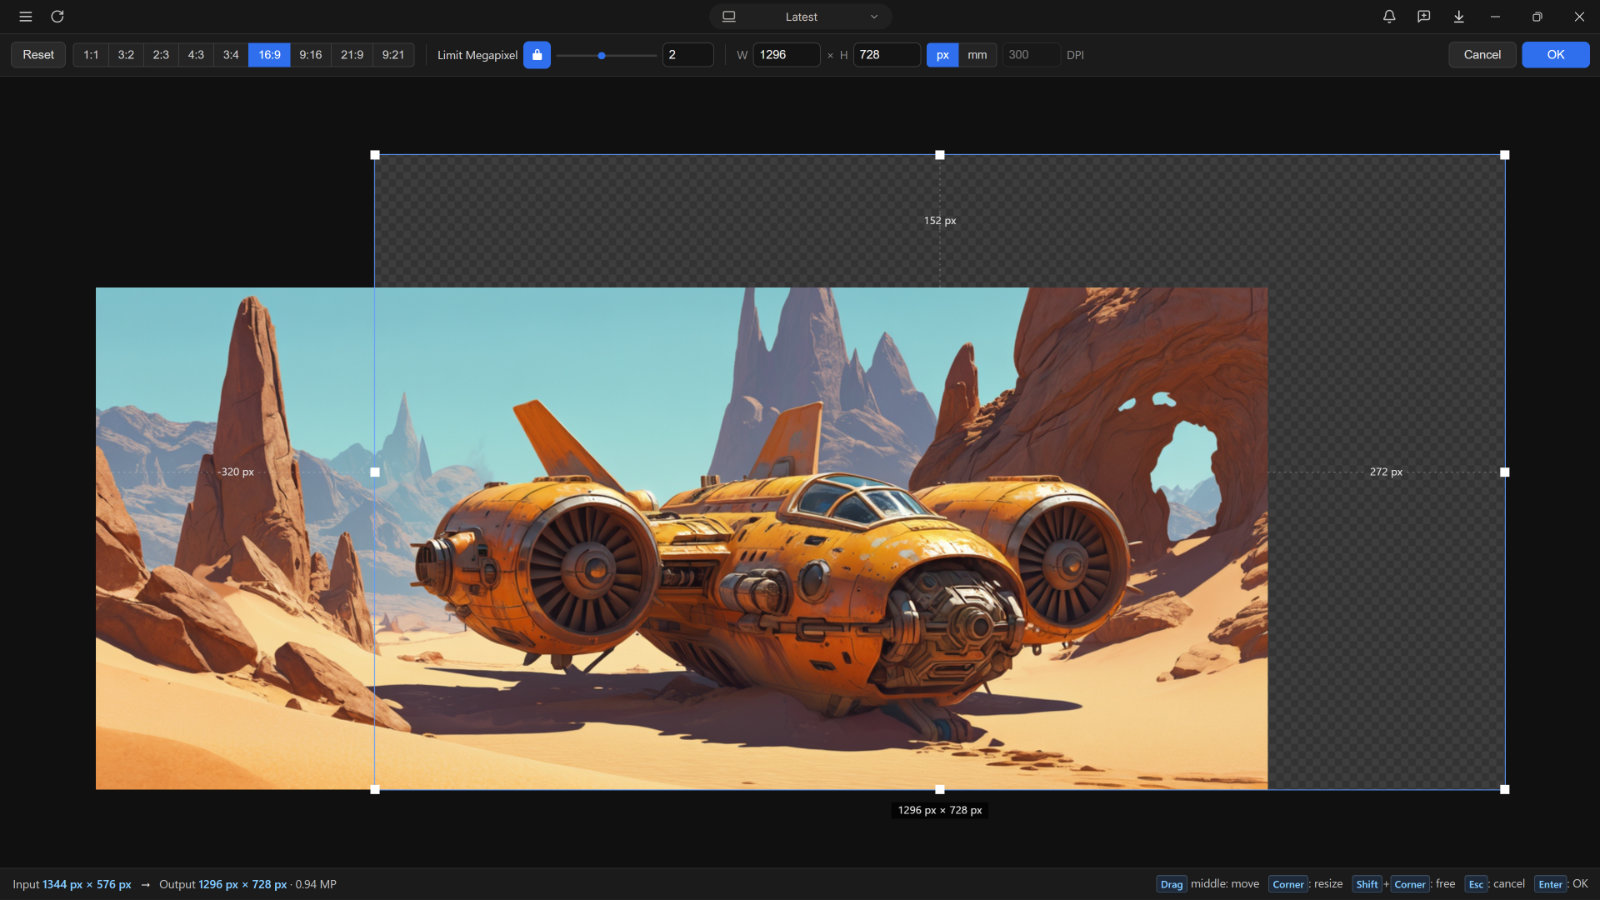
Select or upload an image on the node (or hover the preview and use the clipboard-paste icon).
- 8 draggable handles: corners resize proportionally by default (hold Shift for free resize)
- Snapping to the original image edges and to 16 px multiples.
- Aspect-ratio preset buttons (1:1, 3:2, 2:3, 4:3, 3:4, 16:9, 9:16, 21:9, 9:21)
- Pixel/millimeter readout switch (px | mm) with a DPI field.
- Adjustable megapixel cap ("Limit megapixel" toggle + slider with typical values + narrow manual input) that the frame area cannot exceed. Slider stops track native model sizes.
The node outputs:
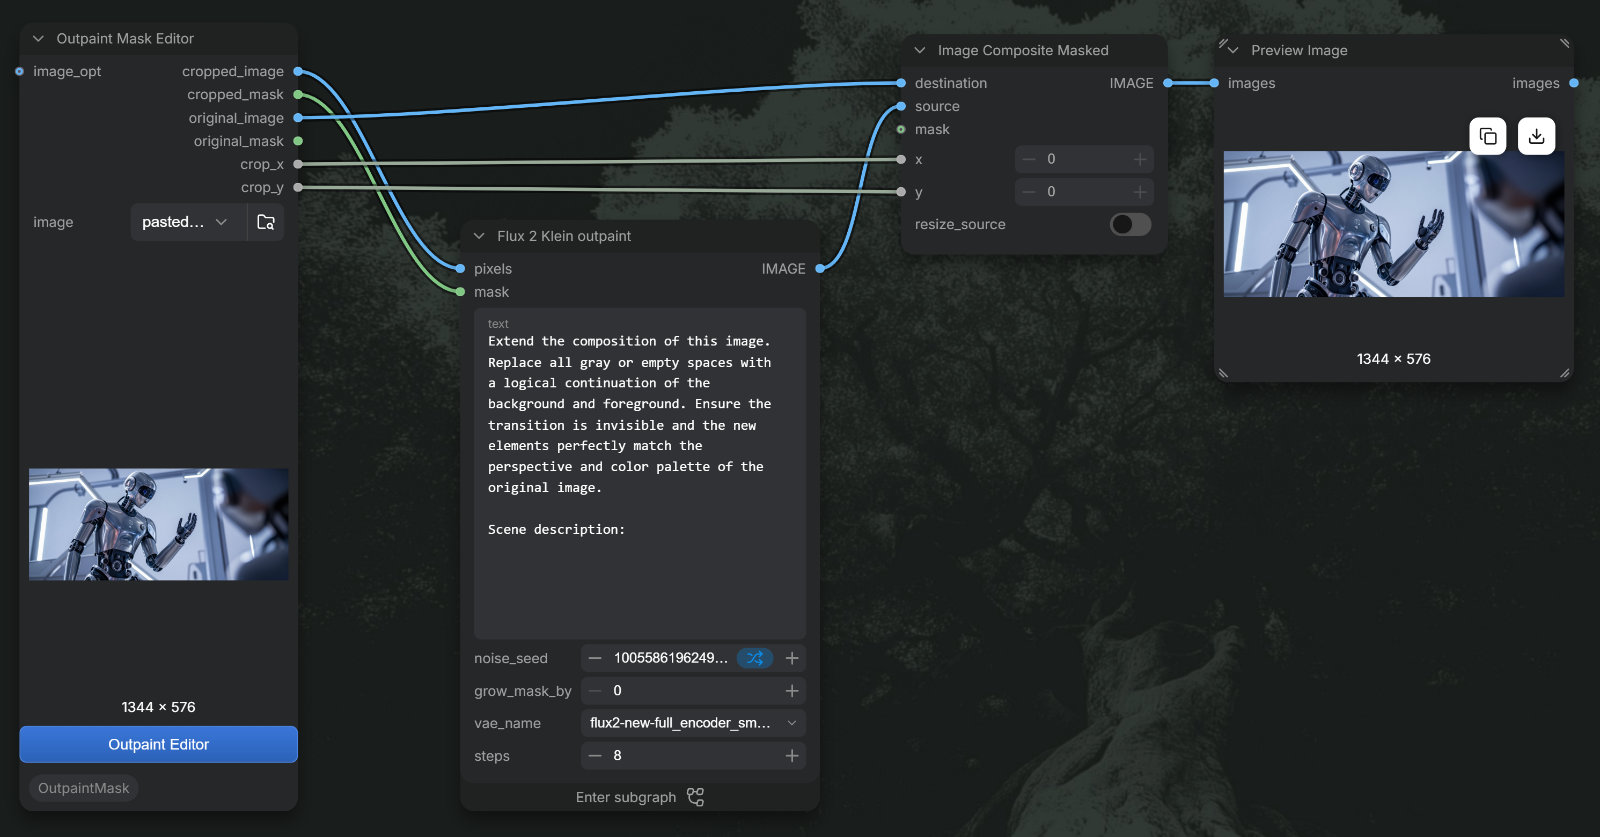
cropped_image— the frame canvas = your render tile (size and context drawn by hand, it may cut into the source), empty outpaint areas are mid-gray (128).cropped_mask—1.0where the image must be generated (outside the original, inside the frame),0.0over the original image.original_image— FULL canvas (whole source + outpaint expansion, nothing cropped away): the source on mid-gray.original_mask— full-canvas mask:0.0over the source and1.0in the outpaint area.crop_x/crop_y— top-left position of the tile on the full canvas. These outputs enable compositing the generated tile back intooriginal_image.
Compositing: Flux2 Klein example
If we not only want to use outpainting but have also cropped a high-resolution image, we can reinsert the cropped section back into the original image. The basic method is use the Composite node.
See the Flux2 Klein sample workflow
Install
Recommended: install with the ComfyUI extension manager. Open
Manager → Custom Nodes Manager, search for ComfyUI-OutpaintMask
(author: zaum), click Install, and restart ComfyUI.
Manual install: copy (or symlink) this folder into
ComfyUI/custom_nodes/ComfyUI-OutpaintMask and restart ComfyUI. No extra
Python dependencies beyond the ComfyUI core.