
H3 Studio
A video editor for MiniMax H3 inside a single ComfyUI node. Keyframes with independent strength dials (guide the motion instead of pinning it), waypoints the clip passes through, and a fullscreen timeline editor with filmstrip cards, framing tool, cast members that persist across clips, and free Creative-Commons image/audio search built in. Continue a clip with real continuity: the previous render's tail frames AND audio are pinned at the new head, so motion and the actual waveform carry through the join — with an auto mode that chains clips hands-free. Finished clips land on a reel you can trim, crossfade, level, score with a soundtrack lane plus three fx lanes, and export as one video. Also includes v2v restyling, soft denoise zones (differential diffusion with per-frame masks), regional prompting and a temporal LoRA blend.
Nodes (6)
The H3 denoise dial that tells you the truth
Tell H3 what belongs inside the mask
Did your H3 clip actually continue the audio, or just sound like it?
Restyle one region of your H3 v2v without the matte line
A whole video editor lives inside one node — for MiniMax H3
A LoRA that changes weight mid-clip, on H3
ComfyUI H3 Studio


A video editor for MiniMax H3, inside a single ComfyUI node. Keyframes with independent strength dials, a fullscreen timeline, clip-to-clip continuation with real motion and audio continuity, and a reel you can trim, score and export as one video.
Want one-line answers instead? Quick recipes.
Install
cd ComfyUI/custom_nodes
git clone https://github.com/shootthesound/ComfyUI-H3Studio
Restart ComfyUI, then hard-refresh the browser (Ctrl+Shift+R) — the pack
ships a frontend extension. No extra Python dependencies. Needs a ComfyUI build
with MiniMax H3 support (v0.30.0 / commit 57500fc onwards).
Start here
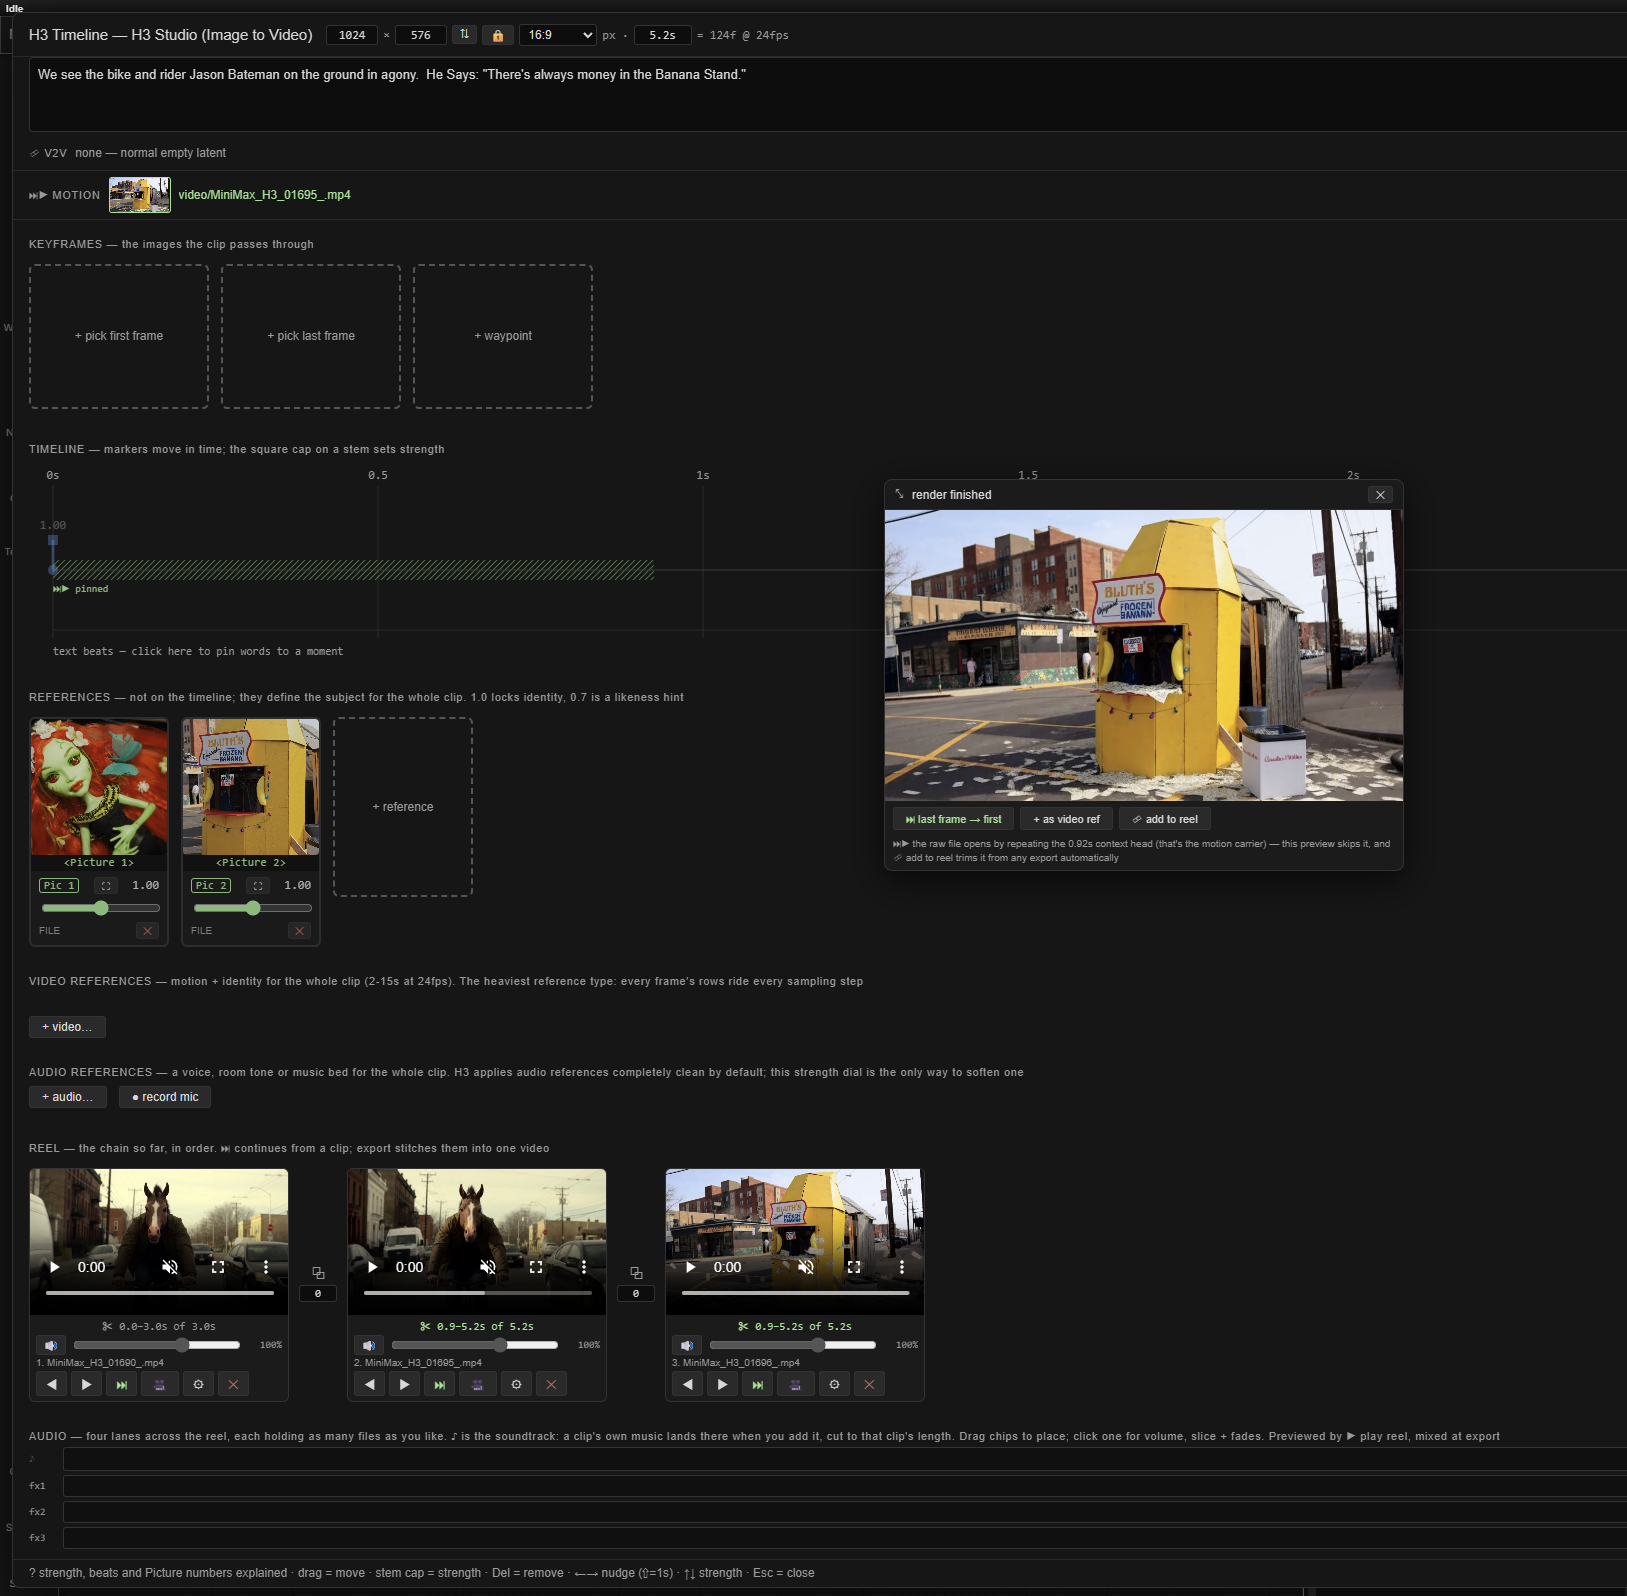
Drag example_workflows/Basic_usage.json onto the ComfyUI canvas. It is the
whole pipeline already wired: loaders, the turbo LoRA, the H3 Studio node,
sampler, and video+audio save. Point the loaders at your own model files, hit
run, and you have a clip.
That workflow is the recommended starting point for everything below — the rest of this page is things you can add to it.
Your first clip
<img src="docs/images/open-editor.png" align="right" width="330" alt="The node, with the open timeline editor button on it">
⤢ Where's the editor? On the node itself — the ⤢ open timeline editor button, right there in the screenshot. The node is a doorway; its widgets are only what the editor writes, so you never need to touch them.
- Click ⤢ open timeline editor on the node.
- Click + pick first frame and choose an image.
- Type a prompt.
- ▶ queue.
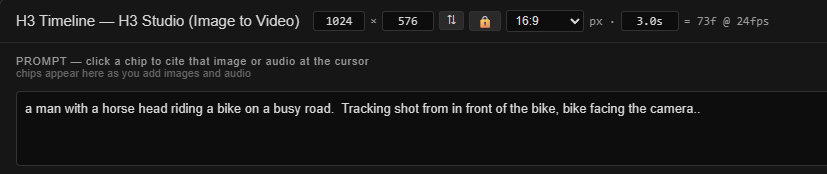
Size, clip length and the frame count sit in the header; the prompt is right under it. Everything else lives in that editor — you never need to leave fullscreen.
What the editor gives you
- Keyframes — first frame, last frame, and waypoints in between, each with
its own strength dial. Strength is the whole point:
1.0hits that frame exactly,0.6–0.8keeps its composition and colour but frees the motion. - Timeline — drag markers to move a keyframe in time; the square cap on each stem sets its strength. Text beats pin words to a moment.
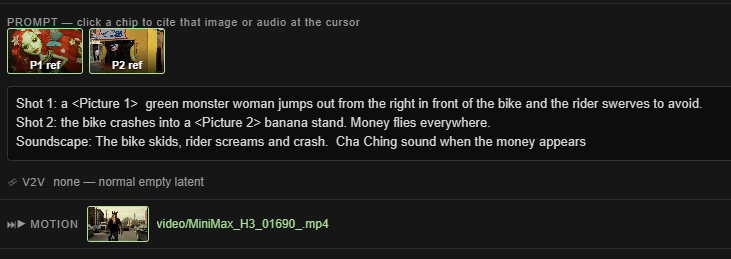
- References — images that define a subject for the whole clip rather than a moment. Plus reference audio and reference video. Each one becomes a chip above the prompt: click it to cite that picture where your cursor is.
- Reel — finished clips chained at the bottom, with trims, crossfades, per-clip volume, audio lanes, and one-button export.
If you want to…
…end on a specific image
Set the last frame card. 1.0 lands on it exactly; 0.6–0.8 treats it as a
target to head toward. If you only loosen one end, loosen this one — the first
frame anchors the shot's geometry, so diluting it can destabilise the whole clip.
…pass through an image mid-clip
+ waypoint → pick the image → drag its marker to the right moment. Keep
strength around 0.6–0.8. Add a short description on the card so the model knows
what it is looking at. (Waypoints are the experimental end of this pack — see
Honest limits.)
…make the next clip continue this one
Hit ▶ queue with a clip in the reel and a chooser appears:
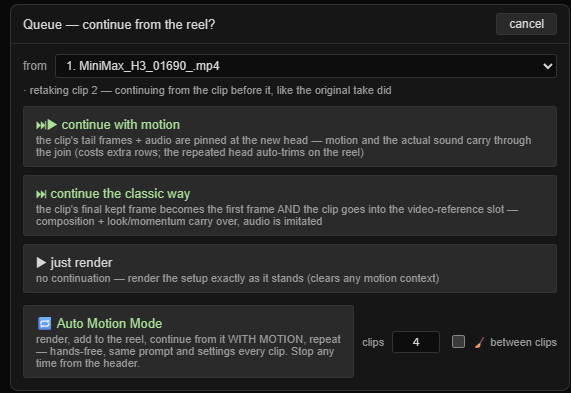
- ⏭▶ continue with motion — the previous clip's tail frames and audio are pinned at the new head. Same motion, same direction, the same waveform carried on rather than imitated. The render opens by repeating that pinned tail, which 🎞 add to reel trims off automatically.
- ⏭ continue the classic way — its final frame becomes the first frame and the clip goes into the video-reference slot. Cheaper; motion restarts at the join.
- ▶ just render — no continuation.
The loop is queue → choose → render → 🎞 add to reel → queue again.
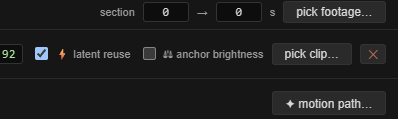
The MOTION bar carries the dials: how many frames to pin, ⚡ latent reuse (hands the previous clip's own latent over instead of decoding and re-encoding it, which is what stops quality compounding down a chain), and ⚖ anchor brightness if a long chain starts to drift.
…stop a chain inheriting a frozen ending
H3 clips often stop moving before they end — with a last frame the model reaches it early and then holds it, and a shot tends to settle regardless. That tail is the worst possible thing to continue from: pinned at the next clip's head it makes the next clip open on a still, and the link after that pins the still in turn.
When a clip joins the reel it is now scanned, and if it locks up the card's out-trim is set to where the motion stops. That one number fixes both halves — the export drops the frozen tail, and ⏭▶ reads the same out-trim, so the next clip takes its history from live motion. It never overrides a trim you set yourself, and the card shows it, so a wrong call is one drag to undo.
It is deliberately not a motion threshold. H3 decelerates as it converges on its ending, so "low motion" fires during the slow-down and throws away good footage. Instead each frame is compared against a pixel-wise median of the final frames — the question is "has this frame already arrived at the ending", not "is it moving". Approach credit: Herrgotts-H3-Infinite-Continuation-Suite.
…check whether a join actually worked
Add H3 Seam Probe and give it this clip's audio before the trim, the audio of the clip it continues, and the same frame count you pinned. It measures four things and passes the audio through unchanged, so it can live in the graph permanently:
continuation  : lag +0.4 ms, correlation 0.981  -- continuation, on time
level at cut  : +0.31 dB  -- inaudible
room tone     : +0.12 dB  -- inaudible
The measurement set, its thresholds and the finding that made it necessary are ComfyUI-H3-Motion-Context's, same as the motion-context technique itself.
Correlation is the one that matters. Above 0.9 the model continued your
actual waveform; around 0.5 it wrote something that merely sounds like it,
which is the failure continuation exists to prevent and is easy to miss by ear on
one join. Lag catches drift, and the two dB figures catch a level or room-tone
jump at the cut. Chain degradation is cumulative and small per link, so measuring
one join beats watching six.
…put a sound at a moment — EXPERIMENTAL
sound_anchors on the node, one line per anchor:
0.4, door-slam.wav
72, 0.7, phone-ring.wav
Position is a fraction of the clip or a frame number; the optional middle number is a strength. The sound is pinned at that frame and the model renders the picture that goes with it.
This is not the reel's fx lanes — those mix a sample over a finished video. This one is a condition: the model hears it while rendering. Keep the files short, since an anchored sound holds audio rows for its whole length.
Nothing is lost at the join and nothing is hidden from the model. A handover has to land on a latent-step boundary — a pinned run can only end on one — so the editor snaps it there. Anywhere else leaves a few frames that the previous clip shows but the continuation never pinned, and anything that appears in them (a car coming into view) is new to the next clip and pops out of existence at the cut.
The first delivered frame after a pinned head carries the context's exposure rather than the one the model settles on, which is what a flash at a cut is. It is corrected by level at export (✨ luma-match join, now on by default for continued clips, over a short window so it cannot drag the frames after it). Dropping the frame instead would cost 1/24 s at every link, and holding frames back so the previous clip covers them — Herrgott's Safe Tail Bridge — was tried and reverted: a latent step is up to four frames, so the model stops seeing what happened in them.
…build several clips hands-free
Pick Auto Motion Mode in that same chooser and give it a clip count. It queues, adds to the reel, and continues from itself that many times, same prompt and settings each clip. Stop it any time from the header.
…keep the same person across clips
Add their photos with + reference (1.0 locks identity, 0.7 is a likeness
hint), then 🎭 cast → 💾 save cast member. From any other clip or workflow,
🎭 cast → add, and their images, strengths and framings come back in one click.
…put music under it
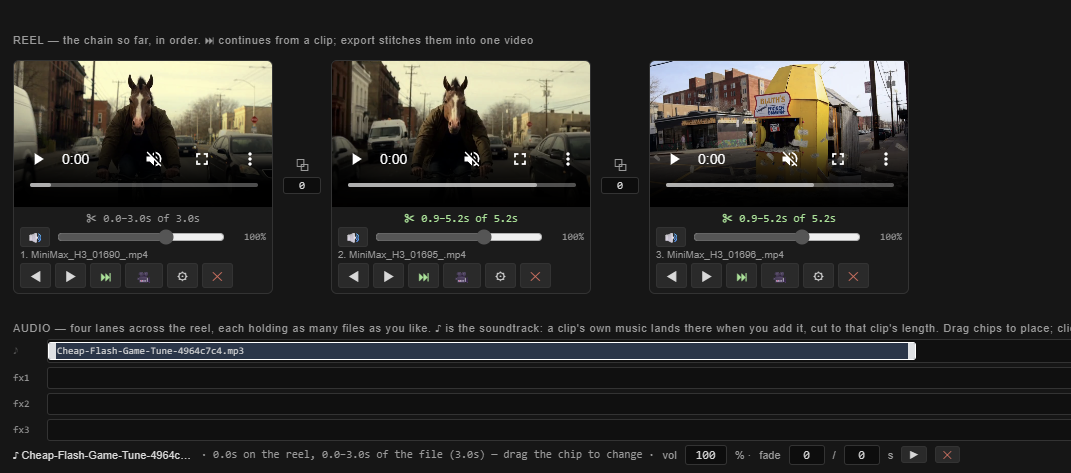
♪ music in the timeline header — pick a file (input folder, upload, mic, or the built-in free web search) and its waveform and detected beats draw on the track. Set use to soundtrack and the song lands on the ♪ lane in AUDIO: one chip per clip, each cut to that clip's length. Drag a chip to move it, drag either end to trim, click it for volume and fades.
Set use to timing only if you just want the beats to aim at, or model reference if you want the model to imitate the sound's character.
…add sound effects
Three fx lanes sit under the soundtrack lane, and they work identically — each holds as many files as you like. + on a lane opens the audio picker; the sample lands as a chip you drag into place.
…find images or sounds without leaving ComfyUI
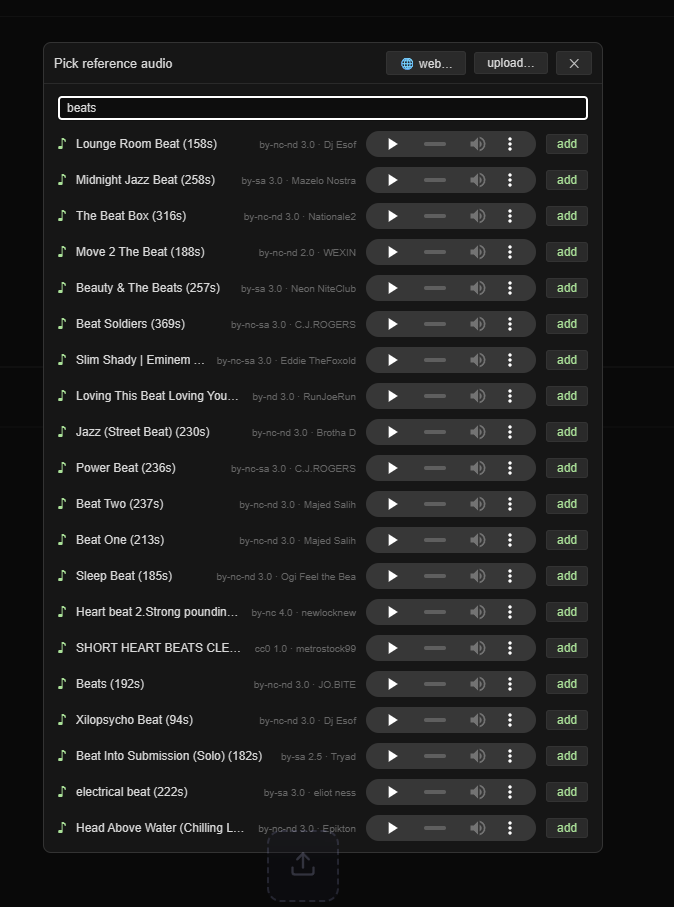
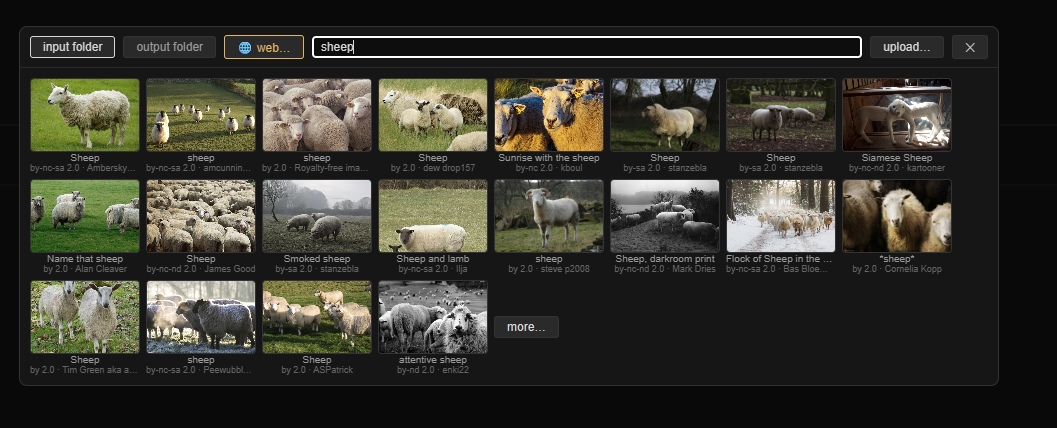
Any picker has a 🌐 web… tab: type a search and results come from Openverse,
all Creative Commons or public domain, with the licence and creator on every
card. Clicking one downloads it into input/web/ and uses it immediately, and
every pull is logged to input/web/credits.txt for attribution.
…export the whole thing as one video
⇧ export as one video on the reel. Per-clip in/out trims, crossfades at the joins, whole-reel fade in/out, per-clip volume, the soundtrack and every fx lane are mixed server-side. ▶ play reel previews the lot first, without exporting.

Each card carries the clip that made it. ✂ trims it without touching the file, the slider sets its volume in the mix, and ⚙ brings the whole setup that produced it back into the editor.
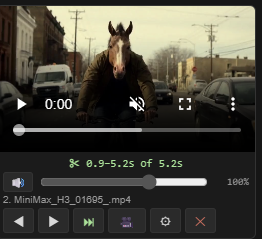
…restyle existing footage (v2v)
Load a clip into V2V at the top of the editor (drag and drop works), set the
section and a denoise around 0.5, and prompt the change you want. match
aspect conforms the output to the footage.
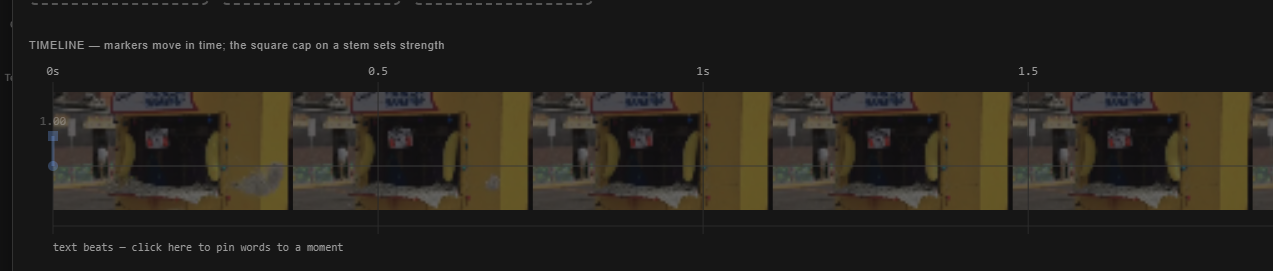
The footage draws faintly under the timeline, so you can place keyframes and beats against what is actually happening in the shot. The slider beside it sets how visible that is, down to nothing.
…change only part of the frame
H3 Soft Denoise Zone takes your latent and a mask and holds everything outside it still — a circular fade-out, or a per-frame SAM2 mask tracking a person. Feed the same mask into H3 Regional Prompt to also say what belongs in that region, rather than only where change is allowed.
…fix a crop or aspect mismatch
Every image and video card has ⛶. Drag and zoom the window over what the model should see. Keyframe windows are locked to the output aspect, so what you frame is exactly what it gets. Without a framing, a mismatched image is centre-cropped — the card warns you which edges are going.
…get a camera move out of one still
✦ motion path… on the KEYFRAMES header: drag the A and B windows, pick a speed curve, and it places tween waypoints along it. ▶ preview move shows the exact move before you spend a single sampling step.
…dial the motion up or down — EXPERIMENTAL
Every other control here describes what should happen. motion_scale changes
the model's clock instead — the time it believes passes between frames — so
the same content has to cover more or less movement. 1.0 is stock, 1.3 is
livelier, 0.7 calms a clip down. motion_curve does the same thing but
varying across the clip: position, speed on each line, ramped between the
points you give, for a shot that settles and then accelerates.
Stay near 0.8–1.3. Further out drifts away from anything the model was trained
on, and the soundtrack is not rescaled, so picture and sound pull apart the
further you go from 1.0. At exactly 1.0 with an empty curve nothing is
touched at all.
These two are new and may not stay. They are the least proven controls in the pack — the geometry is sound and everything anchored to a frame (keyframes, beats, motion-context joins) travels with the clock correctly, but whether the model reads a stretched clock as "more happens here" is the open question. If you try them, please say what you saw in the issues.
…make it faster
The example workflow already uses the turbo LoRA at 6 steps. It samples
through core's own KSamplerSelect, not the special sampler node that ships
alongside the turbo LoRA loader — recent ComfyUI builds don't need that node and
give better results without it. If you are carrying an older copy of the
workflow, swap it for KSamplerSelect. Beyond that,
reference video is the expensive part — every frame's rows ride every sampling
step. Cap it with video refs MP (0.4 is a good start). The references
header shows a live cost meter.
The nodes
| Node | For |
|---|---|
| H3 Studio (Image to Video) | The main event — everything above happens here |
| H3 Soft Denoise Zone (v2v) | Restyle one region of the footage; feathered, no matte line |
| H3 Regional Prompt (mask) | Point part of the prompt at the masked region |
| H3 Basic Scheduler (wired denoise) | Core's scheduler with denoise as a socket, so v2v_denoise drives it. Its rescale mode also fixes core's dead zone at high denoise |
| MiniMax H3 Temporal LoRA Blend | Different LoRA weights before and after a moment inside the clip |
| H3 Seam Probe | Measure a join: is the audio really continued, and do level or room tone step at the cut |
Temporal LoRA Blend needs testing. It is the least exercised node here — the maths is sound and it runs, but how it behaves across real LoRAs, boundary positions and feather widths is barely mapped. If you try it, good result or bad, please say so in the issues — that feedback is worth more than more theory.
Honest limits
- Waypoints are out of distribution. H3 was trained on first/last anchors only. The positions a middle keyframe gets are mathematically correct and the model does attend to them, but whether one reads as "be here at 2.5s" or smears across the clip is genuinely unknown. Keep their strength low. This is the one feature that might simply not work well; the strength dials are on much firmer ground.
- Strength is constant across sampling, not a fade. Below about
0.3a keyframe gets unpredictable rather than gracefully vague. - Sub-
0.5on the first frame is experimental — it anchors geometry for the whole clip, not just the opening. - The
ropetimed-text modes are a gamble. Text has lived in its own coordinate space for every sample the model ever saw.text onlyis the default for that reason. - Motion context: audio dulls slightly at every join down a long chain, and a constant ~10 ms offset per link is unfixed. Restart the chain at a natural transition when you hear it. It also conflicts with running ComfyUI-H3-Motion-Context in the same session — pick one pack.
- Above
1.0strength is unclamped and off-distribution. It is there because sometimes you want it. It can also blow out the ending. sound_anchorsis experimental, and needs a ComfyUI new enough to anchor audio at a frame (theMiniMaxH3AddGuidechange). On older builds the anchors are skipped with a warning rather than silently ignored; nothing else about the render changes.- Strength dials need the per-row label patch. Every keyframe strength and
motion_context_strengthbelow1.0relabels its row's timestep to match how far it was blended. That patch reads ComfyUI's live source, so a change upstream can disable it — you get a warning at render time and a softer, less clean fallback, not a wrong render. If you see it, the pack needs an update. motion_scale/motion_curveare experimental and may be removed. They rescale the RoPE time axis, which is off-distribution the moment you leave1.0, and audio is deliberately left on the original clock.- Inherits every stock H3 constraint: batch size 1, frame counts snap to the 17k+5 grid at 24fps, trained range roughly 124–362 frames.
- Timeline thumbnails are best-effort — they come from the upstream node's own preview. A source with no browser-side preview shows a placeholder. The marker still works; only the picture is missing.
- The node is fully operable without the editor (✎ raw text specs exposes the underlying fields), which also covers browsers where the extension fails to load.
Support
If this tool saves you time or fits into your workflow, consider buying me a coffee. Members get early access to new builds before public release.
Peter Neill — ShootTheSound.com / UltrawideWallpapers.net
Background in music industry photography and video, which is where most of these tools come from — they get built because a real shoot needed them.
Feedback is welcome — open an issue or reach out.
License
MIT