
ComfyUI Extension: ComfyUI Hunyuan-3D-2
Run ComfyUI workflows without the setup
No installs, no CUDA version roulette, no GPU sitting idle on your bill. Bring a workflow and run it in the browser.
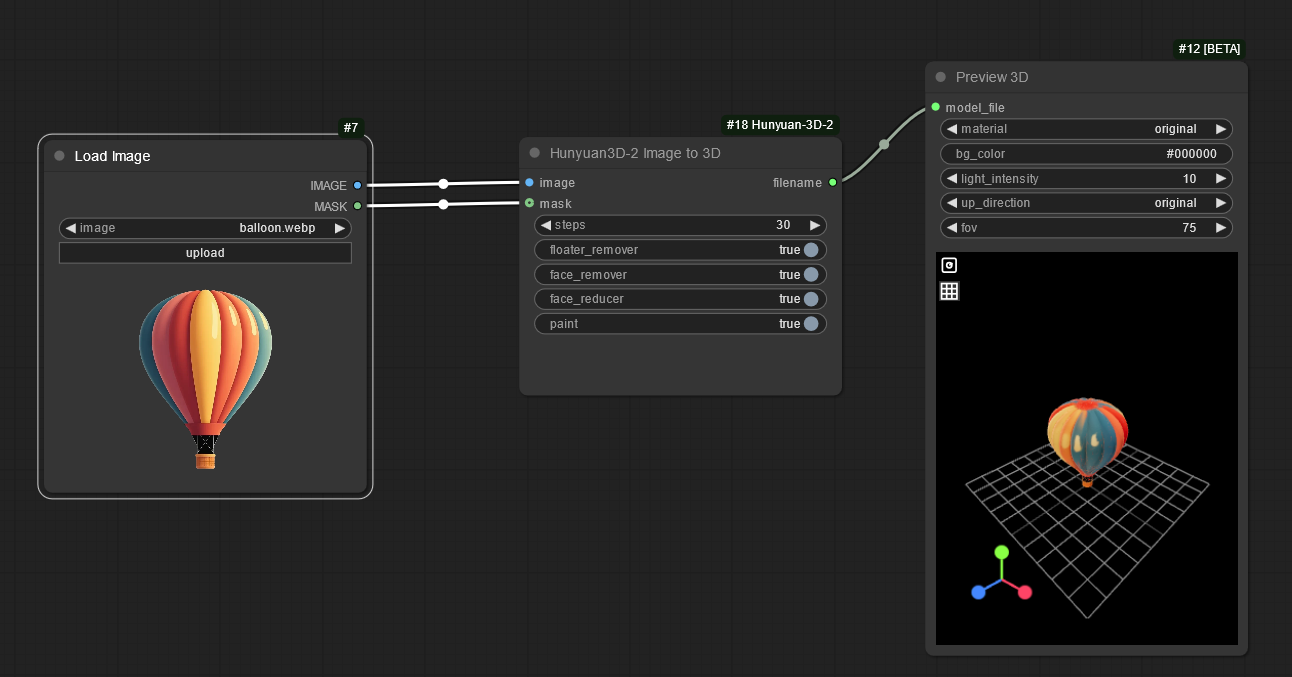
Image to 3D using Hunyuan-3D-2
README
Don't use this one any more. Hunyuan-3D v2 is built into ComfyUI. Find it in the templates section.
This is a custom_node for ComfyUI. It converts an image into a 3D file you can import into Blender or whatever 3d software you use. It uses Hunyuan-3D-2 Hunyuan-3D-2.1 from Tencent.
Make sure you use an image with a transparent background.
This custom node might fail after the first restart. Restart ComfyUI again. Click on the panel ~~☐~~ to look for errors.
Supports v2.1, v2.0, multi view, mini, turbo models.
If it doesn't install...
Your version of git may not support submodules. To install the submodules manually...
cd ComfyUI/custom\_nodes/ComfyUI-Hunyuan-3D-2/
rm -rf Hunyuan3D-2 Hunyuan3D-2.1
rmdir /s Hunyuan3D-2 Hunyuan3D-2.1
git clone https://github.com/Tencent-Hunyuan/Hunyuan3D-2
git clone https://github.com/Tencent-Hunyuan/Hunyuan3D-2.1
There are also pre-compiled .whl files in the releases page. If the custom_rastizer, hy3dgen, mesh_processor python modules fail to install.
Hunyuan 3D v2.1
Paint is not working.
For painting. You need to manually download the RealESRGAN weight to the ckpt folder using the following command:
wget https://github.com/xinntao/Real-ESRGAN/releases/download/v0.1.0/RealESRGAN_x4plus.pth -P ckpt
Windows
You will need to install Visual C++ build tools
ComfyUI_windows_portable
If you installed ComfyUI with ComfyUI_windows_portable, it is using a version of python which is missing the libs and header files. The way around it is to either copy some folders or install the module from else where. See issue #3
If you are getting a has no attribute '_get_vc_env' error.
Run pip install setuptools==75.8.2 to downgrade setuptools.
See Issue #148877
Ubuntu
sudo apt install python3-dev libgl-dev
Suse
Hunyuan-3D needs g++ 13, Suse has g++ 14+ by default
sudo zypper install g++-13 Mesa-libGL-devel python3-dev
Usage...
- Example workflow
- When you run it for the first time it will download the models which will take a long time. Press the panel button on the top right ~~☐~~ to see the progress.
- Put the input image into the "input" folder. It must have a transparent background.
- The 3D .glb file is saved in "output" after you run it.
Workarounds...
- If you get a square panel. Make sure you have a transparent background in the image. If the image came from another node, insert an "invert mask" node before giving the mask to this node, some nodes have a mask that's reversed.
Install from git
Not recommended because ComfyUI-Manager will auto update when you press the update button. git will need manual updates for every custom_node you have.
cd custom_nodes
git clone https://github.com/niknah/ComfyUI-Hunyuan-3D-2
pip install -r requirements.txt
cd ComfyUI-Hunyuan-3D-2
git submodule update --init   # You need to get the submodules if you install from git
Other models...
-
Right click on the node, click "convert input to widget", "model".
-
connect a string node to the "model" input.
-
Put in the string node the ID of the model on hugging face. ie. tencent/Hunyuan3D-2
-
The big model files are downloaded into
~/.cache/huggingface/hub
Changes
0.9.6: Added Hunyuan 3D v2.1 support 0.9.4: Added mini, turbo models.
Run ComfyUI workflows without the setup
No installs, no CUDA version roulette, no GPU sitting idle on your bill. Bring a workflow and run it in the browser.