ComfyUI Extension: ComfyUI Watermark Image Node
Run ComfyUI workflows without the setup
No installs, no CUDA version roulette, no GPU sitting idle on your bill. Bring a workflow and run it in the browser.
This custom node allows you to overlay a watermark image onto an existing image within ComfyUI.
README
ComfyUI MGnodes Collection
A collection of custom nodes for ComfyUI focused on simplicity and usability.
Available Nodes
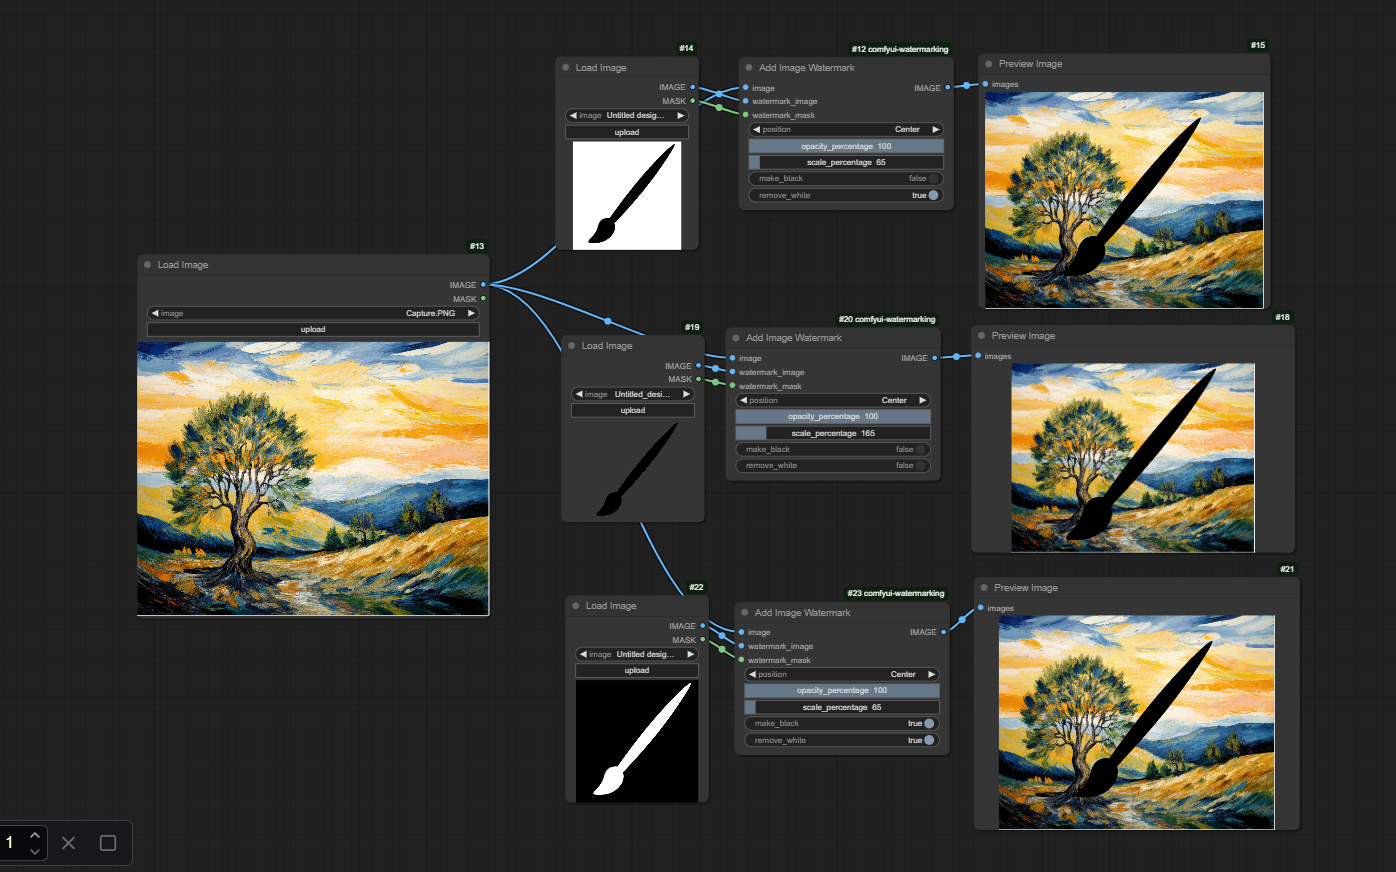
1. Image Watermark Node
Add image watermarks with advanced controls for transparency, positioning, and color manipulation.
 Features:
- Add image watermarks with adjustable transparency
- Multiple positioning options (Center, Top Left, Top Right, Bottom Left, Bottom Right, Tiled)
- Scale watermark size
- Remove white background from watermark
- Invert watermark colors
- Preserve transparency in both base image and watermark
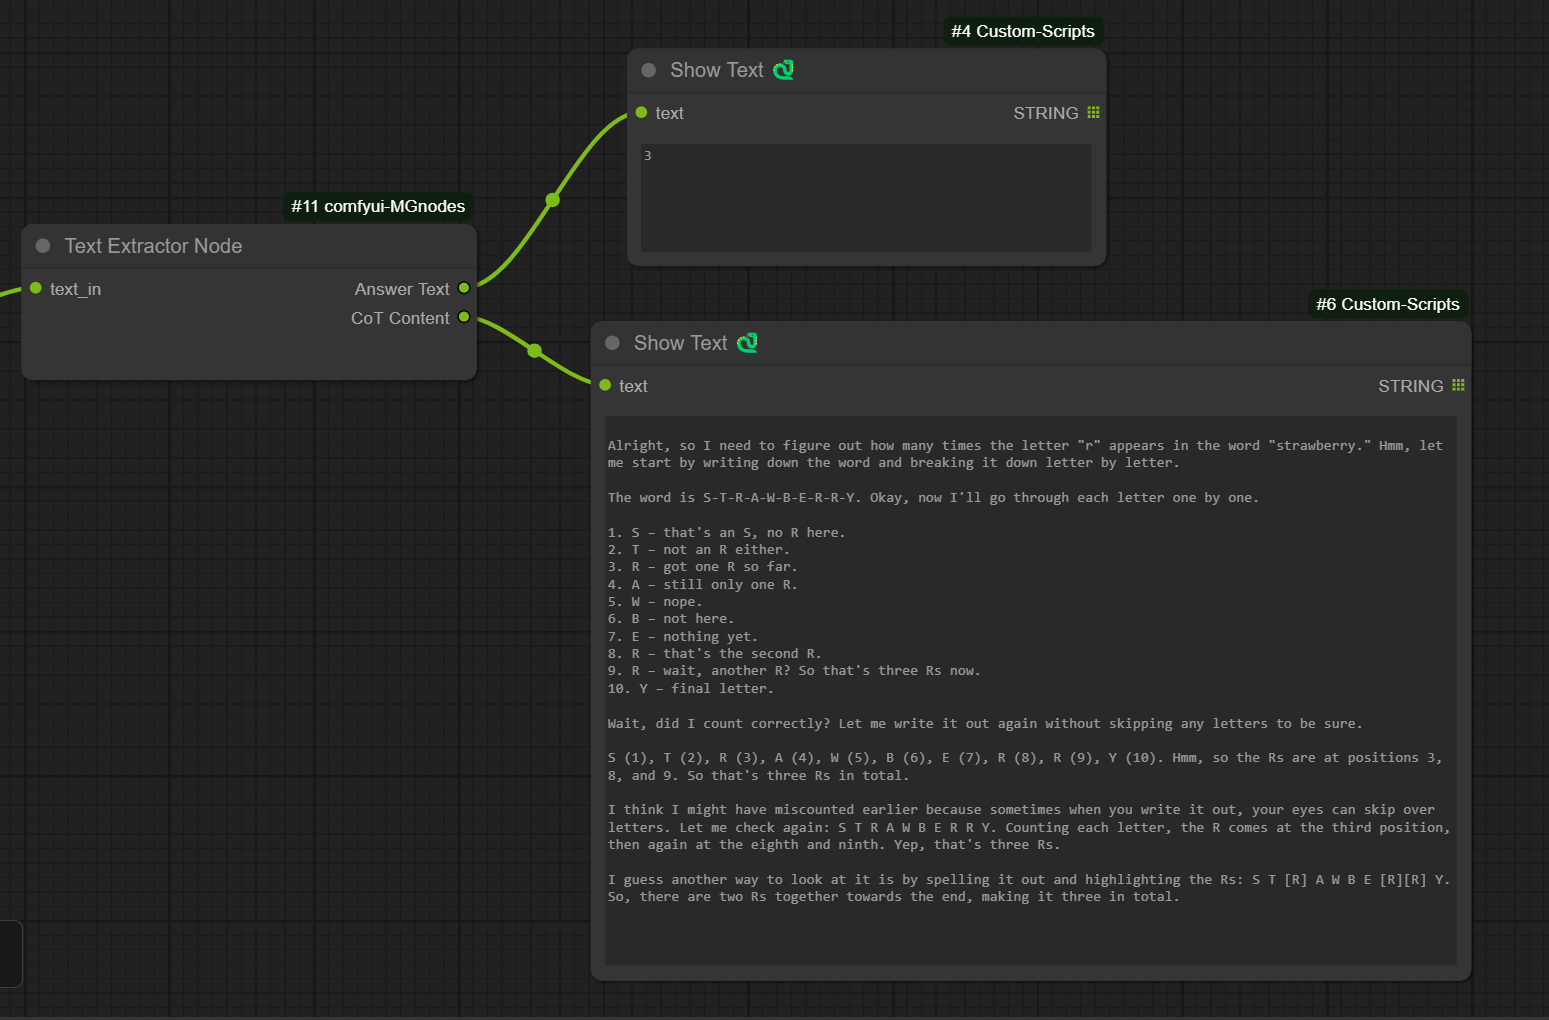
2. Text Extractor Node
A utility node for processing text output from Language Models (LLMs), specifically handling Chain-of-Thought content.
Features:
- Extracts content between
<think>...</think>tags - Outputs both cleaned text and extracted thoughts
- Useful for processing LLM outputs with reasoning steps
- Supports multiple think blocks in a single input
Installation
Option 1: ComfyUI Manager (Recommended)
The easiest way to install is through the ComfyUI Manager. Simply search for "MGnodes" and click install.
Option 2: Manual Installation
- Navigate to your ComfyUI custom nodes directory:
cd ComfyUI/custom_nodes/
- Clone this repository:
git clone https://github.com/meanin2/comfyui-MGnodes.git
- Restart ComfyUI
Usage
Image Watermark Node
- Load your base image using a "Load Image" node
- Load your watermark image using another "Load Image" node
- Connect both to the "Add Image Watermark" node
- Configure the watermark settings:
- Position: Choose where to place the watermark
- Opacity: Adjust transparency (0-100%)
- Scale: Resize the watermark (10-1000%)
- Make Black: Invert the watermark colors
- Remove White: Make white pixels transparent
Text Extractor Node
- Connect any text output (typically from an LLM node) to the Text Extractor
- The node will output two strings:
- Answer Text: The input text with all
<think>...</think>sections removed - CoT Content: The extracted content from within the
<think>tags
- Answer Text: The input text with all
Example Workflow
Check out the examples folder for:
- A complete watermark workflow you can import into ComfyUI
- Sample images used in the showcase
- Test watermark images
Tips
- For best watermark results with "Remove White", ensure your watermark has a clean white background
- When using "Make Black", the inversion happens before white removal
- The watermark mask input is optional and can be used for additional transparency control
- Scale values above 100% will enlarge the watermark, below 100% will shrink it
- For text extraction, multiple
<think>blocks will be joined with newlines in the CoT output
Run ComfyUI workflows without the setup
No installs, no CUDA version roulette, no GPU sitting idle on your bill. Bring a workflow and run it in the browser.