
ComfyUI_ZIM
The unofficial implementation of ZIM in ComfyUI
Nodes (3)
ComfyUI_ZIM
The unofficial implementation of ZIM in ComfyUI.
ZIM: Zero-Shot Image Matting for Anything
ZIM uses positive points (and optional negative points) to determine the segmentation area. The workflow is as follows.
In the mask editor, click on the positive region (or negative region), and use the
mask_to_points node to convert the clicks into points that define the segmentation area.
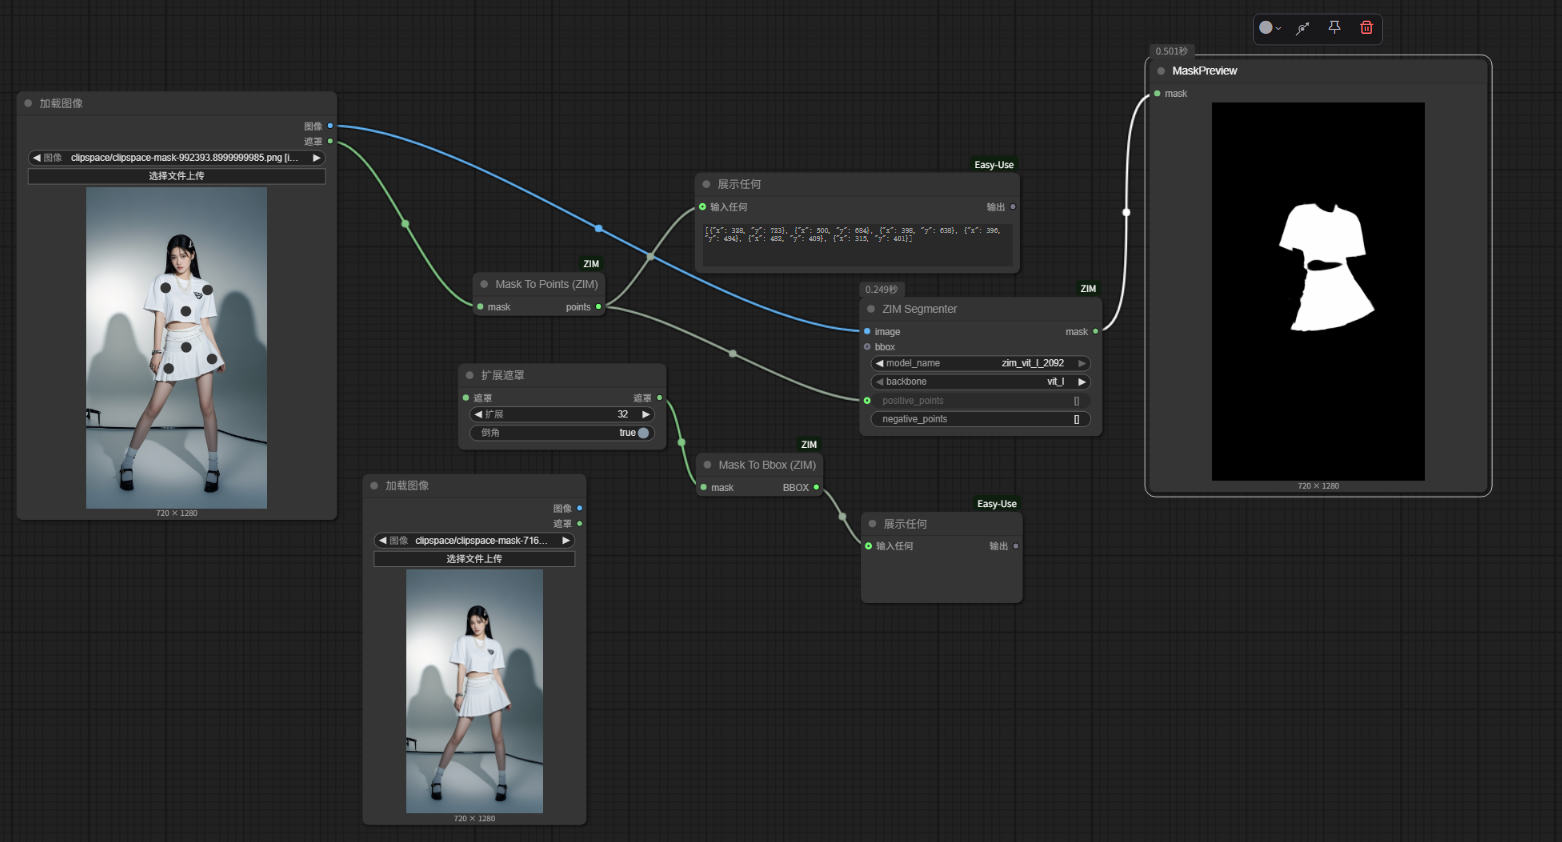 or
or
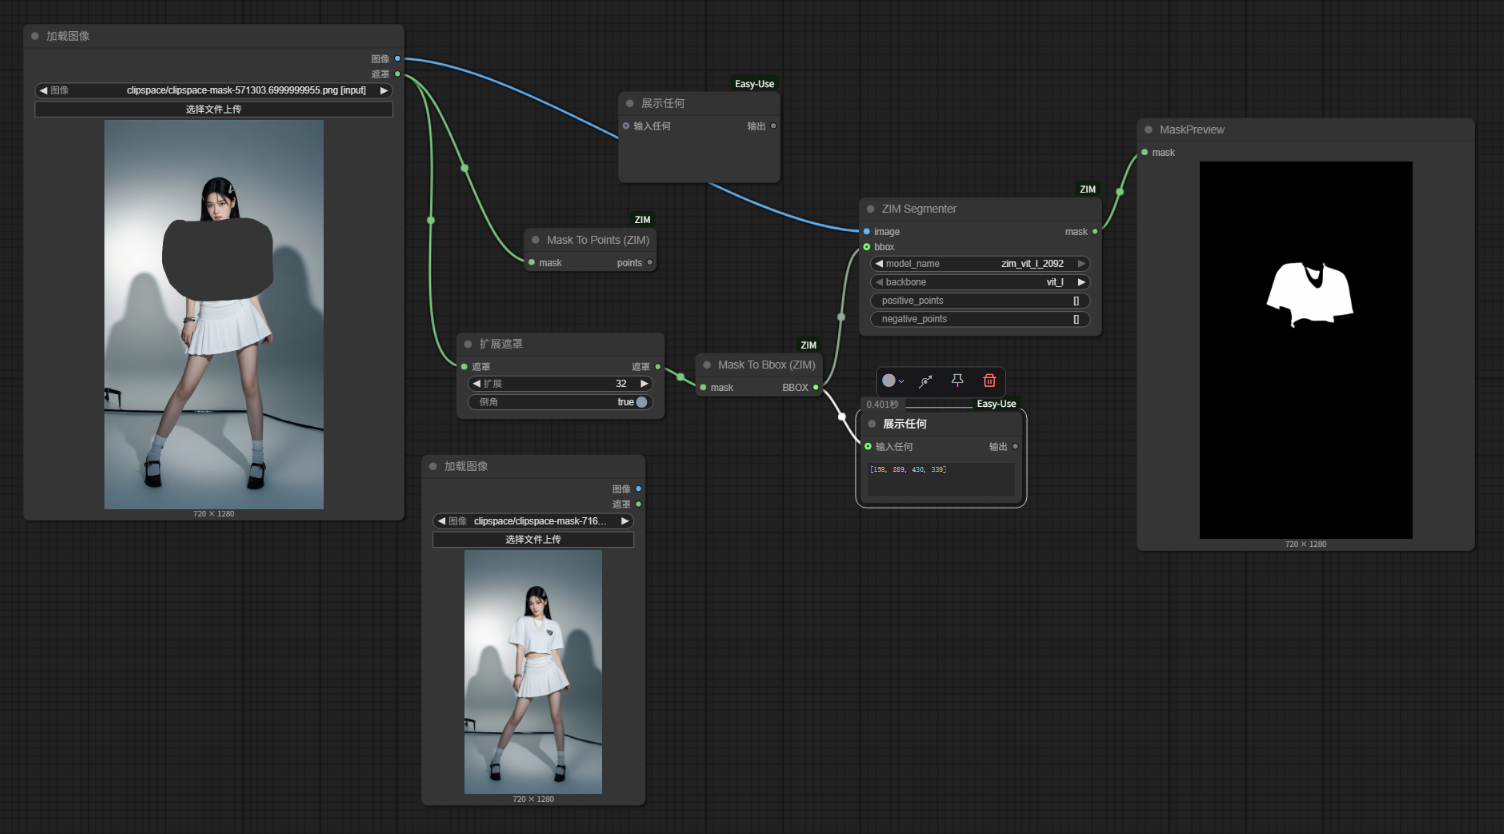
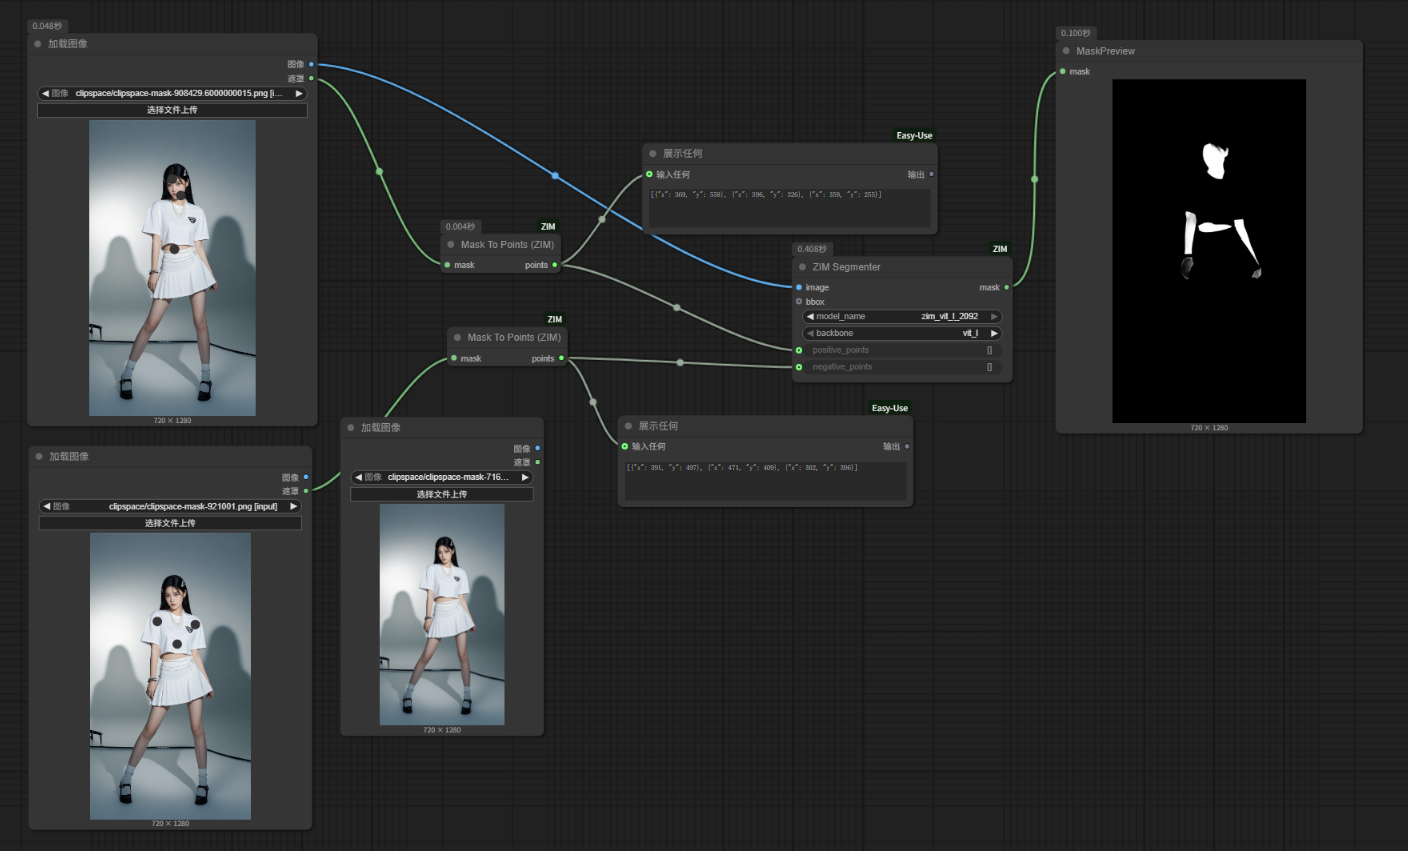 A Bbox can also be used to specify the segmentation area, but its performance is not as precise as using positive points to define the object. You can use the
 mask_to_bbox node to convert a mask into a Bbox. The workflow is shown below.
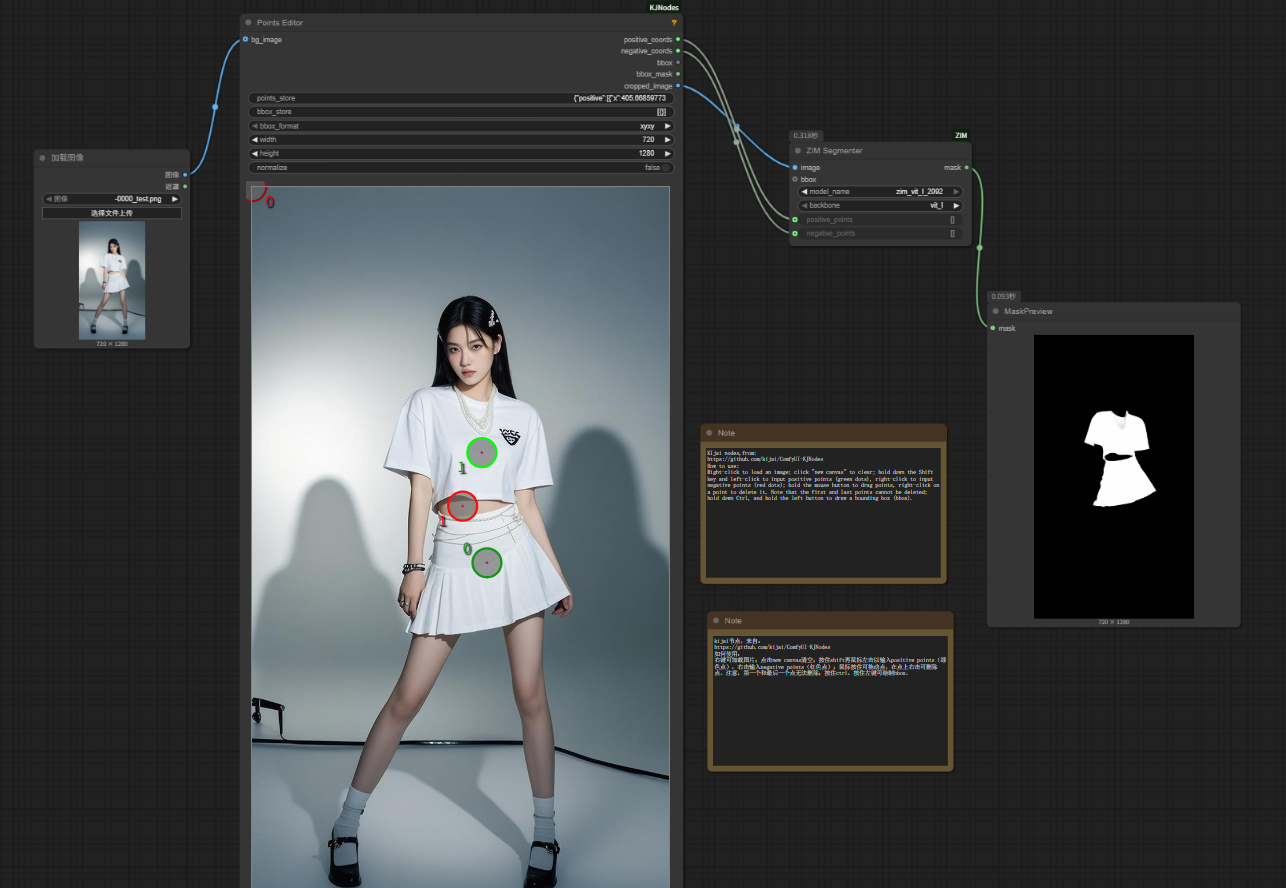
 Additionally, you can use the points node from the ComfyUI-KJnodes to generate positive points, negative points, and masks. The corresponding workflow is as follows.
Download the model from zim_vit_b_2043 or zim_vit_l_2092 and place it in the models\ZIM directory, such as models\zim\zim_vit_l_2092 or models\zim\zim_vit_b_2043, where the zim_vit_l_2092 folder includes encoder.onnx and decoder.onnx.
Note
I used Gemini to write this node, and I'm not very proficient in Python. Any suggestions for code optimization are welcome!