
ComfyUI-ialhabbal
A comprehensive suite of ComfyUI custom nodes for image processing, prompt verification, comparison, extraction, occlusion masking, batch loading, and advanced saving.
Nodes (12)
Batch Load Images
How your ComfyUI workflow learns to make decisions
An image-describing LLM node with no API key
Same Qwen3-VL, but now you get to fiddle with temperature and beams
The local-VLM node that never touches HuggingFace
The GGUF VLM node with llama.cpp's full control panel exposed
From 'girl in red dress in rain' to a full cinematic prompt, on your own GPU
Pull the prompt out of any PNG — even the ones you didn't make
Occlusion Mask
The node that gives AI skin pores, peach fuzz, and a film look
Approve It Before the Long Render
The save node that shows you the image before it commits to disk
ialhabbal — ComfyUI Suite
A suite of ComfyUI custom nodes for image processing, image-vision, video-vision, prompt verification, prompt enhancement. comparison, extraction, occlusion masking, batch loading, local media browsing, image masking, advanced saving, and more..
Suite Overview
ComfyUI-ialhabbal combines 8 powerful ComfyUI nodes into a single, unified package:
- Prompt Verify — Review and approve prompts before generation
- Compare — Side-by-side image comparison with interactive controls
- Meta Prompt Extractor — Extract prompts from images with a full file browser, batch files/folder loading and processing.
- Occlusion Mask — Protect objects in front of faces during faceswaps
- Loader for Batch Image Processing — Load and process image batches
- PhotoLab — Film effects and advanced skin retouching for portraits
- Save_It — Advanced image saving with favorites, history, and compare modes
- ialhabbal_VLLM - Nodes for multimodals Qwen and Gemma.
Installation
- In ComfyUI Manager, search for ComfyUI-ialhabbal, Install, Restart ComfyUI.
- In ComfyUI
custom_nodesdirectory. Run CMD, then: git clone https://github.com/ialhabbal/ComfyUI-ialhabbal.git - Restart ComfyUI.
- Search for any of the node names above in the node browser to add them to your canvas.
Dependencies
Most nodes use standard ComfyUI libraries. OcclusionMask requires additional packages:
pip install insightface onnxruntime opencv-python numpy Pillow retina-face ultralytics segment-anything
This package now includes the ialhabbal_vllm node family for Qwen and Gemma multimodal workflows. The nodes can load both local GGUF models and HuggingFace models, giving you flexible options for local and remote model inference.
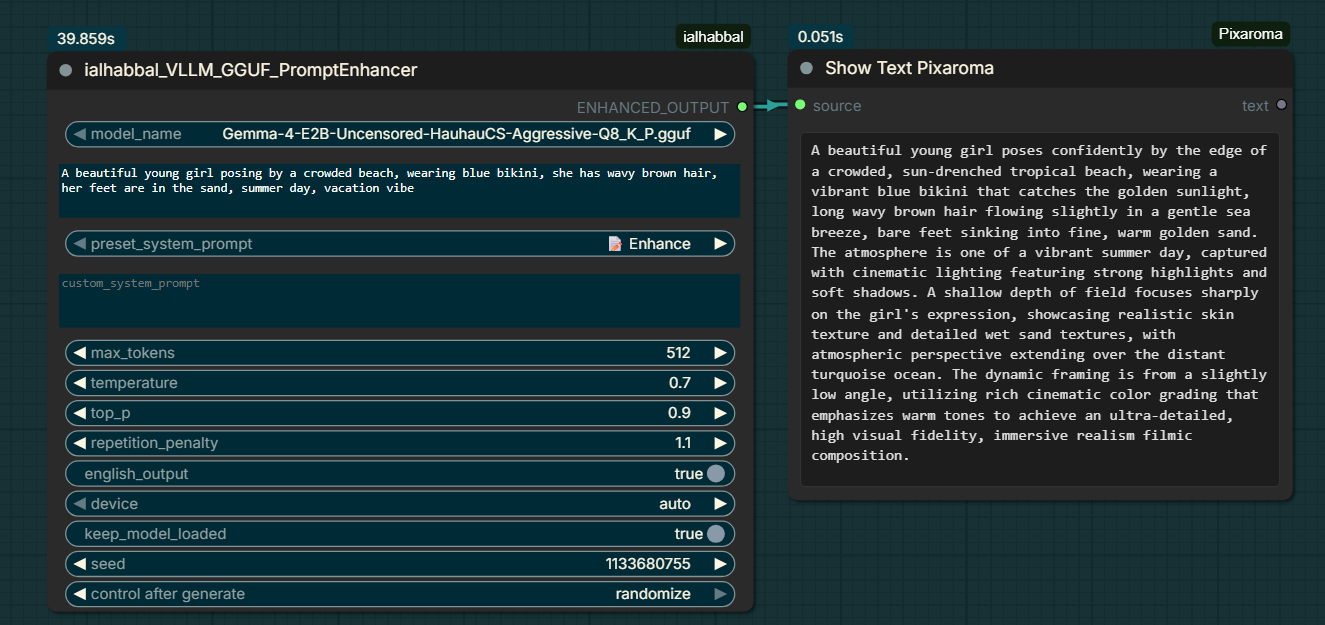
ialhabbal_VLLM— Qwen and GEMMA multimodal node usingtransformersand HuggingFace model checkpoints.ialhabbal_VLLM_Advanced— advanced Qwen and Gemma node with extra device, sampling, and generation controls.ialhabbal_VLLM_GGUF— local GGUF inference node for Qwen and Gemma models usingllama-cpp-python.ialhabbal_VLLM_GGUF_Advanced— advanced GGUF node for Qwen and Gemma models with extra performance and configuration options.ialhabbal_VLLM_PromptEnhancer— prompt enhancement node for Qwen and Gemma VLLM workflows.ialhabbal_VLLM_GGUF_PromptEnhancer— prompt enhancer for local Qwen and Gemma GGUF / llama.cpp workflows.
Screenshots
Prompt Enhancer (QWEN and GEMMA GGUFs)
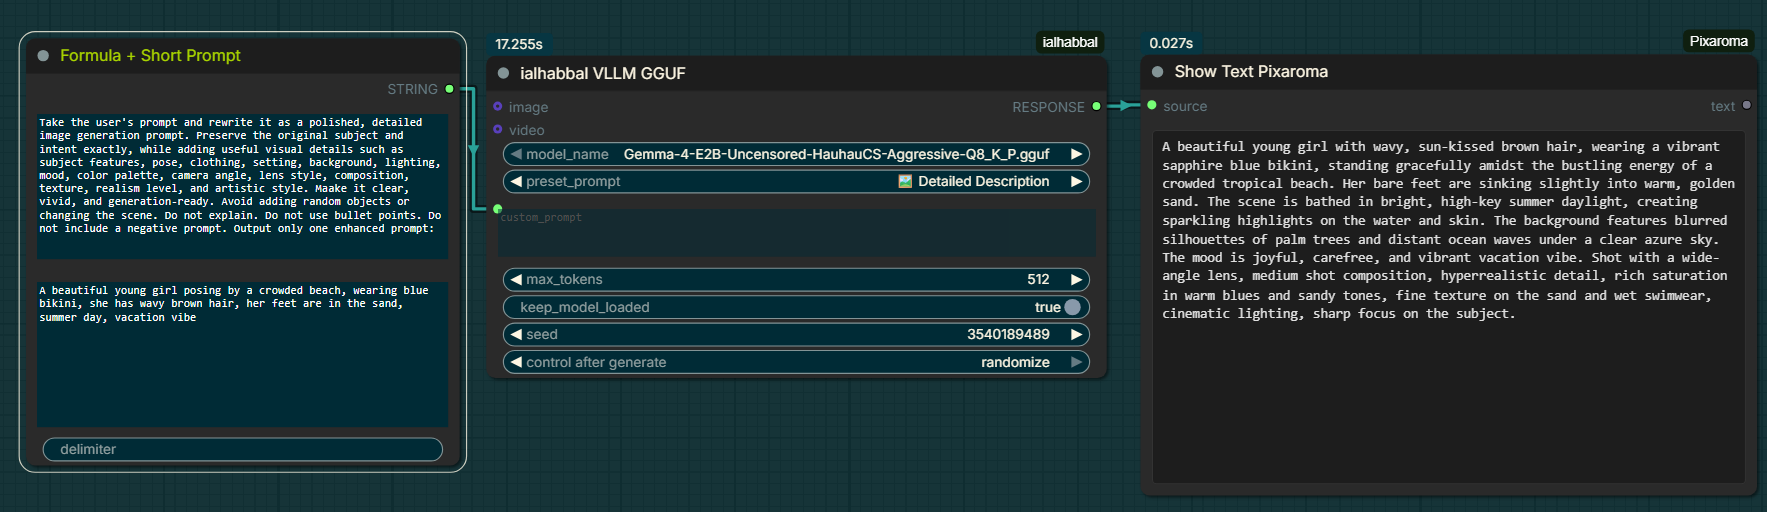
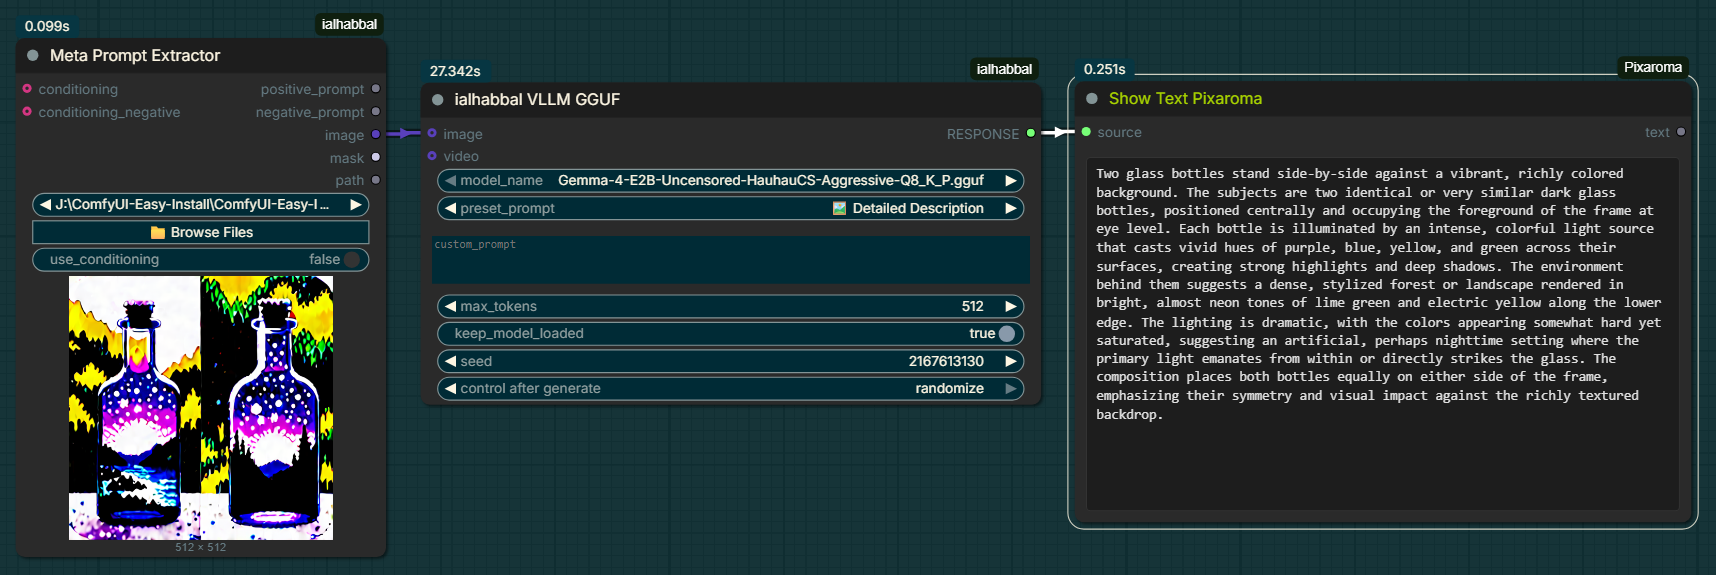
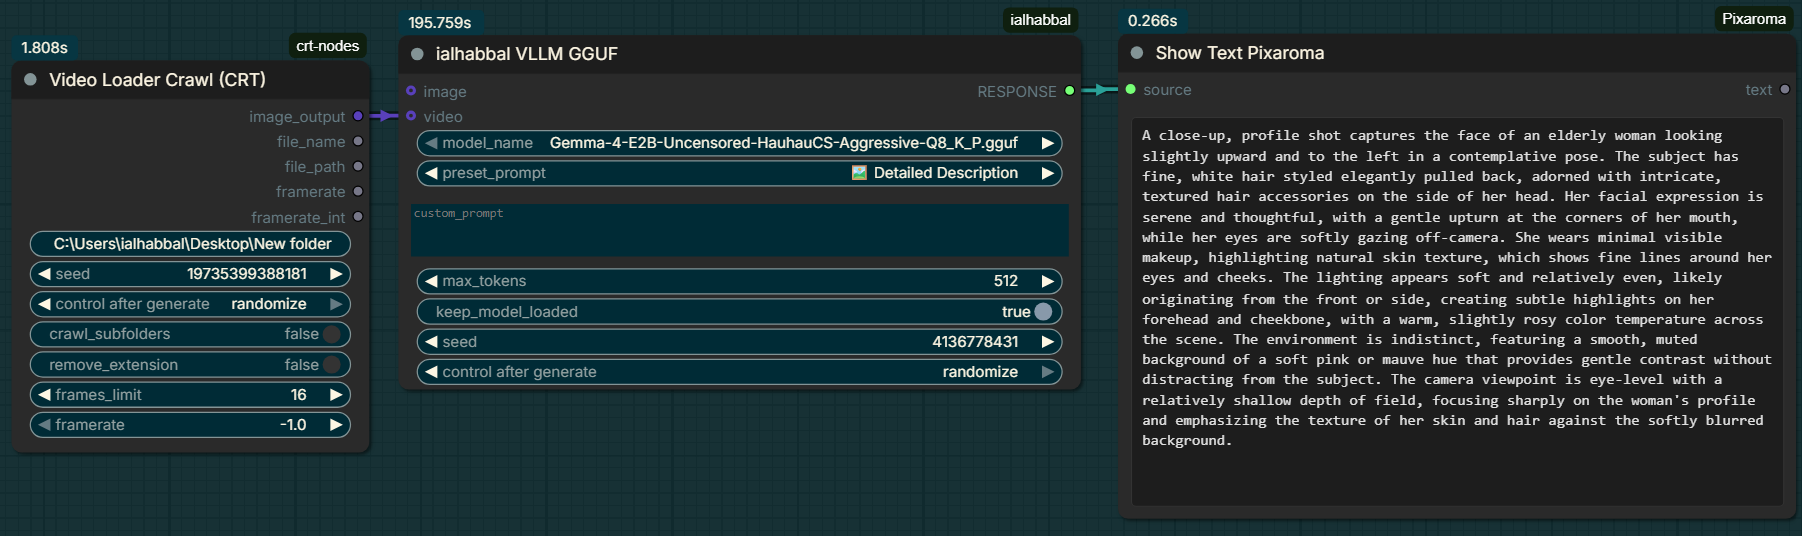
Prompt Enhancer, Prompt from Image, Prompt from Video (QWEN and GEMMA GGUFs)
How They Work
ialhabbal_VLLMandialhabbal_VLLM_Advancedare designed for Qwen and Gemma multimodal models and load HF checkpoints throughtransformers.ialhabbal_VLLM_GGUFandialhabbal_VLLM_GGUF_Advancedsupport local Qwen and Gemma GGUF models withllama-cpp-python, allowing direct local inference without relying only on HuggingFace downloads.- Both node families can handle image and text inputs and return structured multimodal responses into your ComfyUI workflow.
- The prompt enhancer nodes help generate, refine, and format prompts for both the HF and GGUF VLLM pipelines.
Local Gemma / llama.cpp Installation
For Gemma GGUF models in ComfyUI, install llama-cpp-python with the server extra:
pip install --upgrade pip setuptools wheel
pip install "llama-cpp-python[server]"
This installs the runtime support required for local llama.cpp-based GGUF inference. On Windows, ensure your Python environment has compatible build tools and an up-to-date pip if installation fails.
<details> <summary><strong>Prompt Verify</strong> — Pause and review prompts before image generation</summary>
What It Does
When your workflow reaches the Prompt Verify node, execution pauses. The node's built-in text editor fills with the current prompt and a ▶ Submit button becomes active. You can read the prompt, change whatever you like, then click Submit (or press Shift+Enter) to let the workflow continue. If you walk away, the node will auto-submit after the timeout you set.
The node outputs two things:
- CONDITIONING — a ready-to-use CLIP-encoded conditioning signal (only when a CLIP model is connected).
- STRING — the final confirmed text, which you can pipe anywhere else in your workflow.
Screenshots
The Node
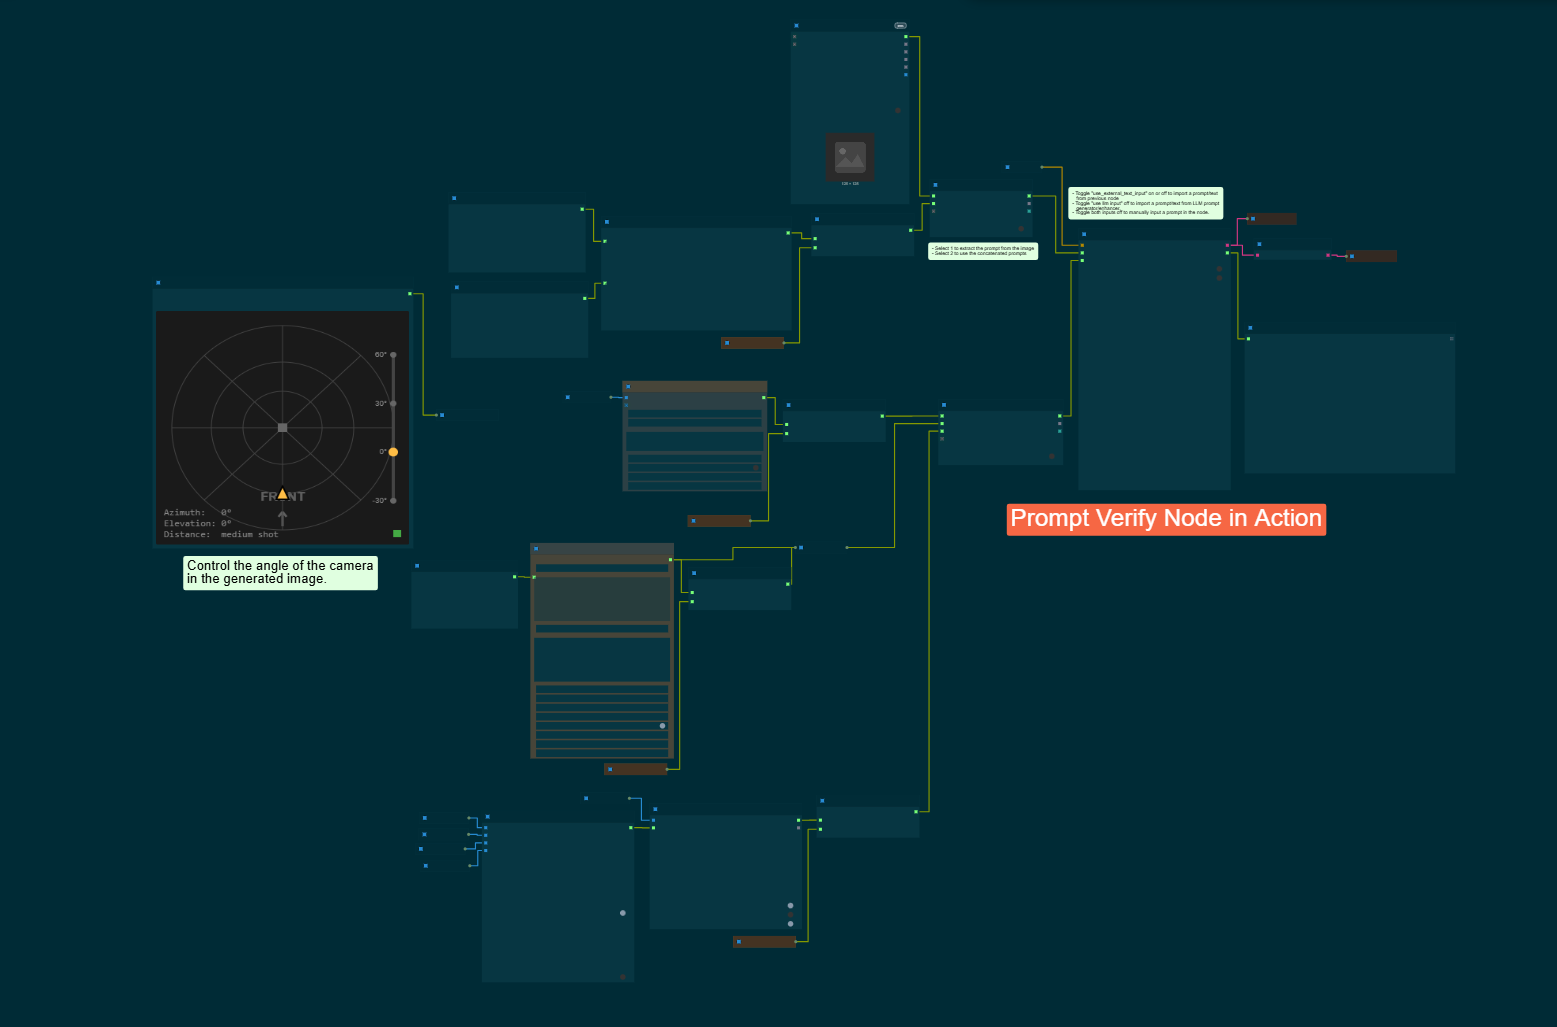
Simple Workflow
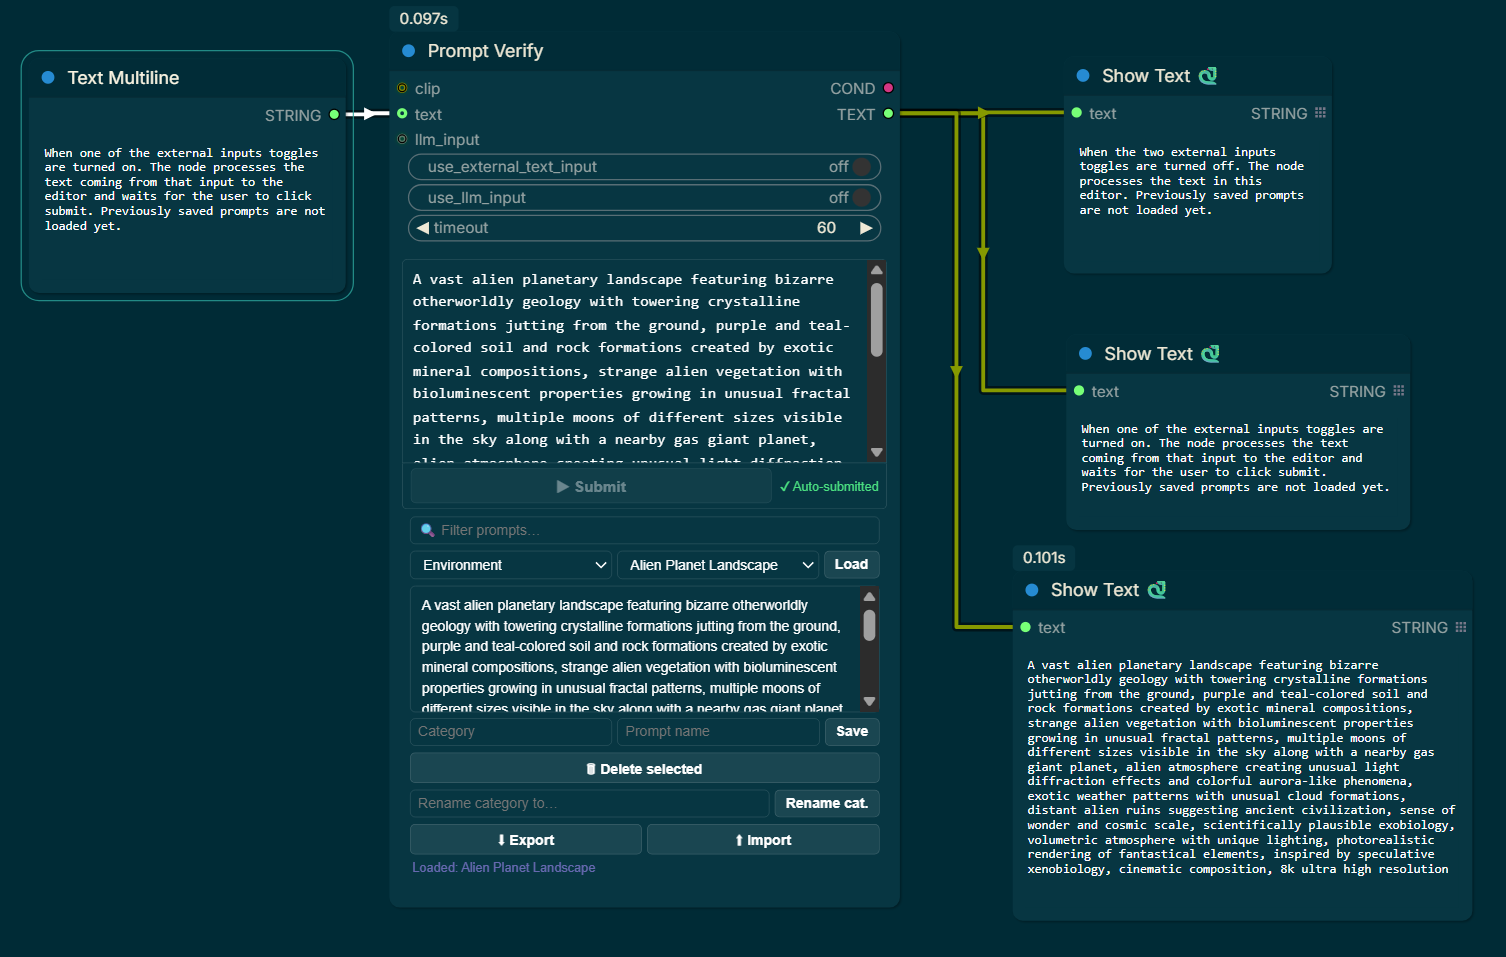
The Node in Action
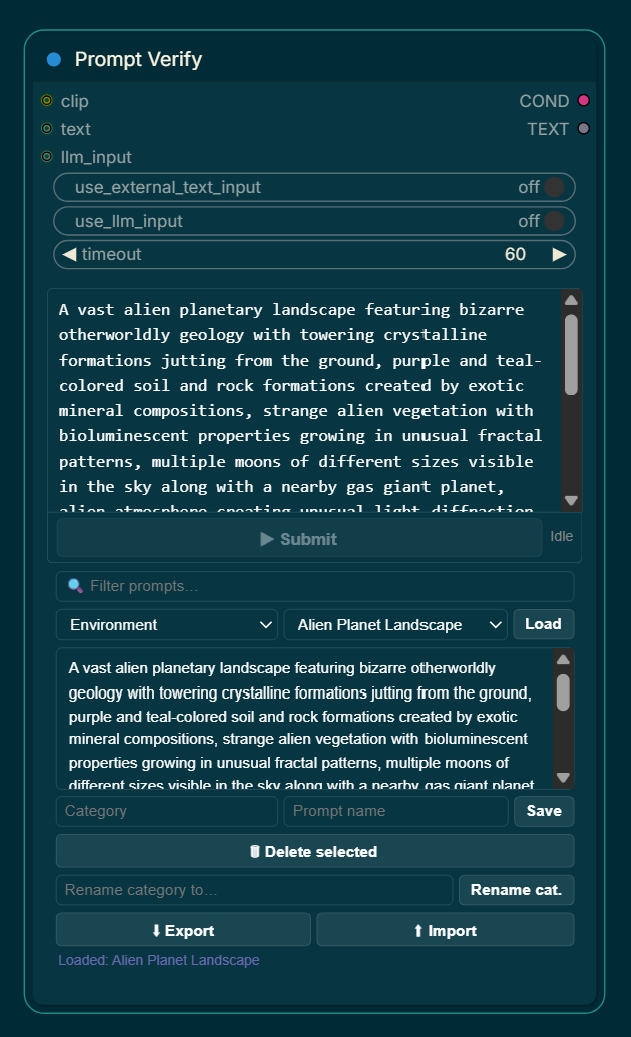
The Node's Interface
Inside the node you'll find, from top to bottom:
1. The editor textarea — where your prompt text appears. Click into it and edit freely.
2. The Submit row — contains the ▶ Submit button and a status indicator.
| Status message | What it means |
|---|---|
| Idle | Node is not currently active. |
| ⏳ Waiting for input… | Workflow is paused. Edit and submit. |
| ✔ Submitted | Your text was sent and the workflow is resuming. |
| ✔ Auto-submitted | Editor had text and both toggles were off — submitted without waiting. |
| ⏱ Timed out — auto-submitted | Timeout elapsed; current editor text was submitted automatically. |
3. The prompt library panel — search, load, save, delete, rename, export, and import your saved prompts.
Input Modes
Mode 1 — Editor Only (both toggles off)
The simplest setup. Whatever is already typed into the editor widget is used directly.
How it behaves: If the editor contains text when the workflow runs, it is submitted automatically without pausing. If the editor is empty, the node pauses and waits for you to type something.
Best for: Fixed starting prompts you occasionally want to tweak.
Mode 2 — External Text Input
Connect any STRING output from another node to the text input. When the workflow runs, that text is loaded into the editor and the node pauses so you can review it before submitting.
Best for: Wildcard or random prompt workflows.
Mode 3 — LLM Input
Connect the text output of an LLM node to the llm_input input. The LLM's output is loaded into the editor and the node pauses for your review.
Best for: AI-assisted prompting where an LLM expands a short idea into a detailed description.
Timeout
The timeout setting (default: 60 seconds, max: 2400 seconds) controls how long the node waits before auto-submitting.
CLIP Encoding
Connect a CLIP model to the optional clip input and the node will encode the final text into a CONDITIONING output.
The Prompt Library
Built-in library for saving and reusing prompts. Everything is stored in prompt_verify_data.json and persists across sessions.
- Saving a prompt — Type or edit your prompt, fill in a Category and Prompt name, click Save.
- Loading a prompt — Pick a Category and Prompt name from dropdowns, click Load.
- Exporting — Click ⬇ Export to download your library.
- Importing — Click ⬆ Import to merge a previously exported library.
<details> <summary><strong>Compare</strong> — Interactive side-by-side image comparison</summary>
What It Does
A simple yet powerful node to compare two images interactively. The node displays the two images side by side. Click on either of the images and they will appear one over the other. Switch between them with the "1/2" toggle at the bottom right. Close the comparison by clicking on "x" on the top-right.
Node Inputs
| Input | Purpose | |---|---| | image_a | First image (e.g., VAE Decode) | | image_b | Image to compare against |
How It Works
The node renders both images in a combined preview that you can interact with:
- Click on either image to switch to overlay mode
- Use the "1/2" toggle to switch which image is shown
- Click "x" to close the comparison view
<details> <summary><strong>Meta Prompt Extractor</strong> — Extract prompts and metadata from images</summary>
What It Does
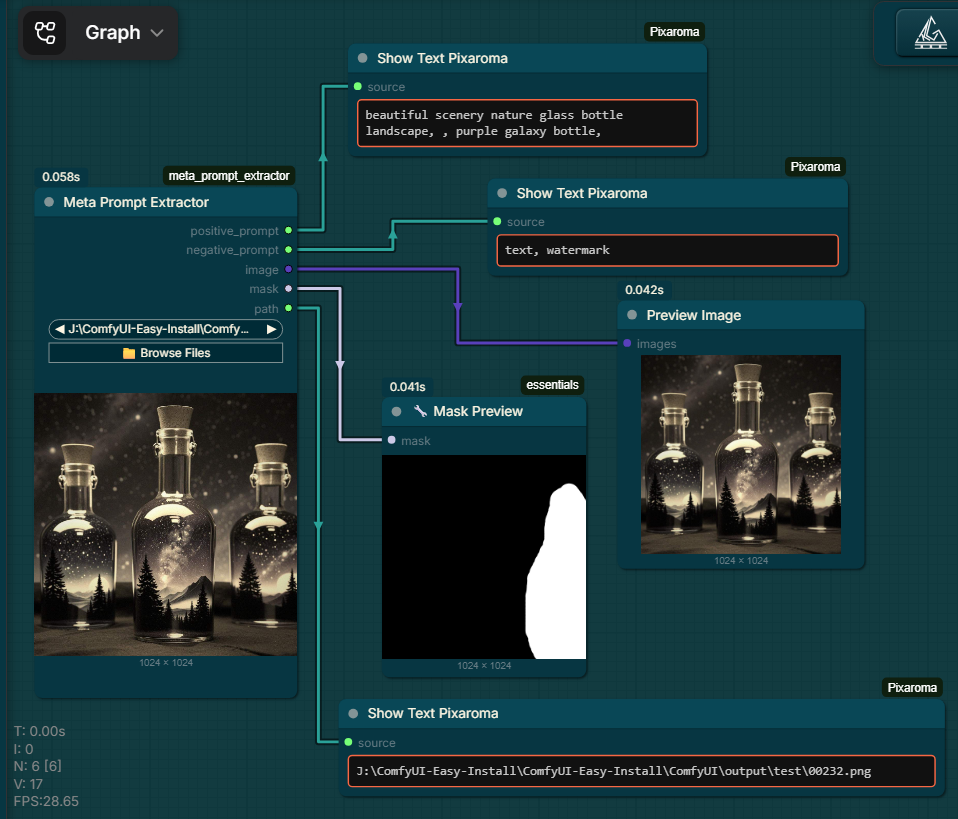
Point the node at any PNG, JPG, JPEG, WebP, or JSON file and it returns the following outputs your workflow can use immediately:
- positive_prompt — The main generation text extracted from metadata or workflow files
- negative_prompt — The negative prompt text
- image — The image as a ComfyUI tensor list (single or batch)
- mask — A mask loaded from a matching
<image>_mask.pngfile or created with the Mask Editor - path — The full file path as a string
- width — The image width in pixels
- height — The image height in pixels
- resolution — Resolution string such as
512x512
The node also accepts:
- conditioning — optional positive conditioning input
- conditioning_negative — optional negative conditioning input
- use_conditioning — when ON, conditioning inputs override file-based prompt extraction
- batch_folder — folder path for batch processing of supported files
- batch_file_list — JSON string array of exact file paths for explicit batch loads
Features
- Full filesystem browser — Navigate any folder on any drive with breadcrumb navigation
- Batch folder / explicit file list — load many images and metadata files in one pass
- Image thumbnail grid — Preview with adjustable grid density and lazy loading
- Metadata detection — Images with embedded data show a 📋 badge
- Real-time search — Filter by filename or metadata-only files
- Flexible sorting — Sort by name, date, size, dimensions, or metadata
- Multi-selection — Use checkboxes, Ctrl+click, or Shift+click ranges
- Metadata preview panel — View all embedded metadata for selected images
- Favorites system — Save frequently used folders as shortcuts
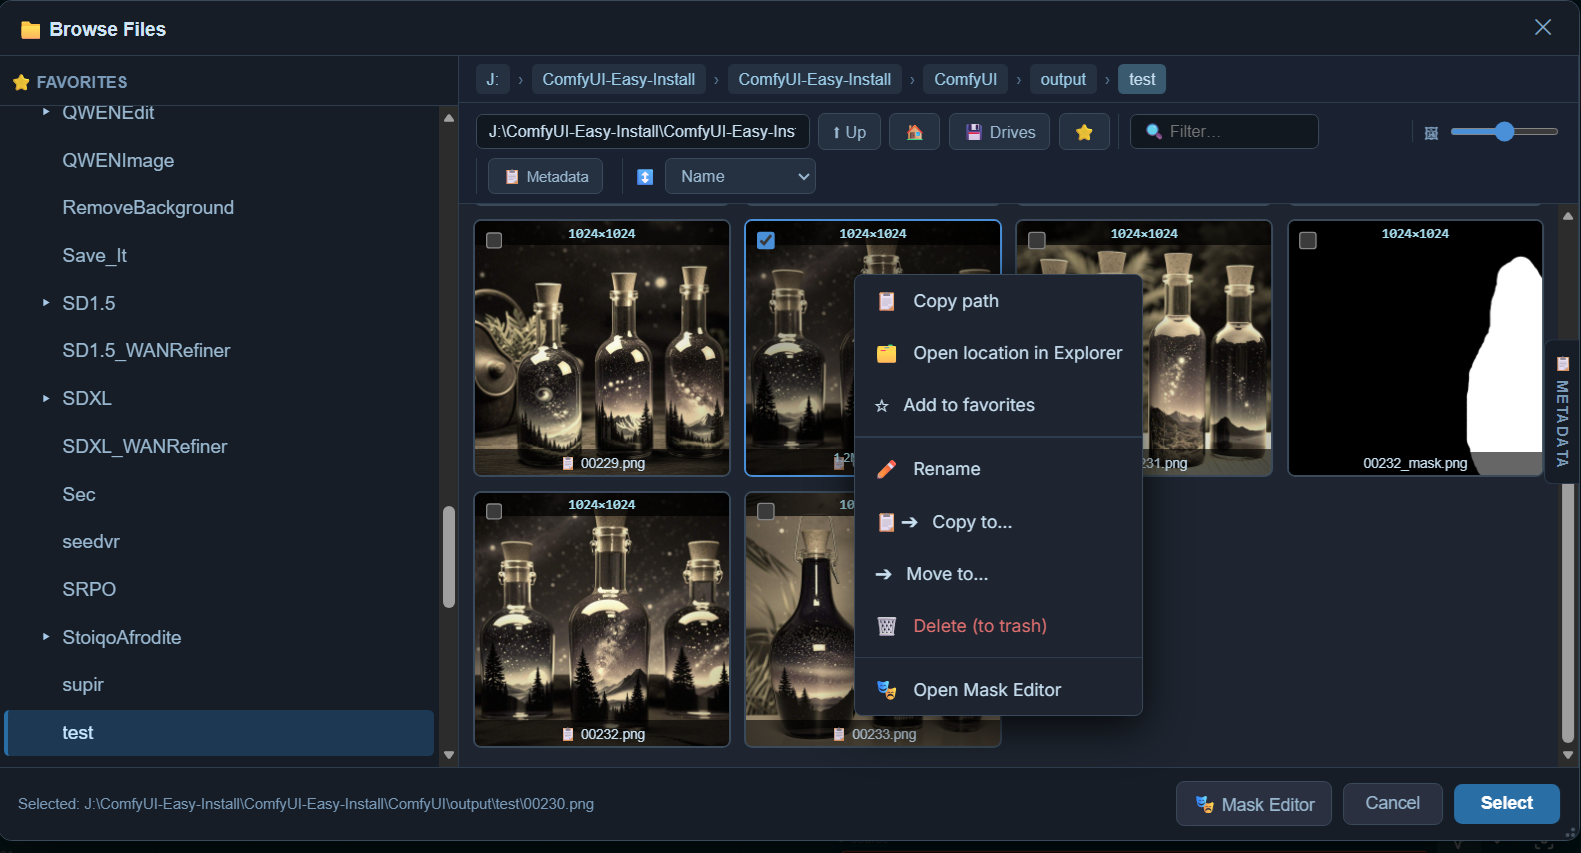
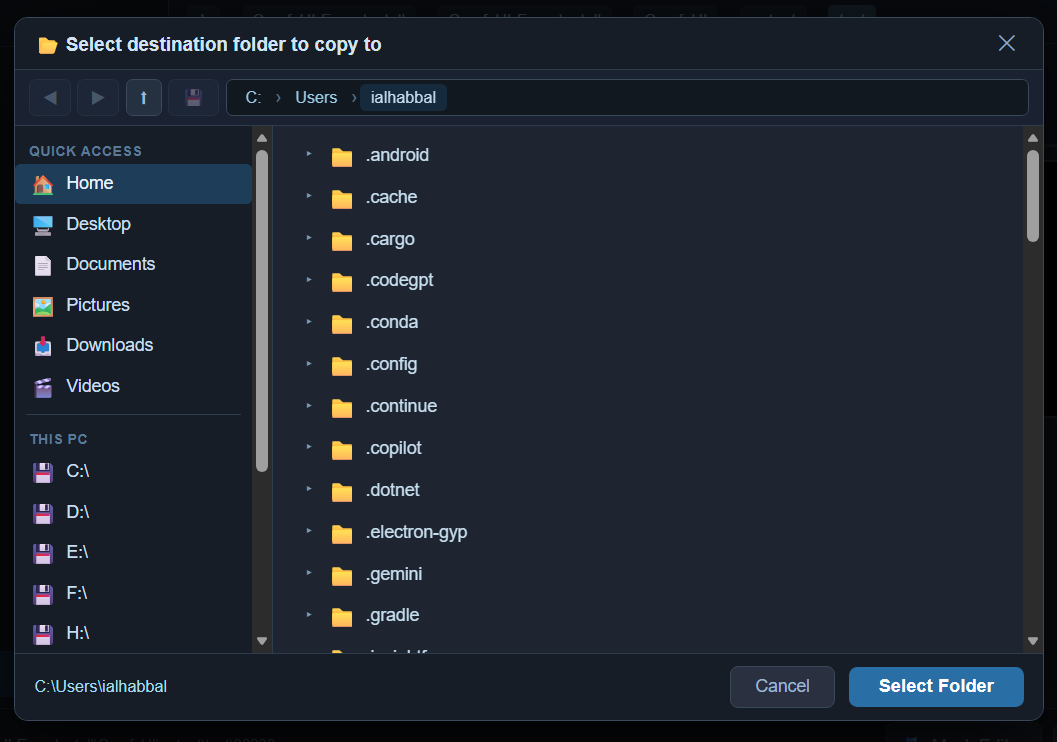
- Right-click menu — Rename, copy, move, delete, or open files in Explorer
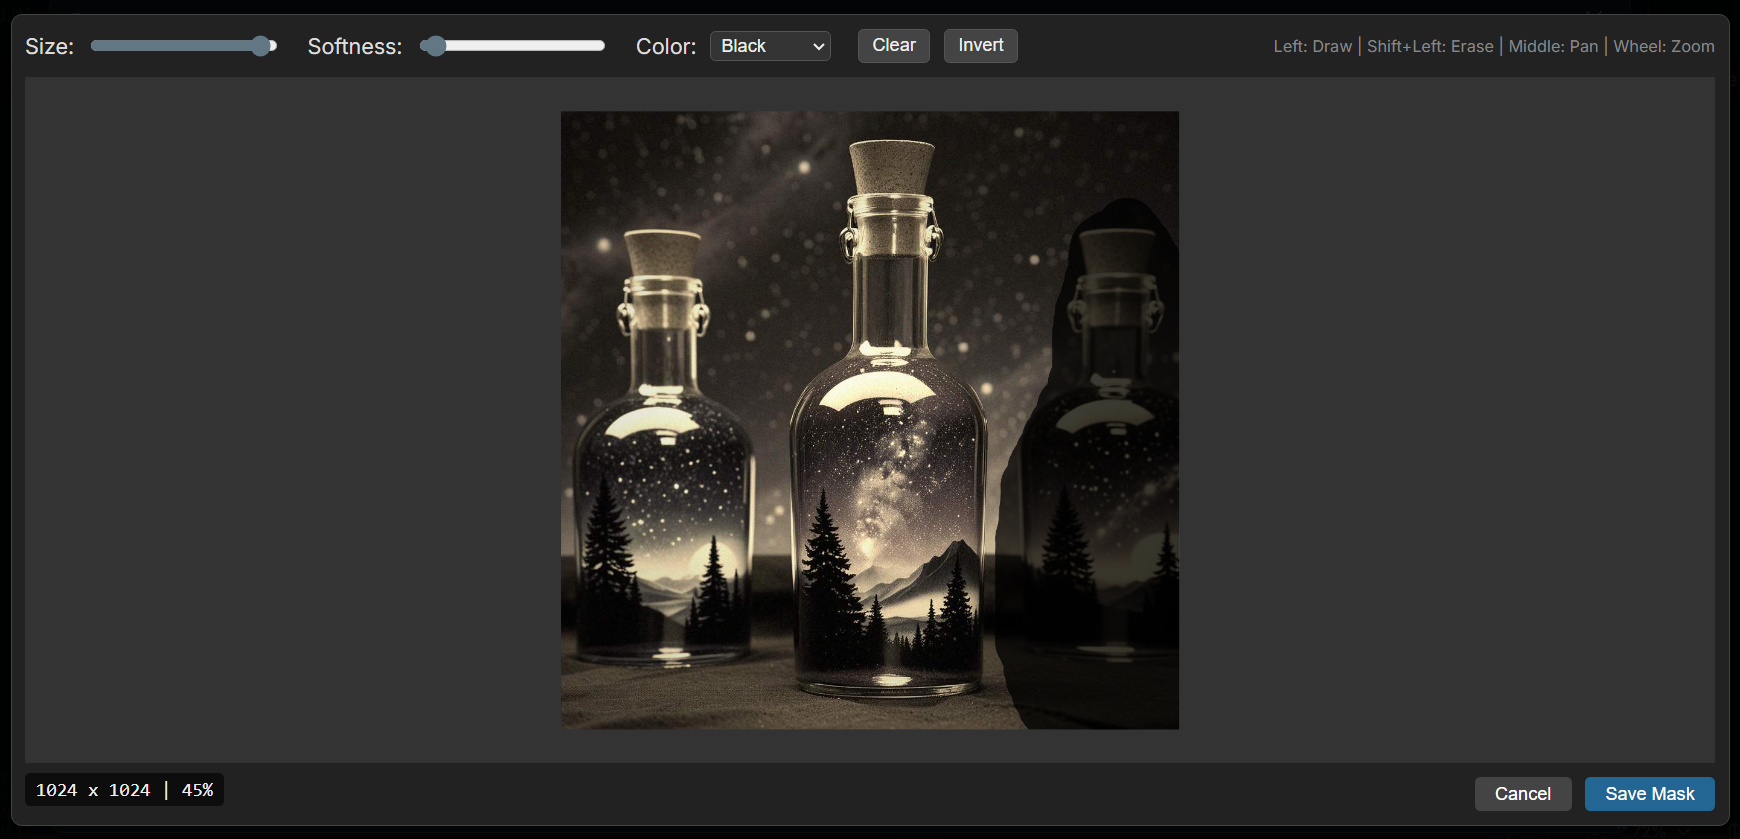
- Mask Editor — Paint inpainting masks directly on images
- Drag and drop — Drop files from your OS onto the node
- Persistent window — Browser remembers size, position, folder, and settings
Screenshots
The Node
Browse Files Floating Window
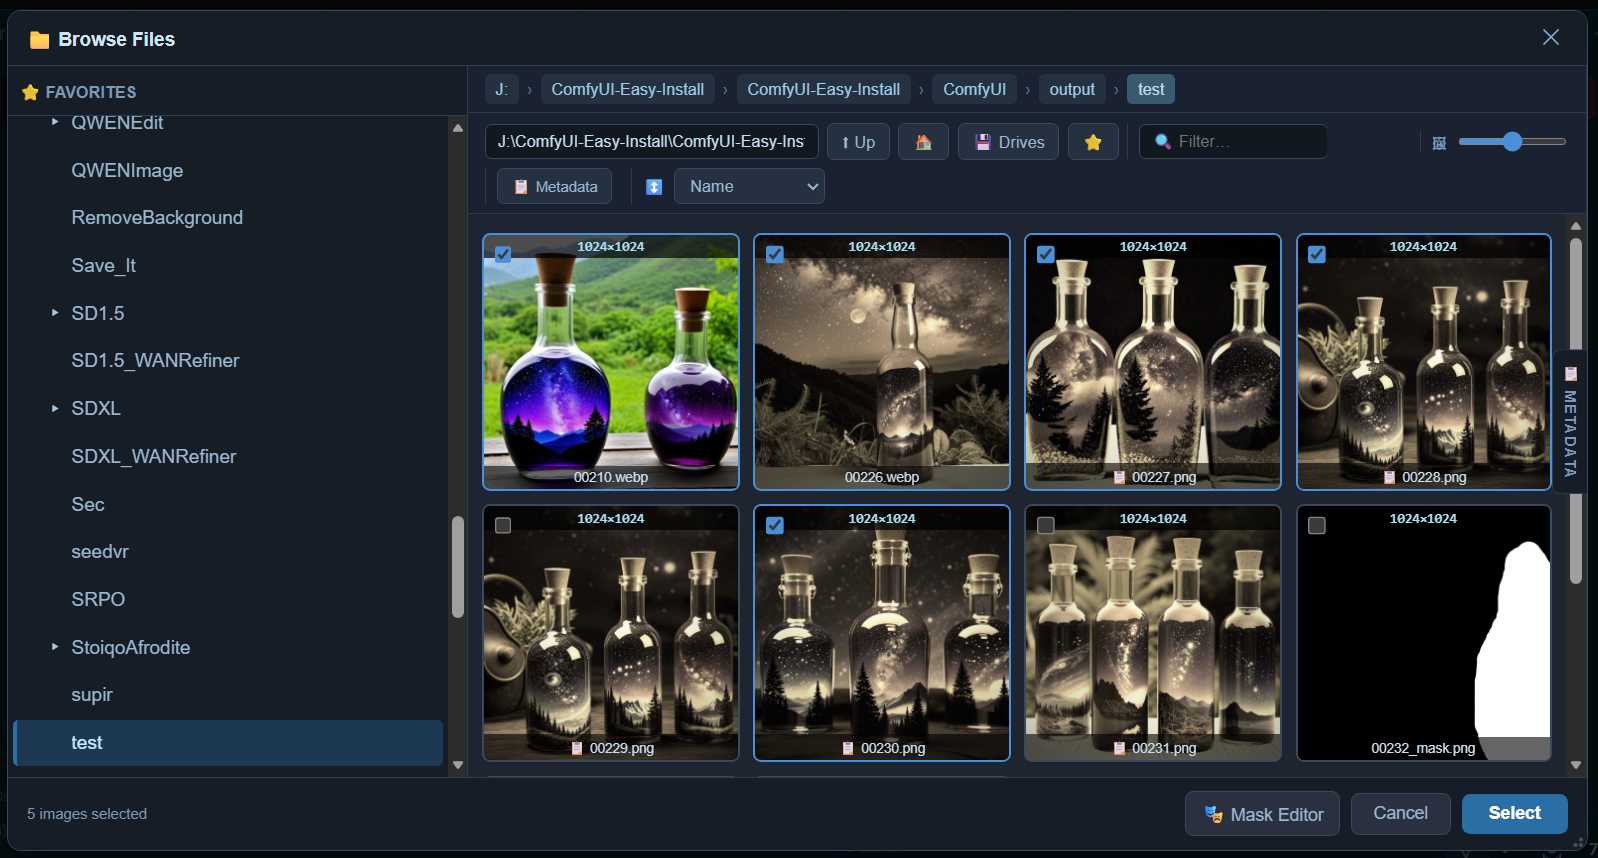
Image Right-Click Functions
Mask Editor Window
Full File Picker for Copy/Move Functions
How the Prompt Is Found
- Finds the sampler first as the anchor point
- Follows connections backwards through intermediate nodes
- Checks a registry of known custom nodes
- Falls back to a smart scan returning the most natural-language-looking result
The Browse Files Window
Click 📁 Browse Files to open the file browser.
- Move by dragging the title bar
- Resize by dragging the grip dots
- Navigate using breadcrumbs, buttons (Up/Home/Drives), or by typing a path
- Filter with the search box or metadata button
- Select with checkboxes, Ctrl+click, or Shift+click ranges
- View metadata in the right panel
- Manage favorites in the left sidebar
- Right-click for file operations
<details> <summary><strong>Occlusion Mask</strong> — Protect objects in front of faces during faceswaps</summary>
What It Does
When you do a face swap and there's an object in front of the face (microphone, hand, glasses, food, etc.), the swap normally overwrites those pixels too. This node generates a protection mask that tells ReActor "don't touch these pixels" so the object stays intact.
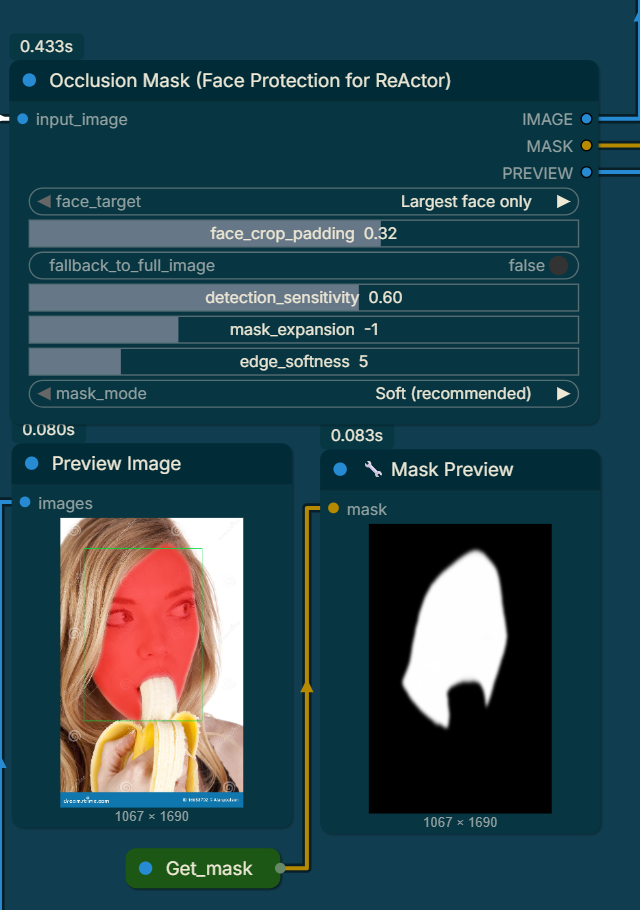
How It Works
The node runs two AI models on your image:
- The Occluder model — Detects anything physically in front of a face
- The XSeg model — Identifies face skin specifically
The node combines them: the final mask covers pixels that the occluder flagged and that XSeg confirmed are not face skin.
Setting Up Your Workflow
[Load Image]
     │
     ▼
[OcclusionMask Node]
     │           │            │
   IMAGE        MASK        PREVIEW
     │           │            │
     └─────┬─────┘     [Preview Image]
           ▼
       [ReActor]
- IMAGE → ReActor's image input
- MASK → ReActor's
face_maskinput - PREVIEW → Preview Image node to see the protection mask
Controls
Face Target — "Largest face only" (fast) or "All faces" (group photos)
Face Crop Padding — Extra space around detected face (default 15%)
Fallback to Full Image — If no face found, treat entire image as face region
Detection Sensitivity (0.0–1.0) — Default: 0.65
- 0.2–0.4: Strict — obvious occlusions only
- 0.5–0.7: Balanced — microphones, glasses, food, props
- 0.8–1.0: Sensitive — subtle/transparent occlusions
Mask Expansion — Grows/shrinks mask (default +6)
Edge Softness — Blurs mask edges (default 4)
Mask Mode — "Soft" (blended) or "Hard" (binary)
Settings for Common Scenarios
| Scenario | Sensitivity | Expansion | Softness | Mode | |---|---|---|---|---| | Handheld Microphone | 0.65 | +8 | 5 | Soft | | Boom/Lavalier Mic | 0.70 | +6 | 4 | Soft | | Sunglasses | 0.55 | +5 | 4 | Soft | | Hand on Face | 0.70 | +10 | 6 | Soft | | Food/Fork | 0.60 | +8 | 5 | Soft | | Scarf/Mask | 0.75 | +8 | 10 | Soft | | Group Photo | 0.65 | +8 | 5 | Soft |
Troubleshooting
- No coverage → Raise Detection Sensitivity or Face Crop Padding
- Covering face skin → Lower Detection Sensitivity or use negative Expansion
- Visible seam → Increase Expansion +3–5 and Edge Softness +2–3
- No face detected → Enable Fallback to Full Image
- Ghosting artifacts → Switch from Soft to Hard Mask Mode
<details> <summary><strong>Loader for Batch Image Processing</strong> — Load image batches from folders</summary>
What It Does
Loads all images from a folder or accepts a batch from another node and outputs a batch tensor suitable for ComfyUI workflows.
Node Inputs
| Input | Purpose | |---|---| | image_directory | Path to the folder containing images | | subdirectories | Scan subdirectories (true/false) | | use_input_images | Toggle to use Input Images from a node | | input_images | Optional — connect image batch from another node |
Node Outputs
| Output | Type | Description | |---|---|---| | image | IMAGE | Batch tensor of images |
How It Works
Mode 1 — Load from Folder:
- Provide a folder path in
image_directory - Node scans for image files (PNG, JPG, JPEG, WebP, BMP, GIF)
- Outputs a batch tensor
Mode 2 — Process Input Images:
- Enable
use_input_imagestoggle - Connect image batch from another node
- Node converts to ComfyUI format
<details> <summary><strong>PhotoLab</strong> — Film effects and advanced skin retouching</summary>
What It Does
Turns clean AI-generated portraits into images that look like they were shot on real film, edited in a darkroom, or simply lived-in and human. Combines classic photo effects with a full suite of face skin effects.
Screenshots
<img src="https://raw.githubusercontent.com/ialhabbal/ComfyUI-ialhabbal/main/media/PhotoLab_New.png" width="600"> <img src="https://raw.githubusercontent.com/ialhabbal/ComfyUI-ialhabbal/main/media/PhotoLab_New1.png" width="600"> <img src="https://raw.githubusercontent.com/ialhabbal/ComfyUI-ialhabbal/main/media/PhotoLab_.png" width="600">Quick Start Settings
| Setting | Value | |---|---| | quality | 75 | | grain_strength | 12 | | color_grade | Faded | | color_grade_strength | 40 | | mask_mode | Face Only | | skin_texture_strength | 35 | | pores_strength | 30 | | sss_strength | 18 | | skin_redness_strength | 20 |
Tip: Click preset buttons at the bottom of the node for starting points.
Photo Effects
- quality (0–100) — JPEG compression level
- passes (1–10) — Compression iterations
- pixelate_strength (0–100) — Pixel grid effect
- grain_strength (0–100) — Film grain noise
- vignette_strength (0–100) — Edge darkening
- saturation (0–200) — Colour intensity (100 = unchanged)
Color Grading
- color_grade — None / Warm / Cool / Faded / Sepia
- color_grade_strength (0–100) — How strongly applied
Blur
- blur_type — None / Gaussian / Box / Motion / Radial / Lens / Soft Focus
- blur_strength (0–100) — Intensity
Lighting Match & Mask
- lighting_match_mode — Disabled / Histogram / Reinhard / Full LAB
- reference_image — Optional image for lighting reference
- mask_mode — Face Only / Inverted / Disabled
Skin Effects (all 0–100)
-
skin_texture_strength — Surface relief (pores, lines, shadows)
-
pores_strength — Visible skin pores
-
freckles_strength — Melanin freckles
-
blemishes_strength — Pigmentation marks
-
acne_strength — Inflammatory acne lesions
-
sss_strength — Subsurface scattering (warm inner glow)
-
peach_fuzz_strength — Fine facial hair
-
skin_redness_strength — Blood vessel redness (cheeks, nose)
-
sebum_shine_strength — Oil/sebum shine on T-zone
-
skin_seed (0–2B) — Random pattern for procedural effects
-
face_mask — Optional mask input
Presets
Global Presets — Film Snapshot, Darkroom B&W, Cool Editorial, Sepia Vintage, Golden Hour, Lo-Fi Degraded, Dreamy Soft Focus
Face Presets — Natural Skin, High-Detail Skin, Freckled & Rosy, Acne Breakout, Oily T-Zone, Aged Complexion
Outputs
- images — Processed image batch
- face_mask — Pass-through of connected mask
<details> <summary><strong>Save_It</strong> — Advanced image saving with favorites and compare</summary>
What It Does
A powerful image-saving node that gives you full control over where, when, and how your generated images are saved — with a clean, interactive UI.
Node
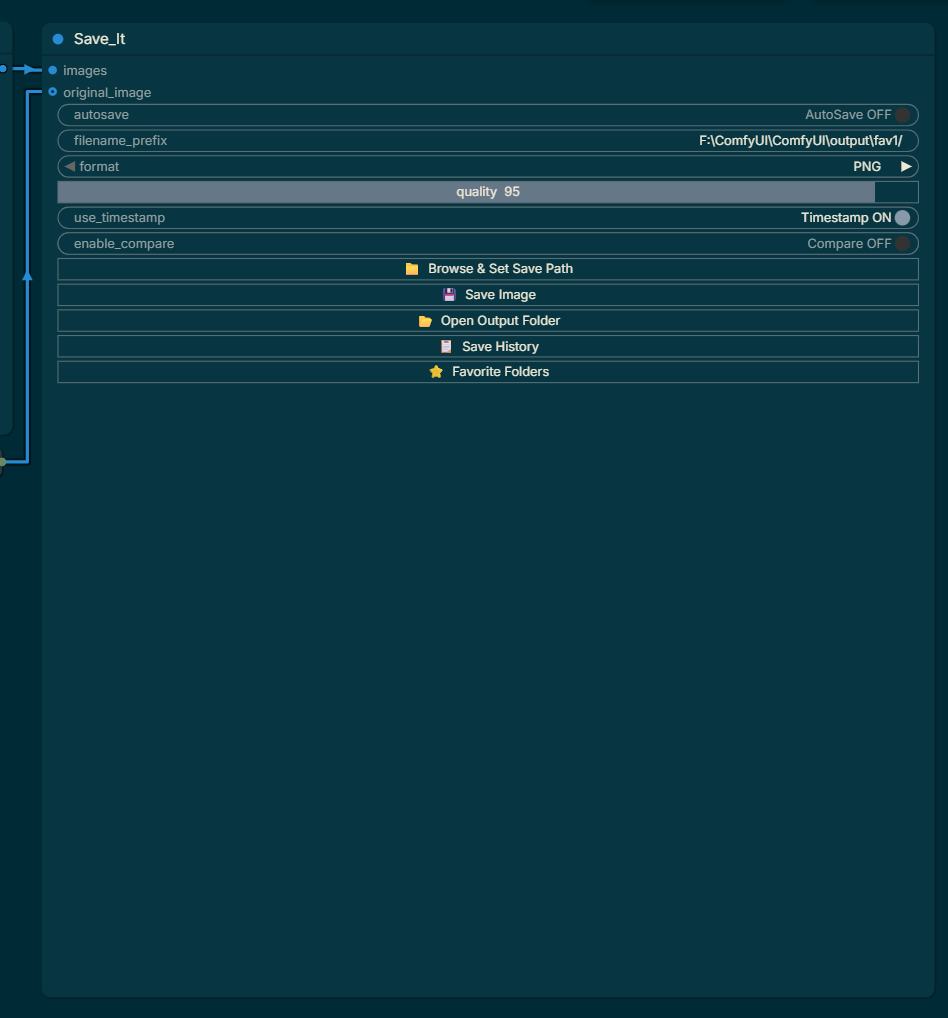
Compare off
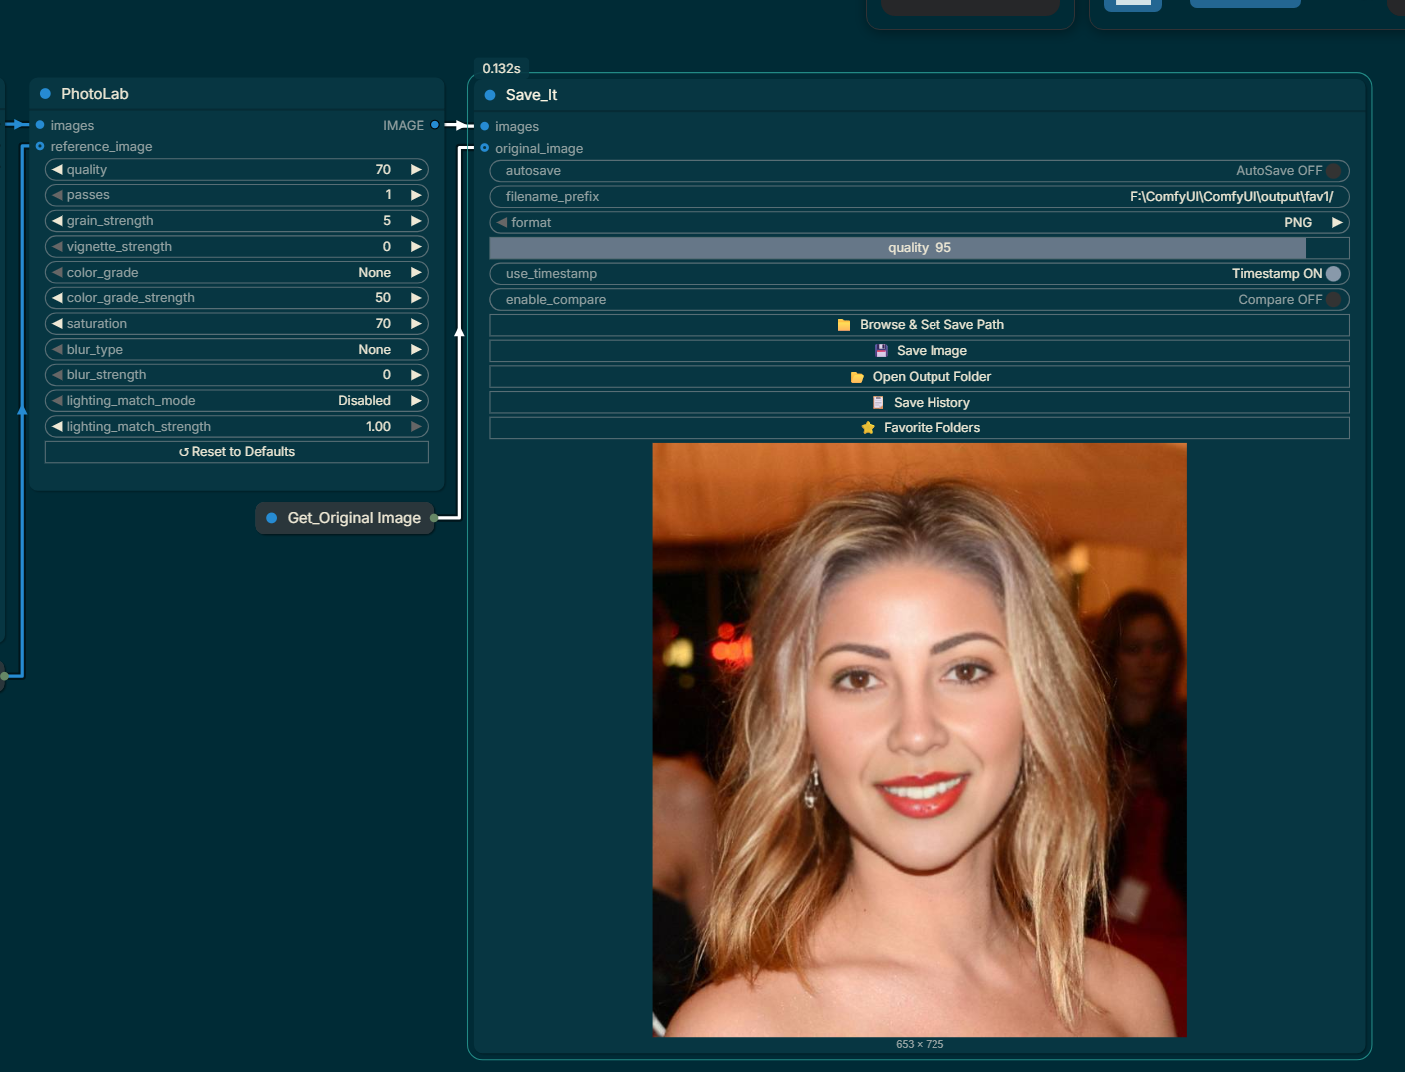
Compare on without toggling
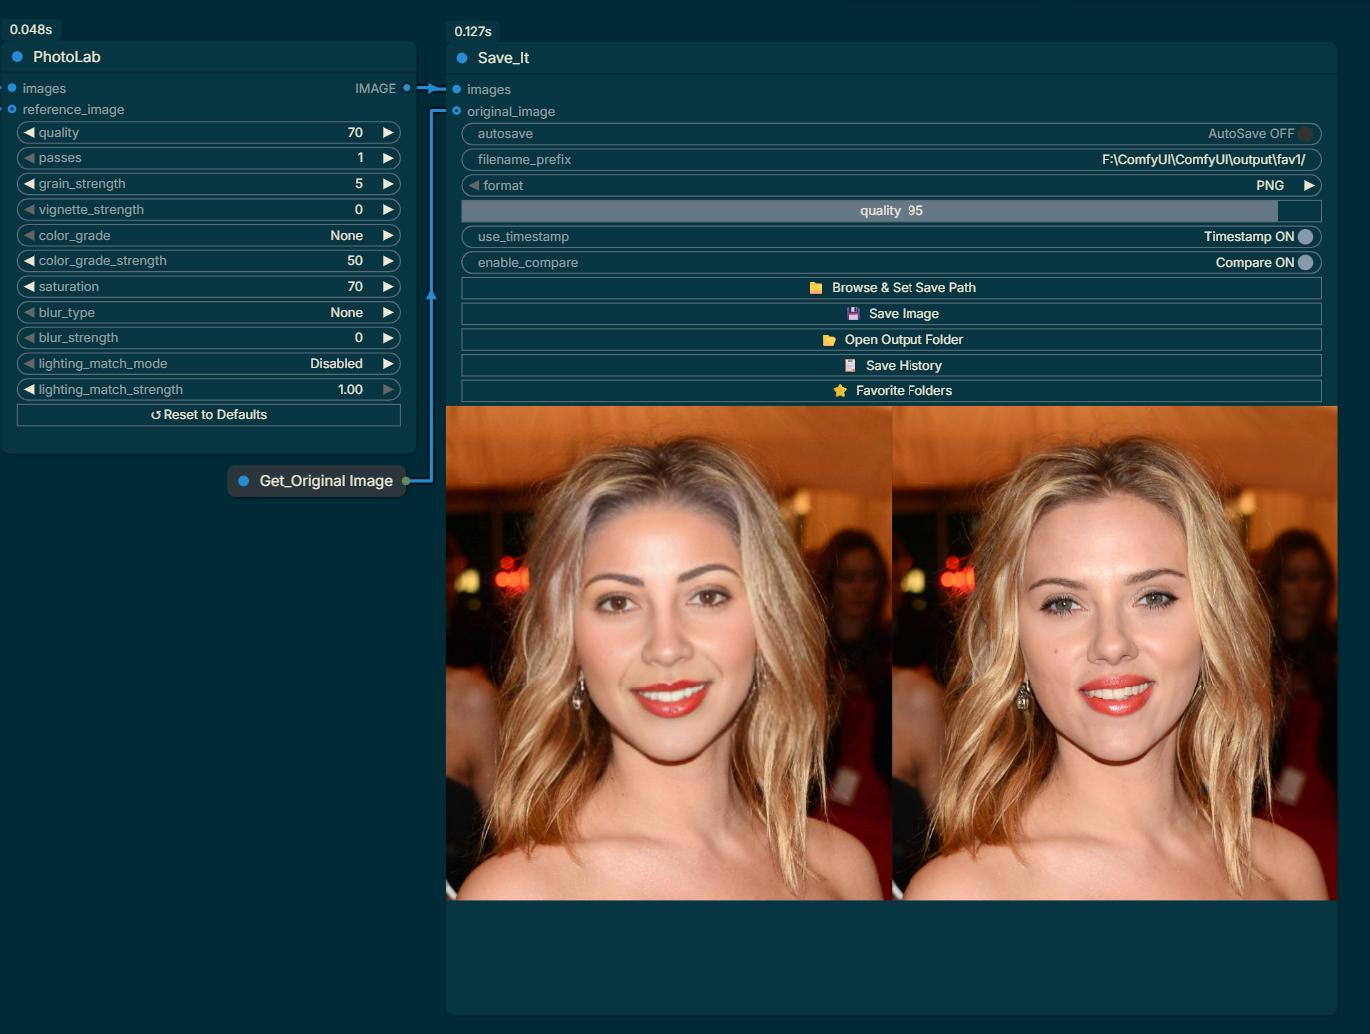
Compare on with toggling
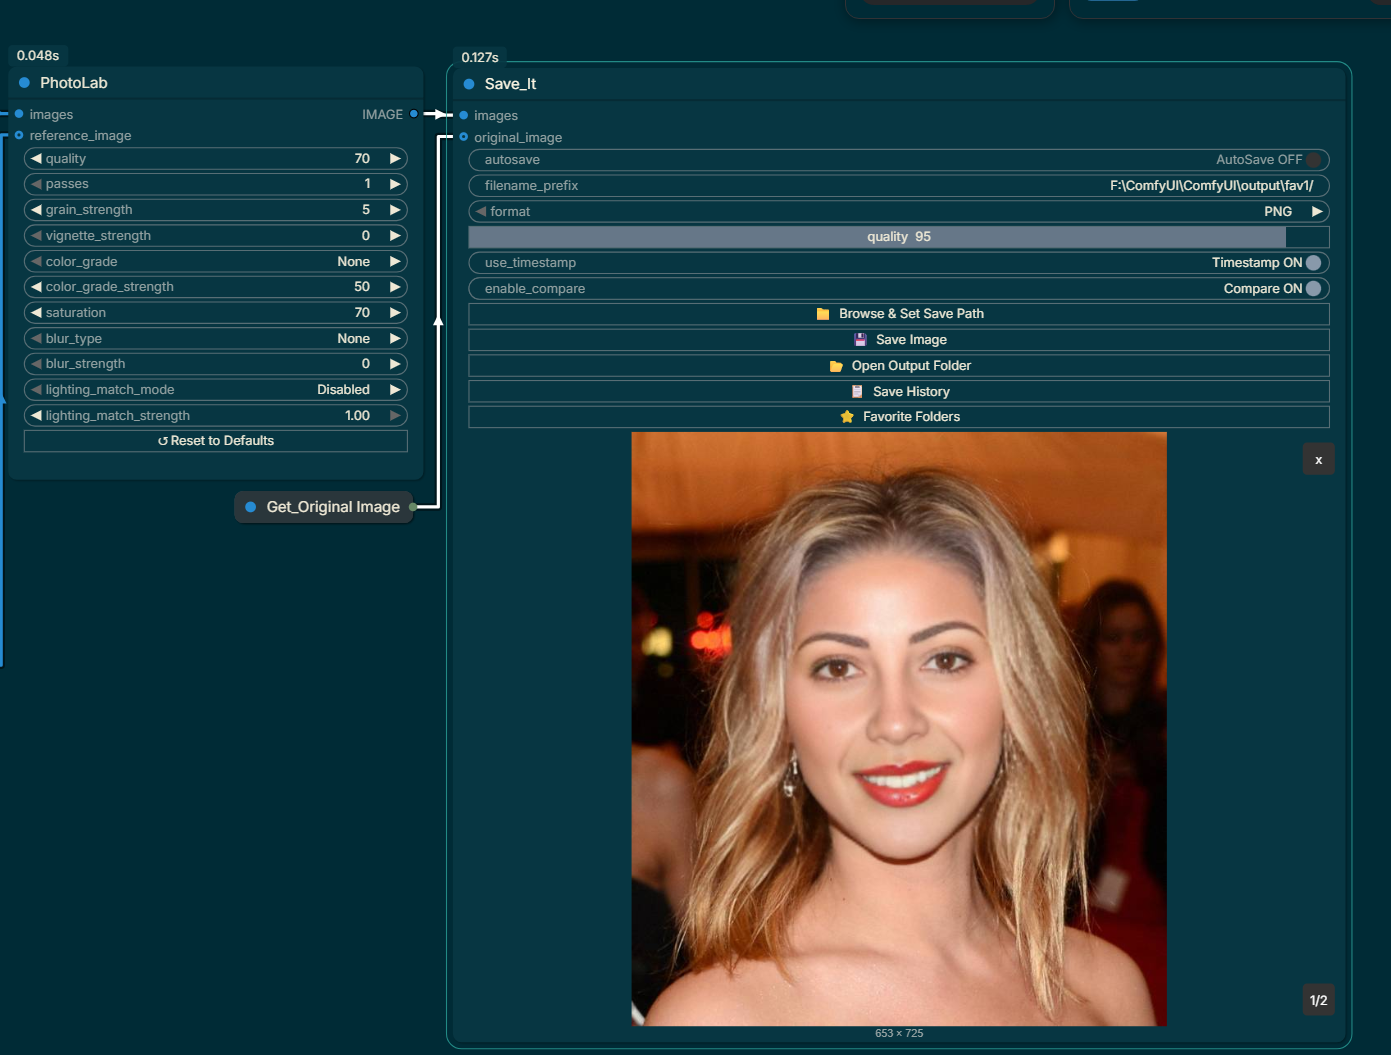
Compare on with toggling
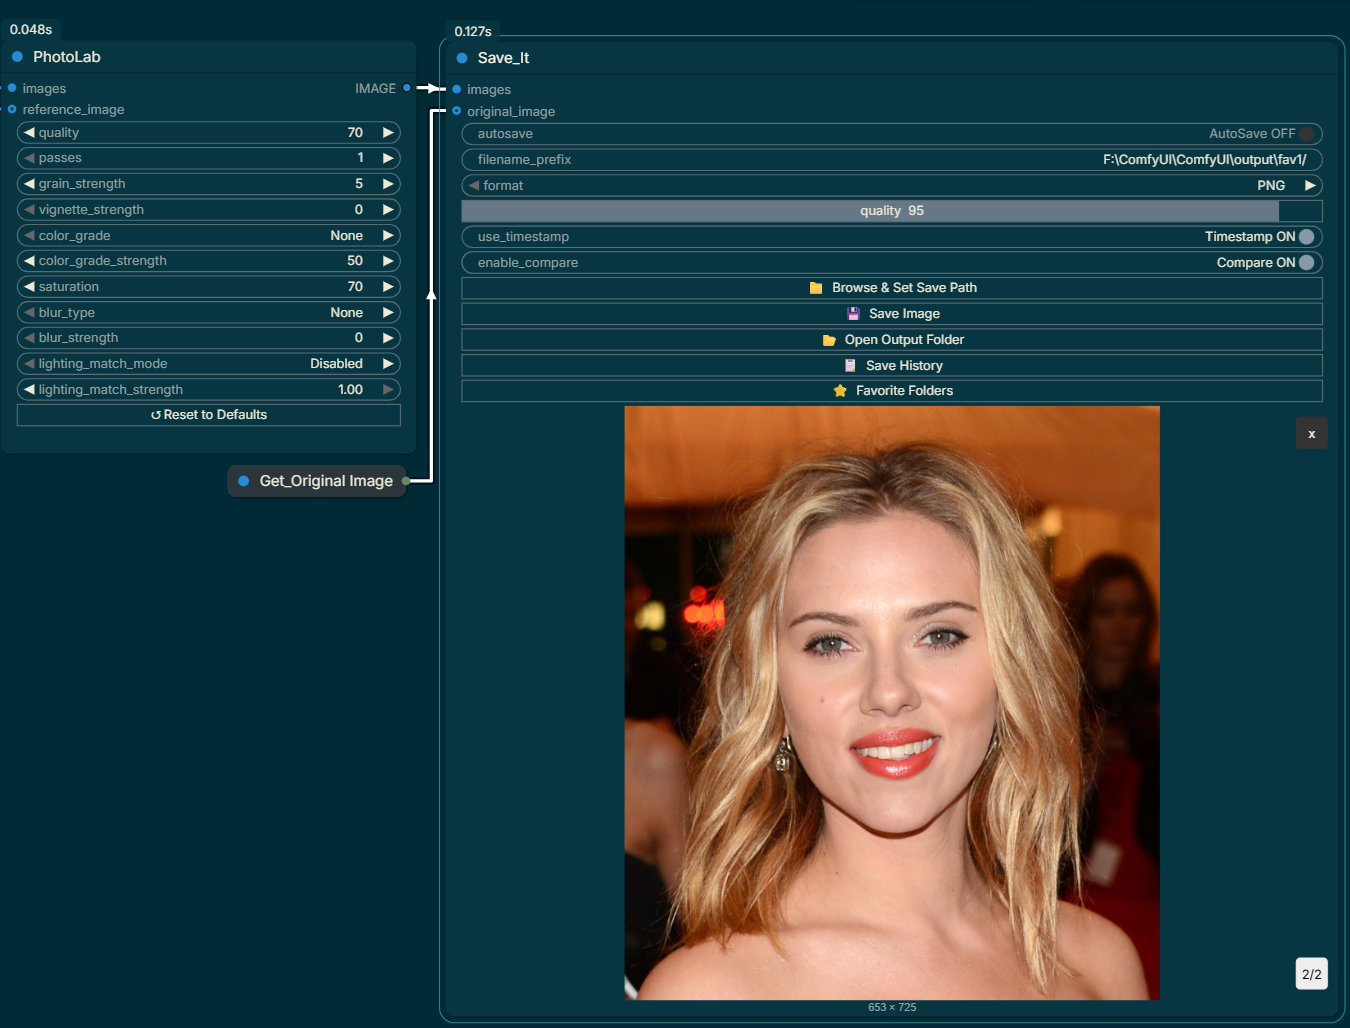
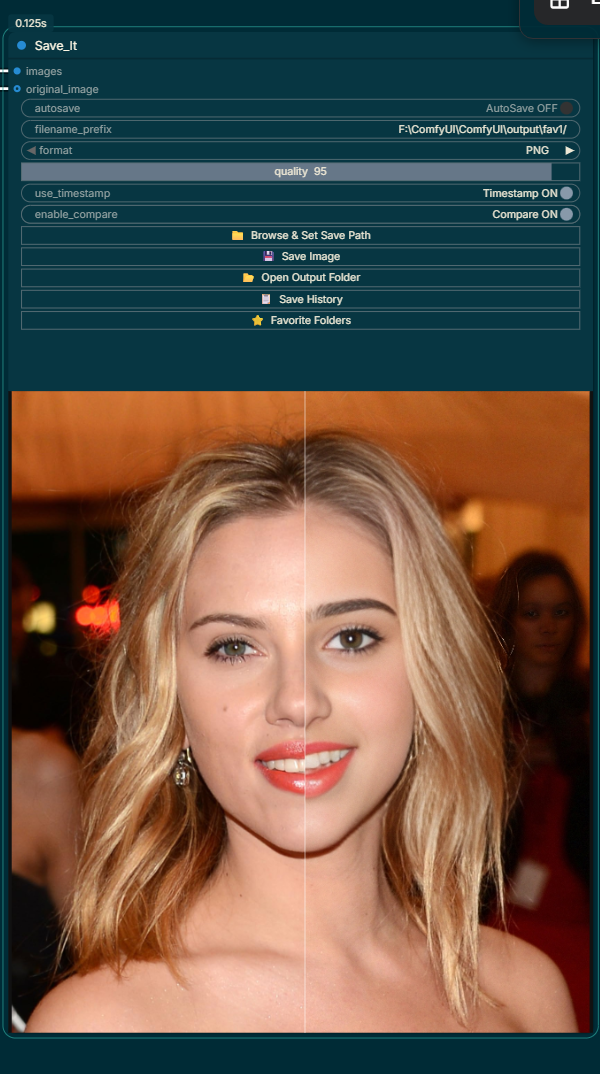
Compare (vertical wipe left to right)
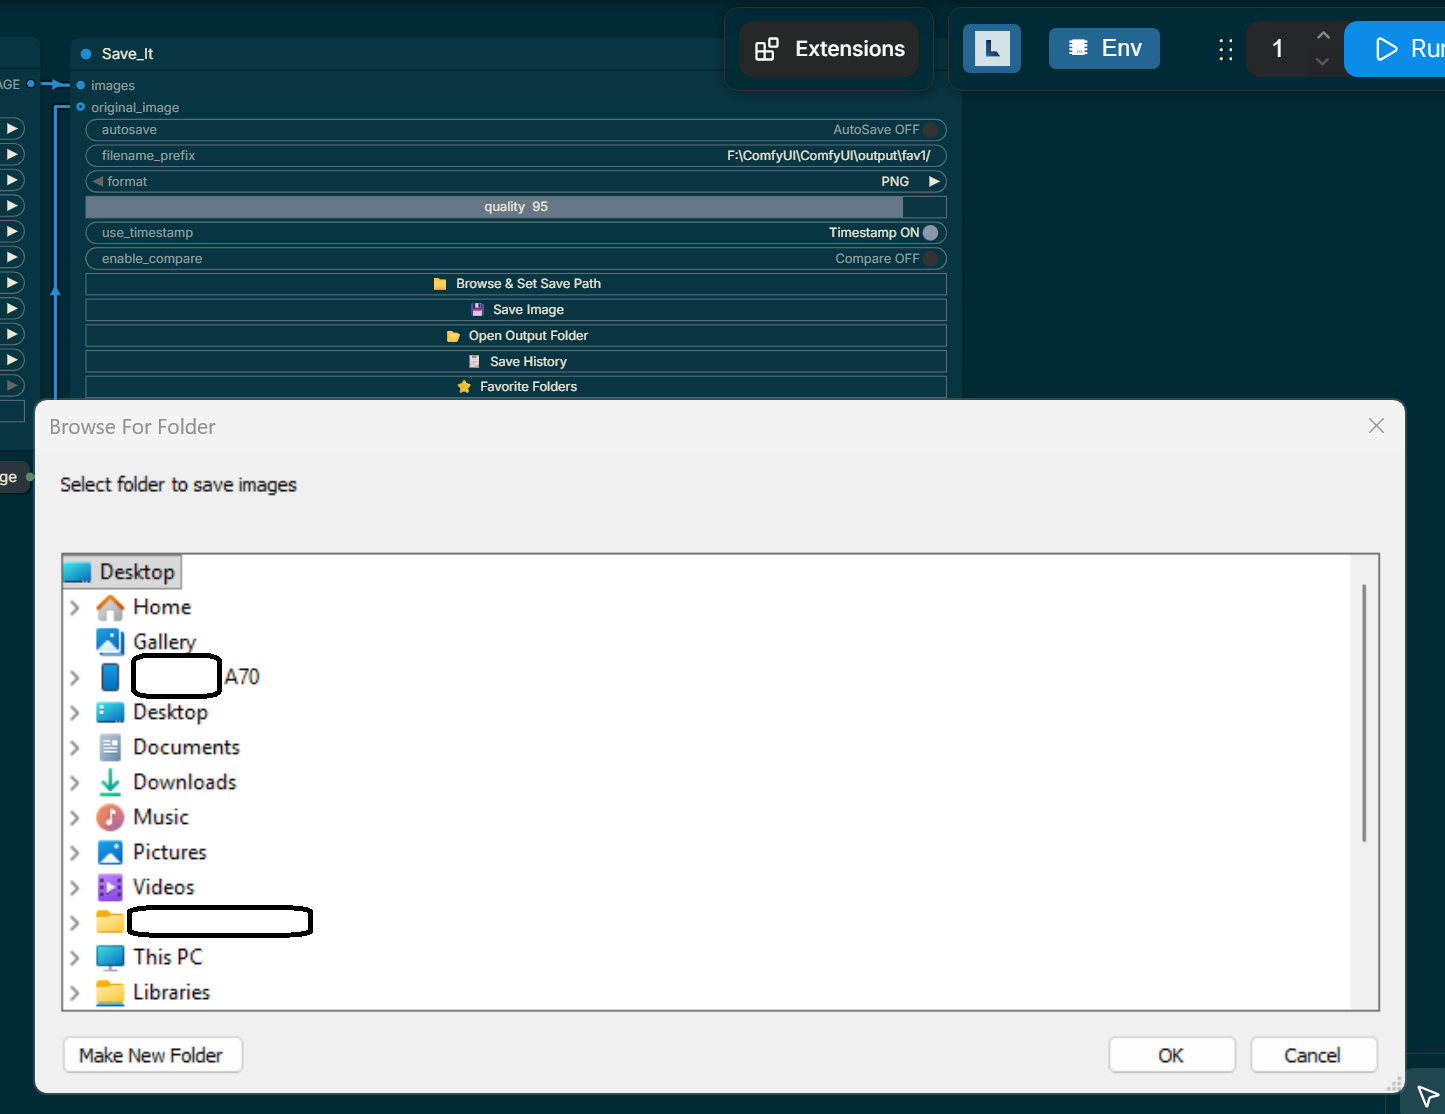
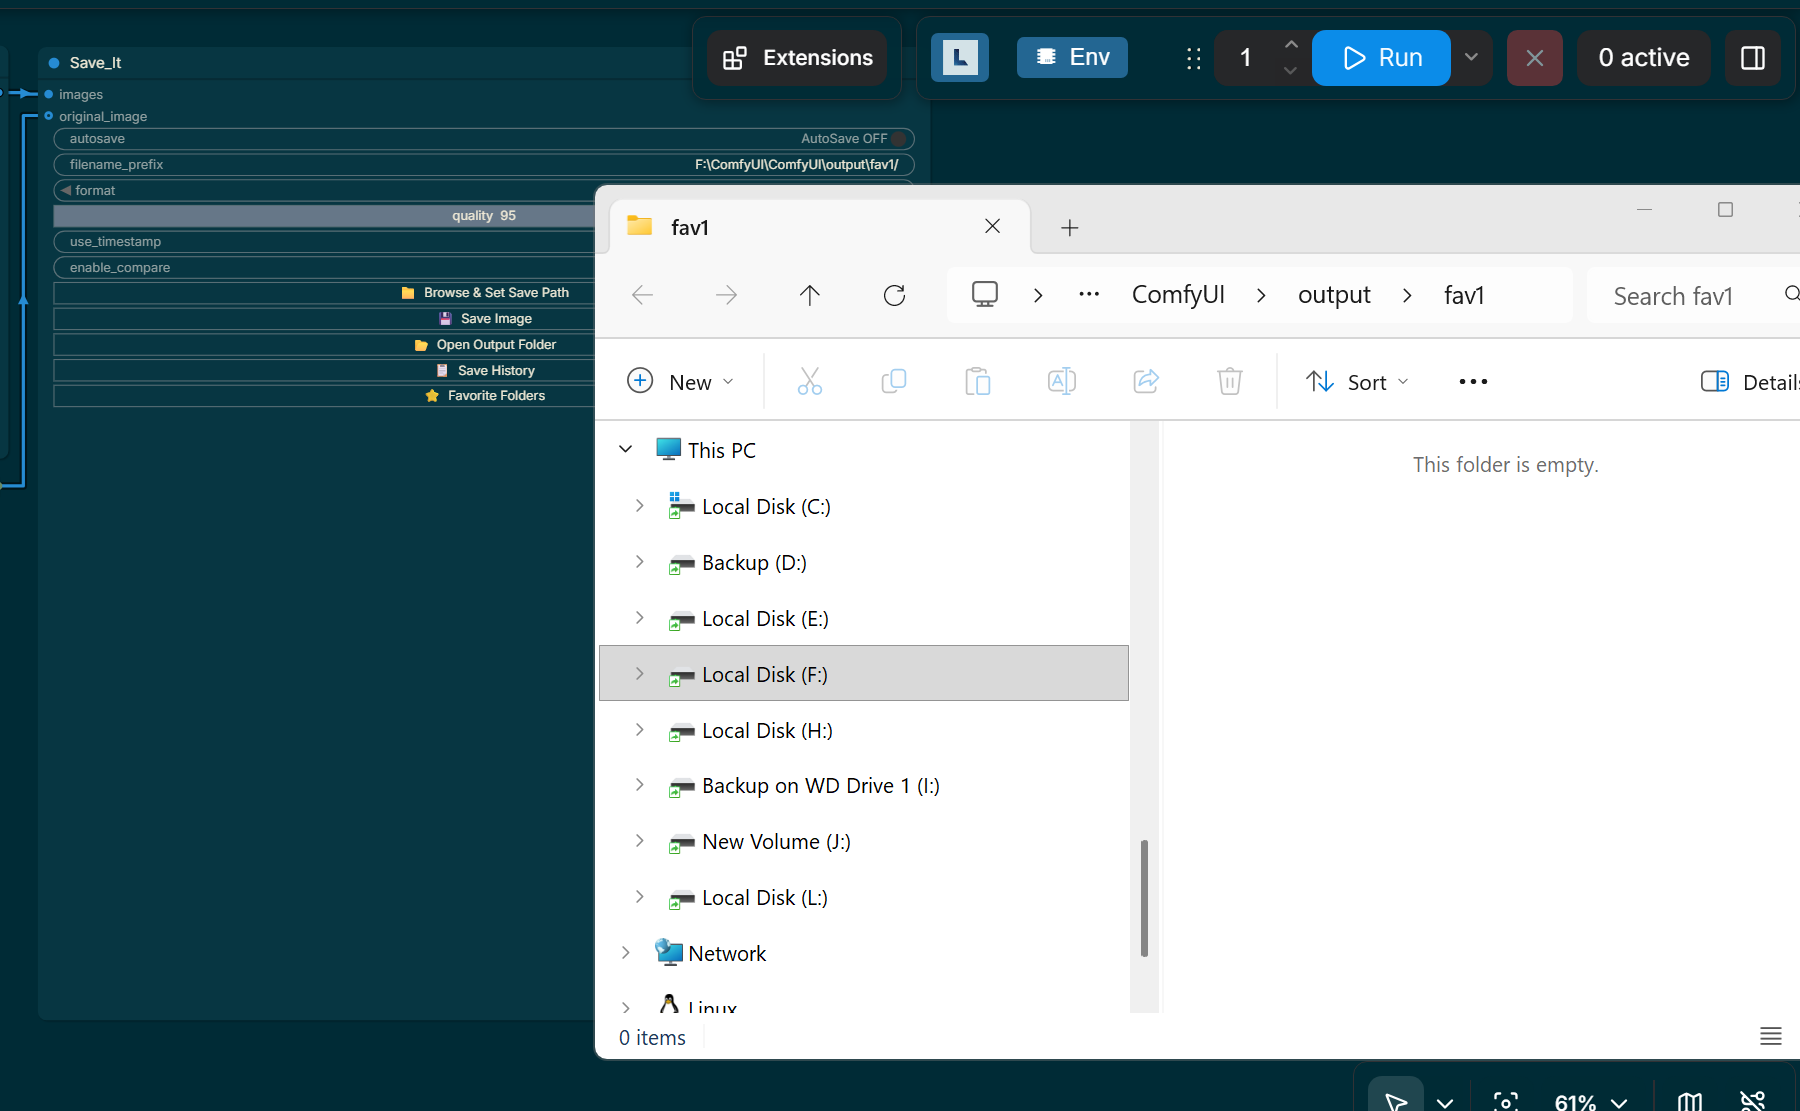
Browse & Set Save Path
Open Output Folder
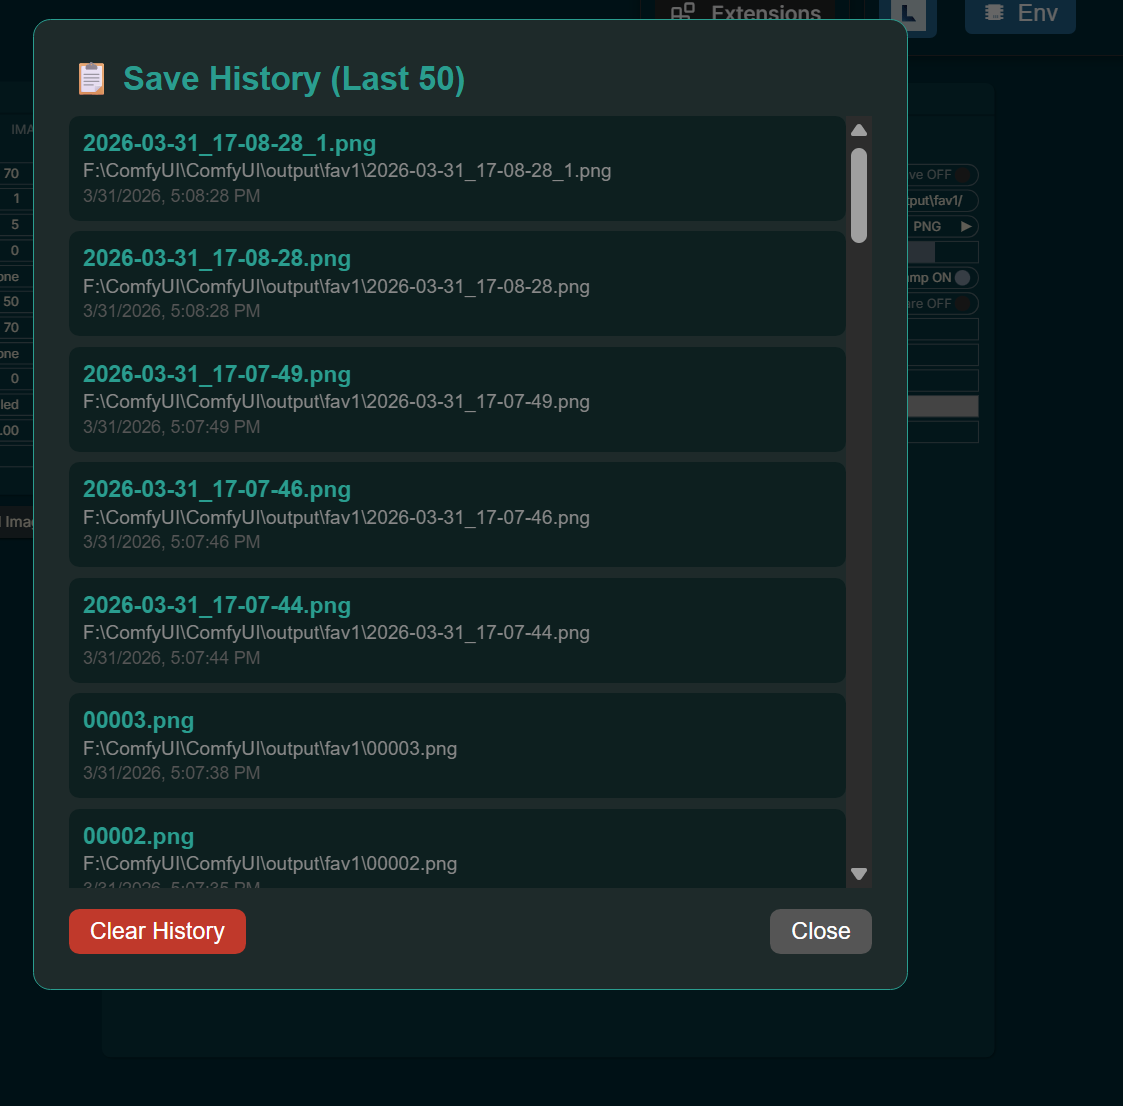
Save History
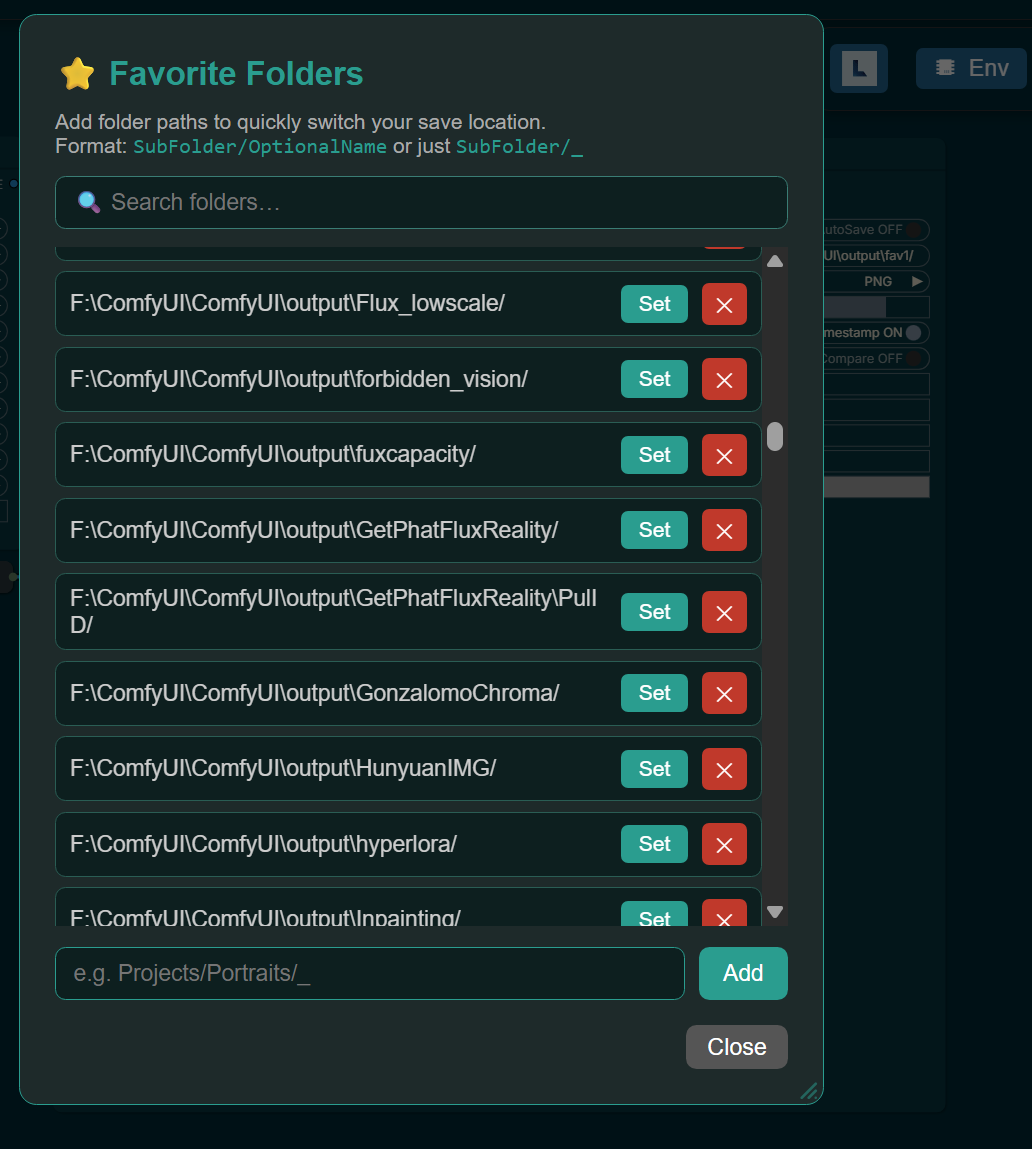
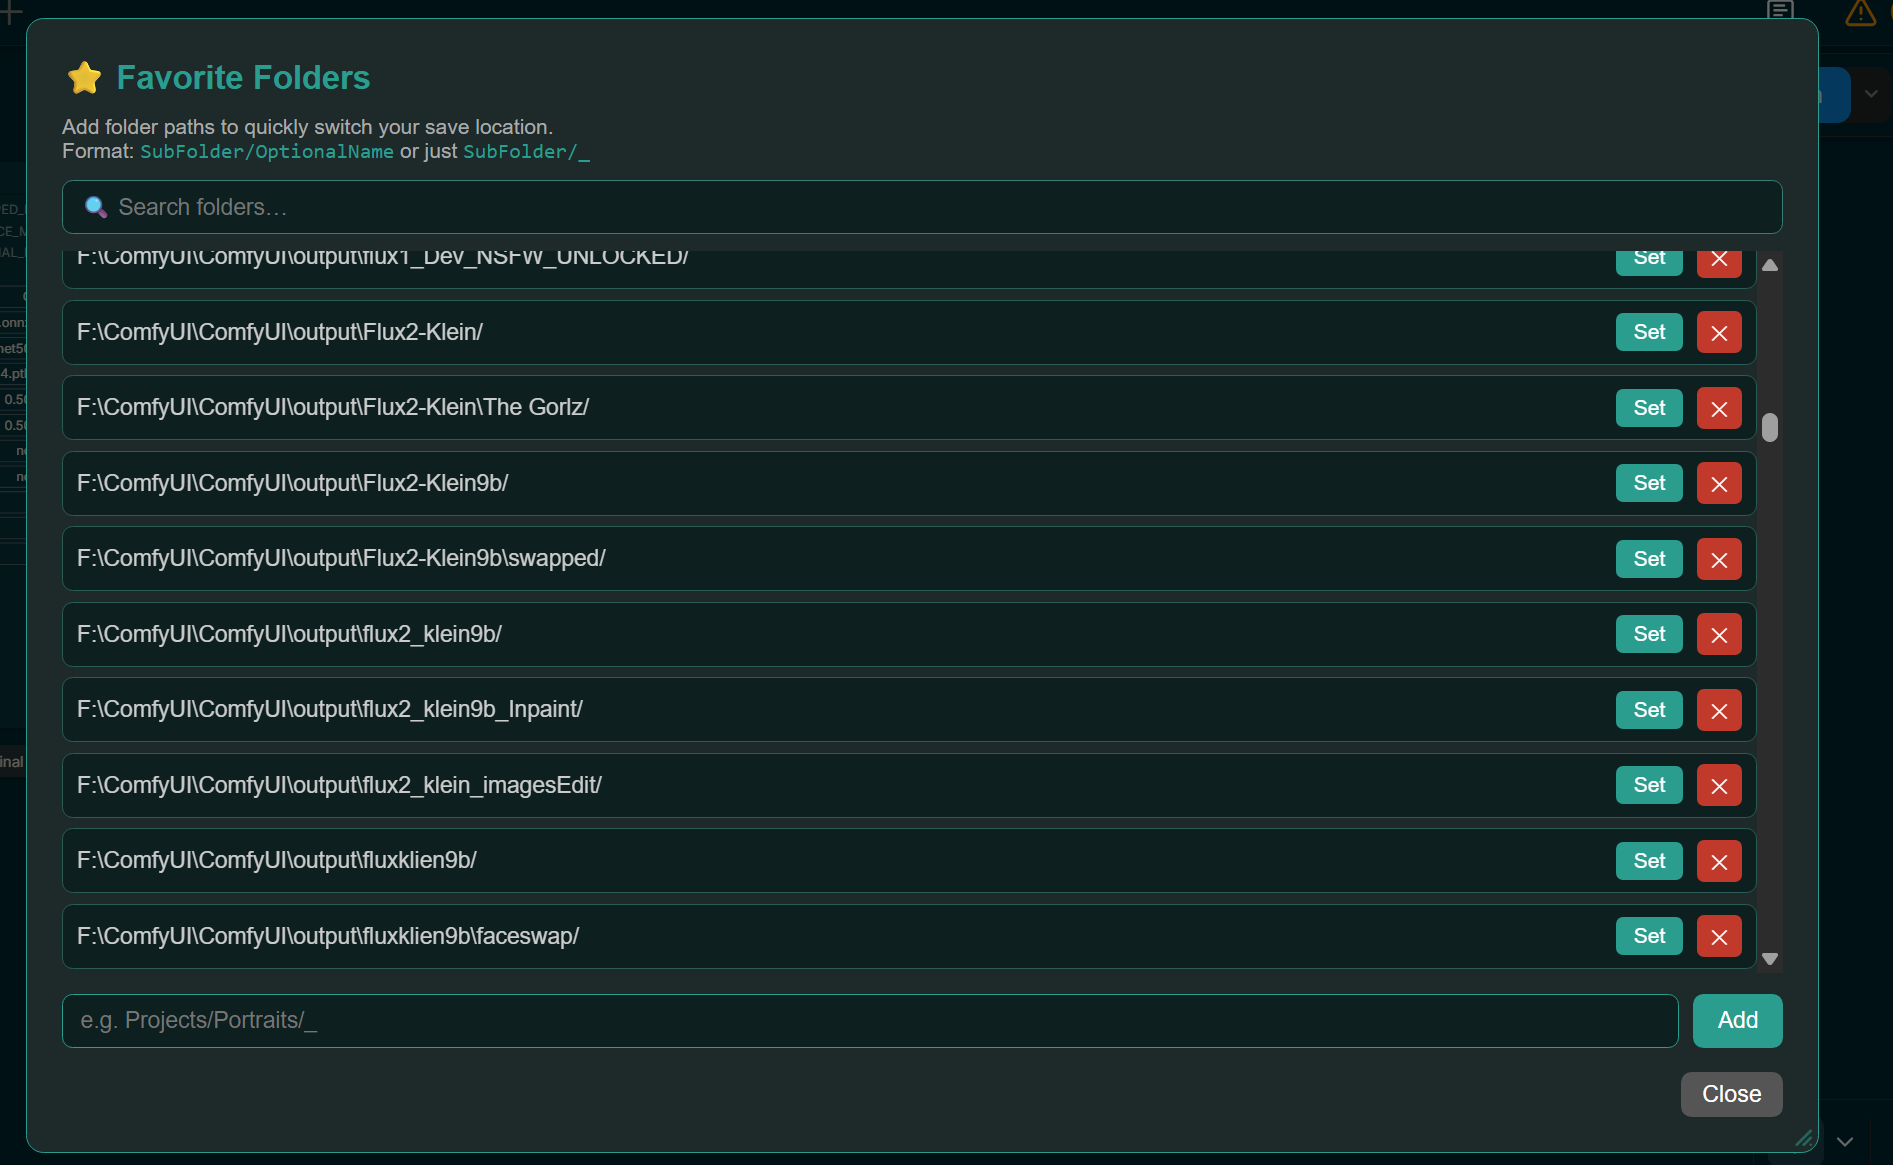
Favorite Folders
Features
- One-click manual save — save selected images immediately
- Save All Images — save every image in the current batch
- AutoSave — automatically save newly generated images and deduplicate repeated frames by pixel content
- Browse & Set Save Path — native folder dialog
- Favorite Folders — bookmark save locations
- Save History — view the last 50 saved files
- Timestamp or counter filenames — sequential or date-time naming
- Multiple formats — PNG, JPEG, WebP
- Compare mode — interactive A/B comparison when
original_imageis connected - Absolute paths — save anywhere on your system
- Metadata preserved — prompt/workflow metadata is saved into PNG files
- Preview support for external folders — external save locations still generate a temp preview copy for the UI
Node Inputs
| Input | What it does | |---|---| | images | The image(s) from your workflow | | original_image | Optional second image for comparison when Compare is ON |
Settings
AutoSave — Toggle ON/OFF. When ON, images are saved automatically and manual Save is disabled unless Compare mode is active.
Filename Prefix — Controls folder and filename.
| What you type | Where it saves | Filename |
|---|---|---|
| ComfyUI | output/ | ComfyUI_00001.png |
| Portraits/face | output/Portraits/ | face_00001.png |
| D:\MyImages | D:\MyImages\ | 00001.png |
Format — PNG / JPEG / WebP
Quality — 1–100 (for JPEG/WebP)
Timestamp — Toggle ON to use date-time naming instead of a counter
Compare Mode — Toggle ON for side-by-side comparison using the optional original_image
Comparison Modes
- Horizontal split — drag left/right
- Vertical split — drag up/down
- Overlay — blend with opacity slider
- Difference — highlights differing pixels
Buttons
- Save — manually save current image
- Save All Images — save every image in the current batch
- Browse & Set Save Path — native folder picker
- Open Output Folder — open the target save folder
- Save History — view recent saved files
- Favorite Folders — open folder shortcuts panel
File Naming
Pattern: prefix_NNNNN.ext
The counter is stored in .save_it_counter inside your save folder — each folder has its own counter.
Tips
- Save only best generations → Leave AutoSave OFF and manually save what you want
- Save everything automatically → Turn AutoSave ON and organize with folder prefixes
- Compare before/after → Connect
original_imageand toggle Compare Mode - Many projects → Use Favorites for quick switching
- Time-sorted files → Turn Timestamp ON
Suite Requirements
- ComfyUI (standard installation)
- Python 3.8+
- Standard packages: Pillow, numpy, torch
Optional Dependencies
For Occlusion Mask:
pip install insightface onnxruntime opencv-python retina-face ultralytics segment-anything
Notes
- The suite exposes all nodes separately in the ComfyUI node menu
- Each node keeps its existing functionality and frontend assets
- Frontend files are served from the
webfolder - If a node fails to import, the suite attempts to load remaining nodes
License
MIT License
Credits
Developed by ialhabbal
Suite combines 8 ComfyUI custom nodes with unified installation and documentation.