
ComfyUI Extension: a-person-mask-generator
Run ComfyUI workflows without the setup
No installs, no CUDA version roulette, no GPU sitting idle on your bill. Bring a workflow and run it in the browser.
Extension for Automatic1111 and ComfyUI to automatically create masks for Background/Hair/Body/Face/Clothes in Img2Img
Looking for a different extension?
Custom Nodes (2)
README
a-person-mask-generator
Extension for Automatic1111 and ComfyUI to automatically create masks for Background/Hair/Body/Face/Clothes in Img2Img
Uses the Multi-class selfie segmentation model model by Google.
Updates
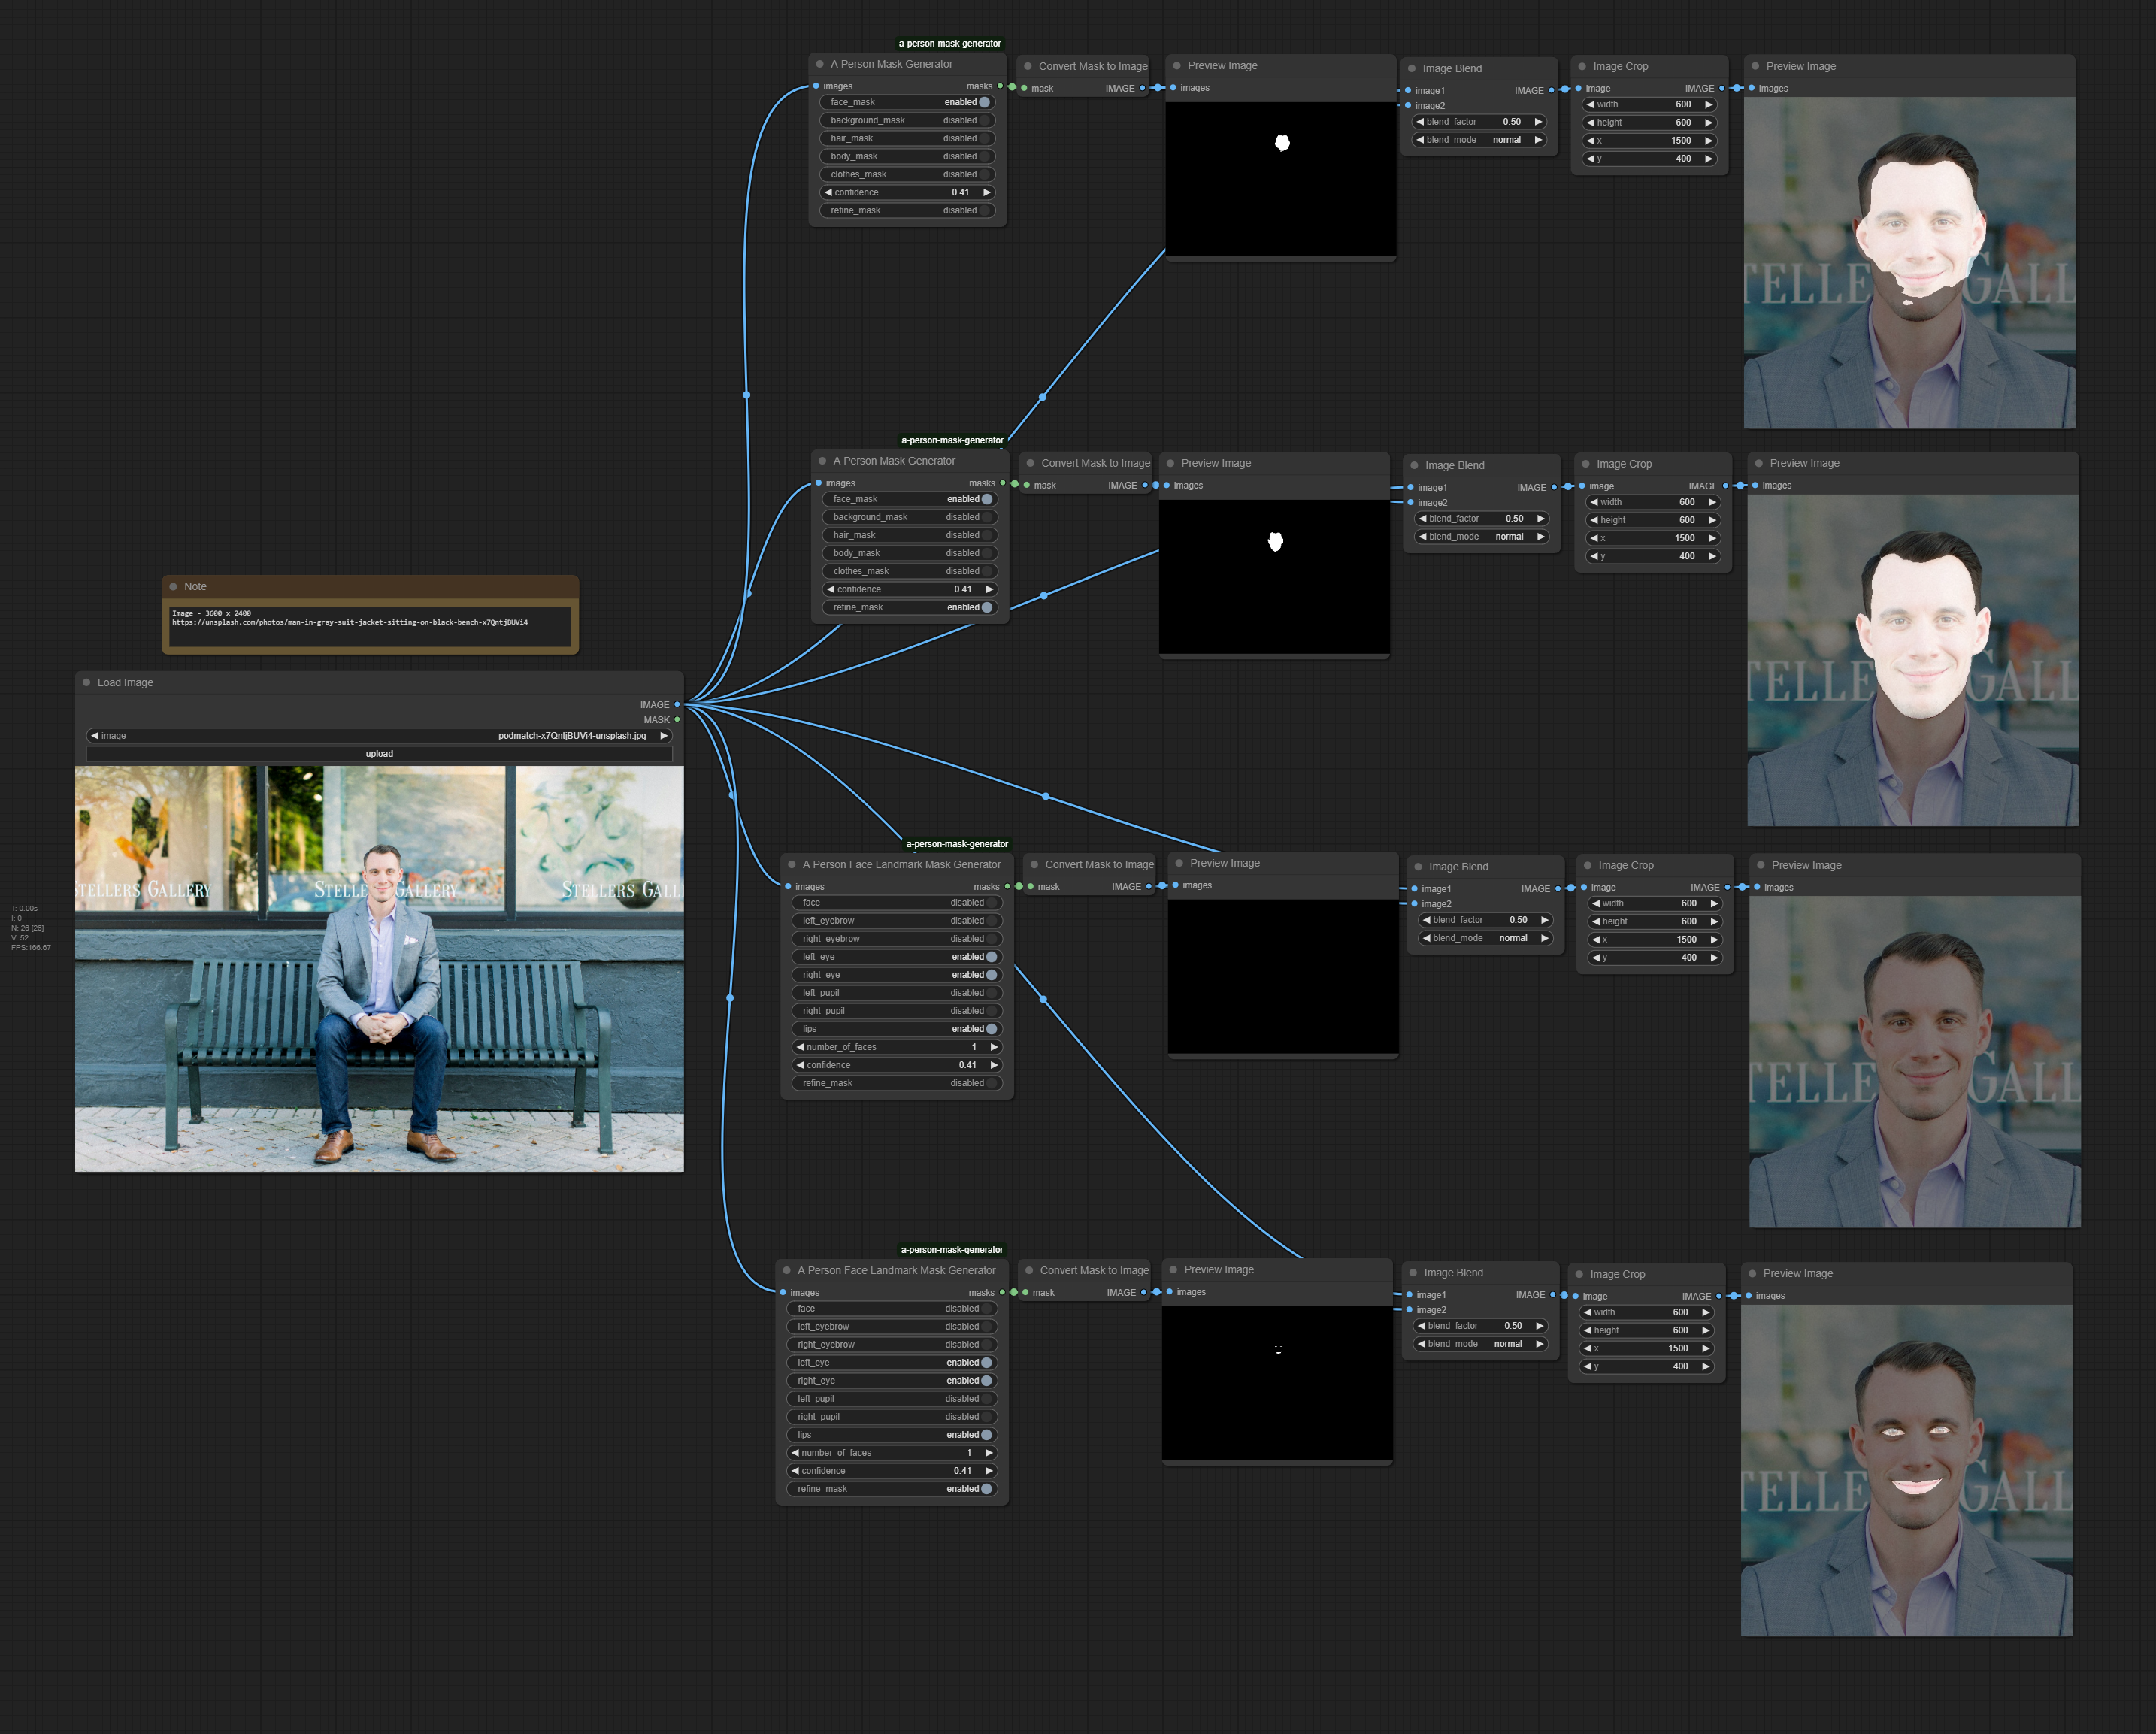
- 2025-02-19 - Adding mask refinement. This creates a bounding box around the detected mask, then crops the image to the detected area, then runs a second pass for the mask detection. Especially helpful on large resolution images with the person far away.
- 2025-02-07 - Fixing ComfyUI vs Auto1111 (improved ComfyUI by adding alpha channel to the image that gets passed to media pipe. See issue #47)
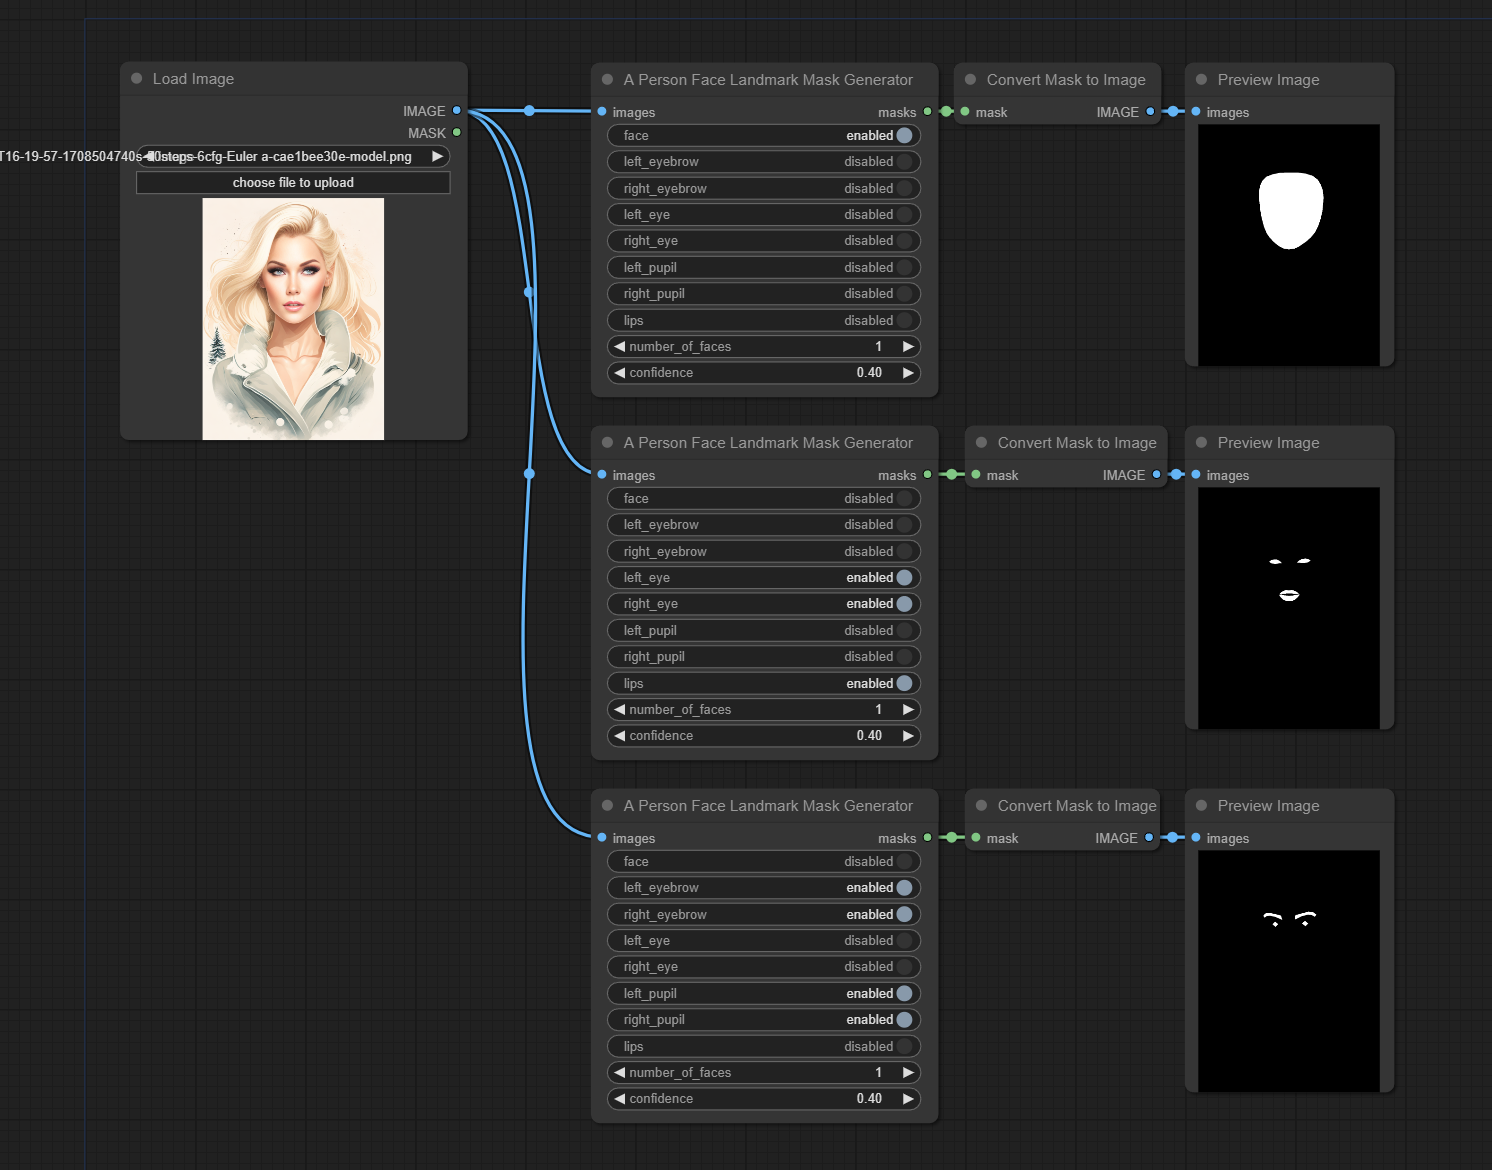
- 2024-05-26 - Adding facial landmark mask outputs for ComfyUI
- 2024-05-25 - Fixed ComfyUI requirements and install
- 2024-01-01 - Added ComfyUI support
- 2023-11-16 - Initial release
Install - ComfyUI
- Navigate to your ComfyUI folder in a command prompt and activate your
venv
venv\Scripts\activate.bat
- Navigate to your
custom_nodesfolder and run the following commands
git clone https://github.com/djbielejeski/a-person-mask-generator
cd a-person-mask-generator
pip install -r requirements.txt
If you are using the ComfyUI portable install, run this in ComfyUI_windows_portable folder
python_embeded\python.exe -m pip install -r ComfyUI\custom_nodes\a-person-mask-generator\requirements.txt
- Restart ComfyUI.
Full Example
D:\ComfyUI> venv\Scripts\activate.bat
(venv) D:\ComfyUI> cd custom_nodes
(venv) D:\ComfyUI\custom_nodes> git clone https://github.com/djbielejeski/a-person-mask-generator
(venv) D:\ComfyUI\custom_nodes> cd a-person-mask-generator
(venv) D:\ComfyUI\custom_nodes\a-person-mask-generator> pip install -r requirements.txt
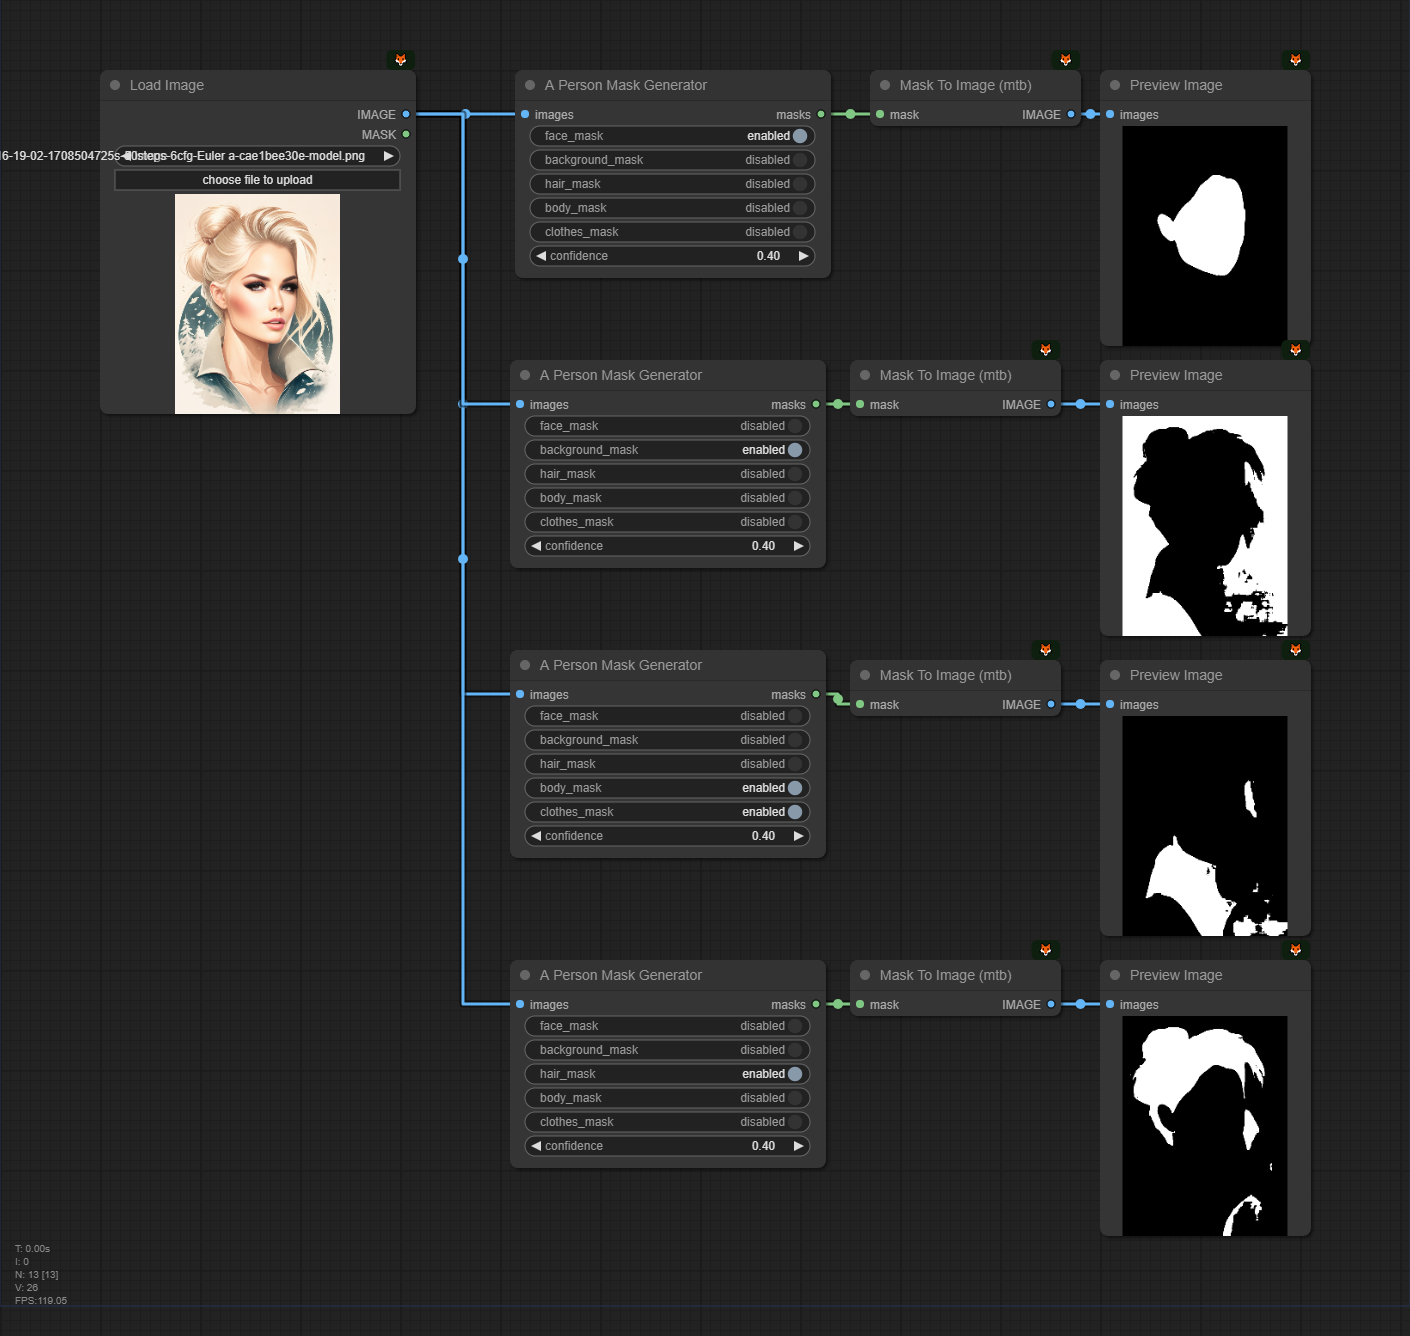
ComfyUI Example - Person
Workflow embedded in image, drag into ComfyUI to use.
Masks in this order
- Face
- Background
- Body + Clothes
- Hair
ComfyUI Example - Face Landmarks
Refine Mask - 1st and 3rd - refine_mask = false, 2nd and 4th - refine_mask = true
Install - Automatic1111 Web UI
(from Mikubill/sd-webui-controlnet)
- Open "Extensions" tab.
- Open "Install from URL" tab in the tab.
- Enter
https://github.com/djbielejeski/a-person-mask-generator.gitto "URL for extension's git repository". - Press "Install" button.
- Wait 5 seconds, and you will see the message "Installed into stable-diffusion-webui\extensions\a-person-mask-generator. Use Installed tab to restart".
- Go to "Installed" tab, click "Check for updates", and then click "Apply and restart UI". (The next time you can also use this method to update extensions.)
- Completely restart A1111 webui including your terminal. (If you do not know what is a "terminal", you can reboot your computer: turn your computer off and turn it on again.)
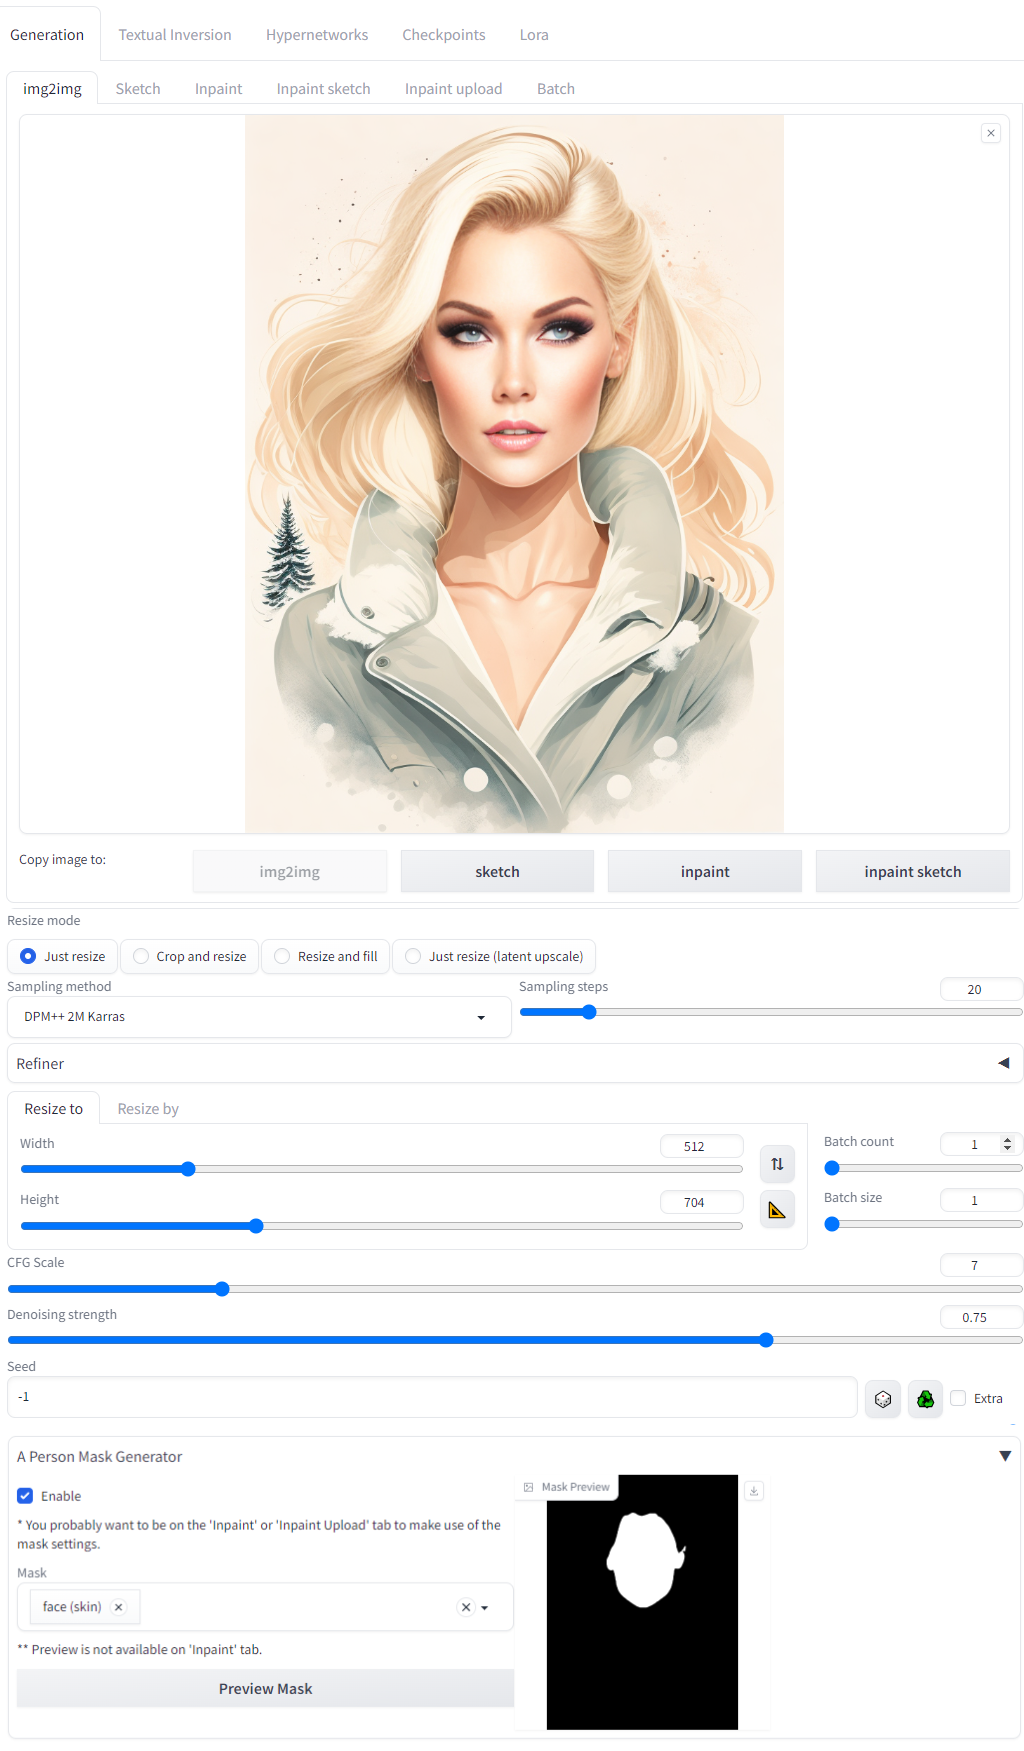
Automatic1111 Examples
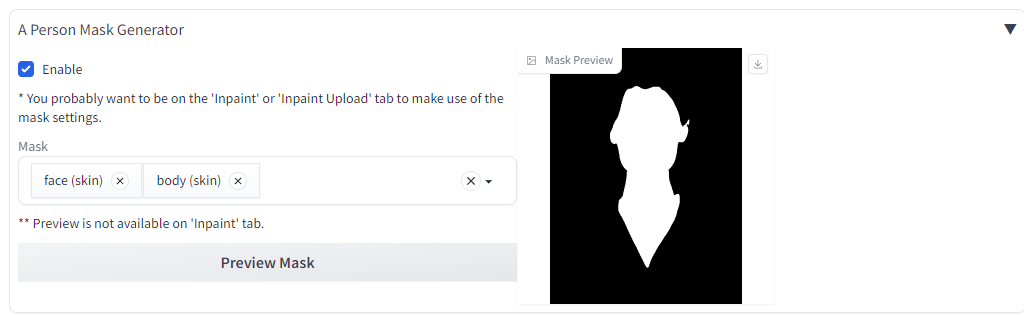
Face
Face + Body
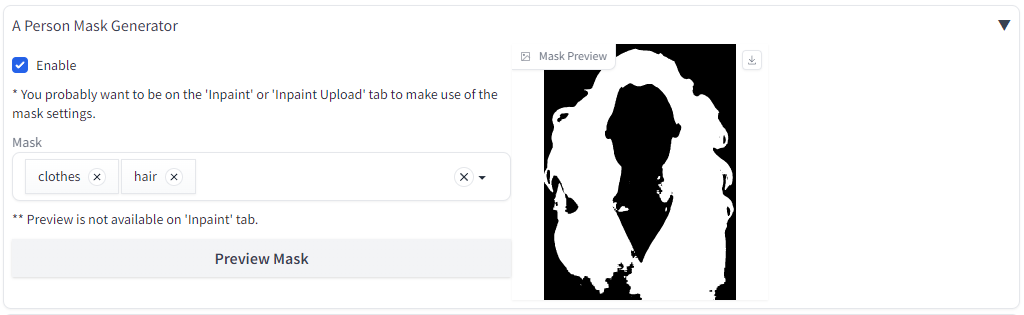
Clothes + Hair
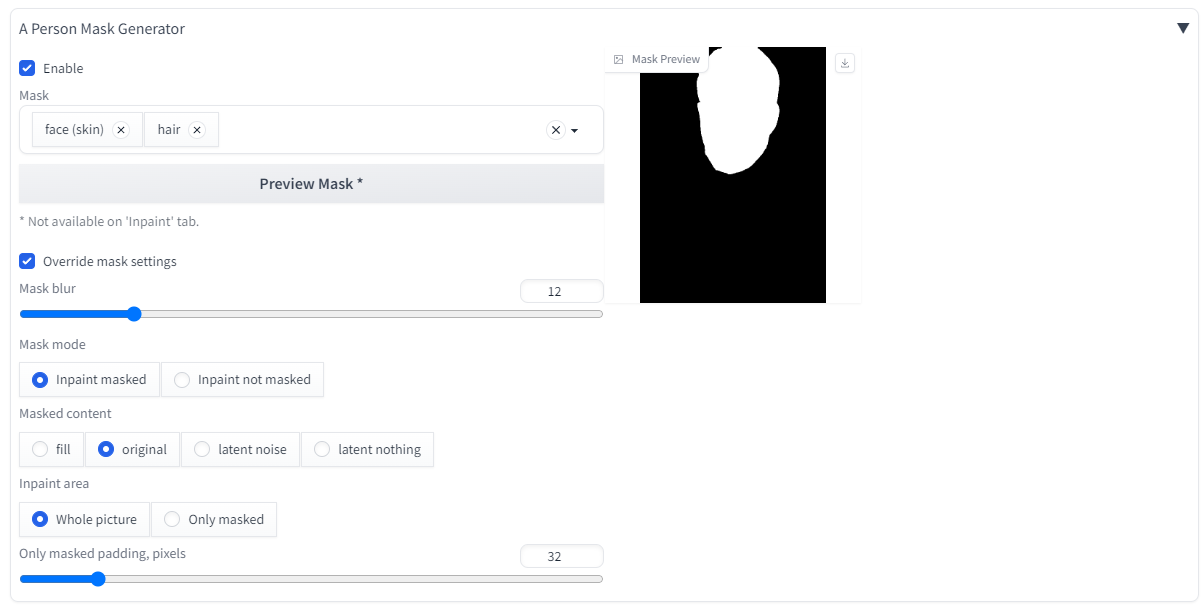
Mask Settings
Run ComfyUI workflows without the setup
No installs, no CUDA version roulette, no GPU sitting idle on your bill. Bring a workflow and run it in the browser.