
comfyui-mliang-lora-loader
A professional ComfyUI custom node for browsing and loading LoRA files with folder tree navigation, multi-slot support, and instant preview.
Nodes (1)
MLiang LoRA Loader
English | 中文
A professional ComfyUI custom node for browsing and loading LoRA files with folder-tree navigation, multi-slot support, and instant preview.
📸 Screenshots
| Node UI | Tree Browser | Preview | Workflow |
|---------|-------------|---------|----------|
| 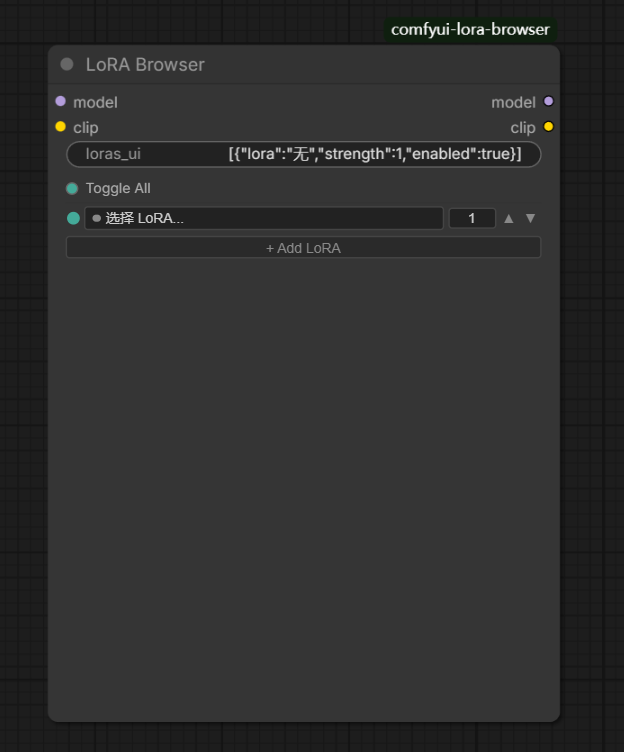 |
| 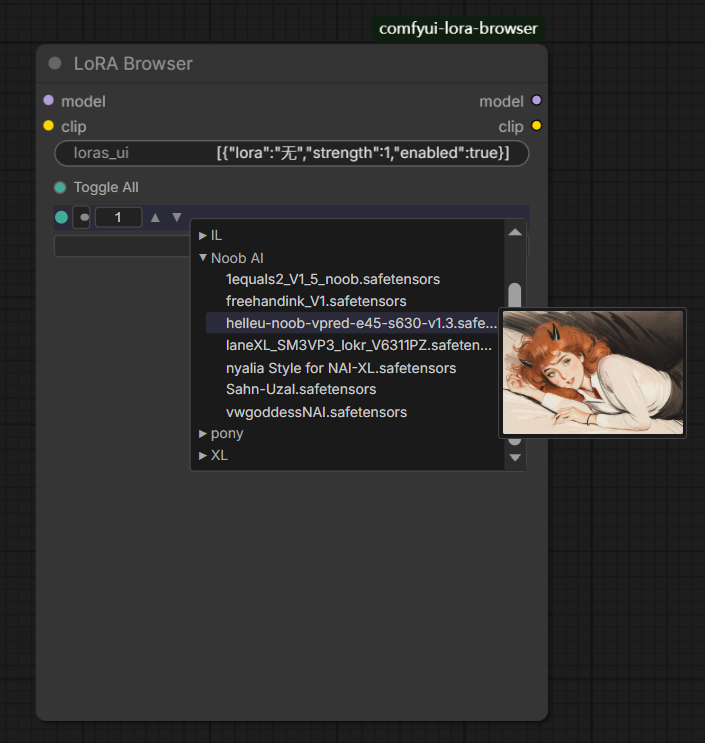 |
| 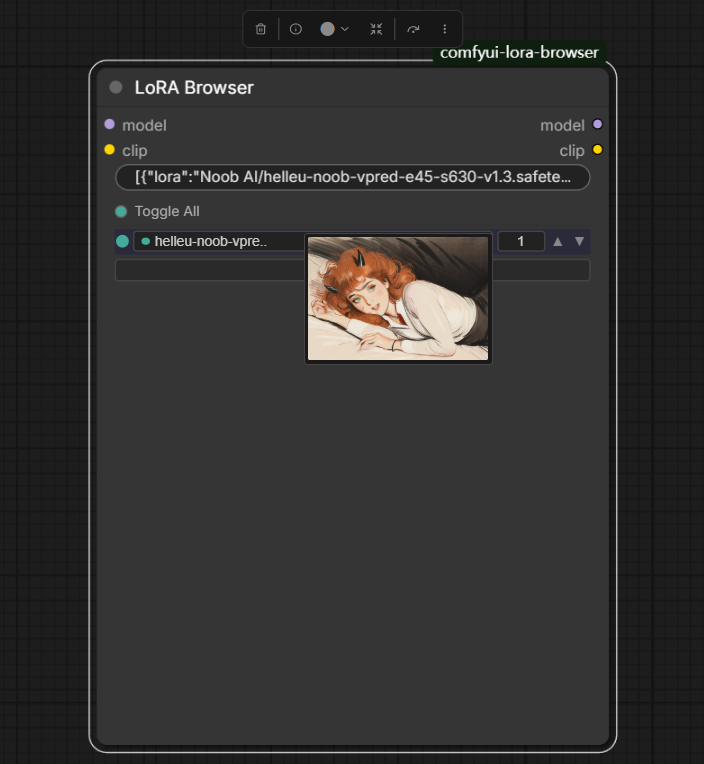 |
| 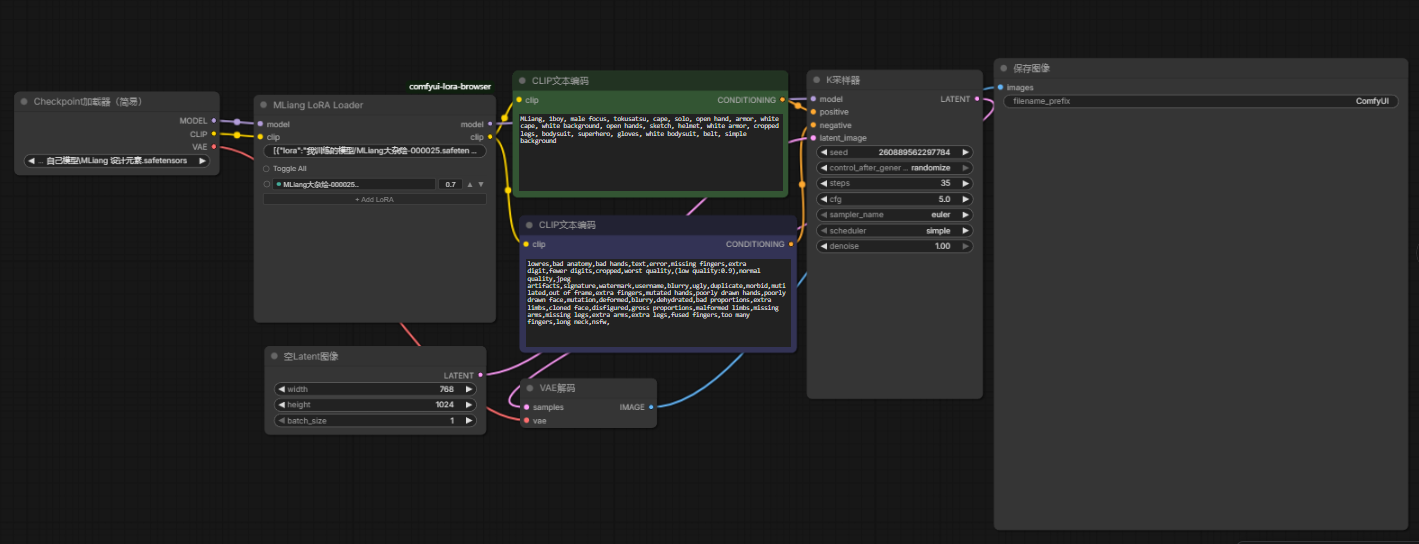 |
|
✨ Features
- 🗂️ Folder-tree Browsing — Navigate your LoRA collection by real folder hierarchy
- 🔍 Real-time Search — Type to instantly filter, auto-expand matching branches
- ⌨️ Keyboard Navigation —
↑↓to move highlight,Enterto select,Escapeto close - 🔗 Multi-slot Loading — Add unlimited LoRA slots, applied sequentially
- 🎛️ Strength Control — Text input with
▲▼arrow fine-tuning per slot - 🖼️ Hover Preview — Mouse over any LoRA file to see preview image instantly
- 📋 Right-click Menu — Show Info / Toggle / Move Up/Down / Remove
- 🔄 Toggle All — One-click enable/disable all LoRAs
🚀 Quick Start
Installation
Method A — ComfyUI Manager (recommended)
Search
MLiang LoRA Loaderin ComfyUI Manager → Install → Restart ComfyUI
Method B — Git Clone
cd ComfyUI/custom_nodes/
git clone https://github.com/dingmuliang/comfyui-mliang-lora-loader.git
Then restart ComfyUI.
Usage
- Search "MLiang LoRA Loader" in the node list
- Connect MODEL and CLIP inputs
- Click the file button to open the tree panel
- Expand folders → click to select a LoRA file
- Adjust Strength (type or use
▲▼arrows) - Click "+ Add LoRA" to add more slots
- Right-click any LoRA row for context menu
📁 Project Structure
comfyui-mliang-lora-loader/
├── __init__.py              # Python backend
├── js/
│   ├── lora_browser.js      # Frontend DOM widget
│   └── tree_data.js         # Auto-generated folder tree
├── assets/                  # Screenshots
├── .github/workflows/       # CI/CD
├── README.md
├── LICENSE
├── pyproject.toml
└── requirements.txt
⚠️ Known Limitations
- New LoRAs require ComfyUI restart
- Preview images need same-name PNG/JPG files
- Single strength value for model+clip (planned for future)
🙏 Credits
Inspired by and references:
- rgthree-comfy — UI design inspiration
- ComfyUI-Lora-Manager —
addDOMWidgetarchitecture - ComfyUI-Custom-Scripts — Extension patterns
🤝 Community
| QQ Group | Support |
|----------|---------|
|  |
|  |
| 1084104075 | WeChat Pay |
|
| 1084104075 | WeChat Pay |
📄 License
MIT © dingmuliang
中文文档
English | 中文
专业的 ComfyUI 自定义节点 — 文件夹树形 LoRA 浏览器,支持多槽位加载和即时预览。
📸 截图展示
| 节点界面 | 树形浏览器 | 预览图 | 工作流 |
|---------|-----------|------|--------|
| | | | |
✨ 功能特点
- 🗂️ 文件夹树形浏览 — 按真实文件夹层级浏览 LoRA
- 🔍 实时搜索过滤 — 打字即时过滤,自动展开匹配分支
- ⌨️ 键盘导航 —
↑↓移动高亮,Enter确认,Escape关闭 - 🔗 多槽位加载 — 不限数量添加 LoRA 槽位
- 🎛️ 强度调节 — 文本输入 +
▲▼箭头微调 - 🖼️ 悬停预览 — 鼠标悬停即时显示预览图
- 📋 右键菜单 — 查看信息 / 开关 / 上移下移 / 删除
- 🔄 一键全开关 — Toggle All 控制所有 LoRA
🚀 快速上手
安装
方法A — ComfyUI Manager(推荐)
搜索
MLiang LoRA Loader→ 安装 → 重启 ComfyUI
方法B — Git 克隆
cd ComfyUI/custom_nodes/
git clone https://github.com/dingmuliang/comfyui-mliang-lora-loader.git
然后重启 ComfyUI。
使用
- 搜索 "MLiang LoRA Loader"
- 连接 MODEL 和 CLIP 输入端
- 点击 文件按钮 打开树形面板
- 展开文件夹 → 点击选中 LoRA 文件
- 调节 Strength(输入或点
▲▼) - 点击 "+ Add LoRA" 添加更多槽位
- 右键 任意 LoRA 行弹出菜单
🙏 致谢
参考项目:
- rgthree-comfy — UI 设计灵感
- ComfyUI-Lora-Manager — 架构参考
- ComfyUI-Custom-Scripts — 扩展模式
🤝 社区交流
| QQ 交流群 | 赞赏支持 |
|----------|---------|
| | |
| 1084104075 | 微信收款码 |
📄 许可证
MIT © dingmuliang