
ComfyUI Extension: SaveAsScript
Run ComfyUI workflows without the setup
No installs, no CUDA version roulette, no GPU sitting idle on your bill. Bring a workflow and run it in the browser.
A version of ComfyUI-to-Python-Extension that works as a custom node. Adds a button in the UI that saves the current workflow as a Python file, a CLI for converting workflows, and slightly better custom node support.
Looking for a different extension?
Custom Nodes (0)
README
ComfyUI-SaveAsScript
ComfyUI-SaveAsScript (or SaS) is a fork of ComfyUI-To-Python-Extension. It provides a more robust command-line interface and the ability to export your current workflow as a script directly from a button on the ComfyUI web interface.
Once exported, this script can be run to run the workflow without a frontend, or it can be imported and the main() function can be used to call the workflow programatically.
NEW: Now compatible with the recent changes to ComfyUI that combined widgets and inputs. The Save as Script button now also appears on the new UI.
Feature: Module Support
Now, scripts exported with SaS can be imported as modules! Once you have a script exported, you can use it like:
>>> import exported_script
>>> results = exported_script.main(text5="A prompt that would be sent to the command-line arguments", queue_size=1)
The first save node reached (SaveImage, SaveImageAdvanced, SaveAudio/SaveAudioMP3/SaveAudioOpus/SaveAudioAdvanced, SaveVideo, or SaveWEBM) will instead return the output to the calling function.
Feature: Custom Output Path
When running the exported script normally, you can now specify an --output option that will override the default path of save nodes.
If only a single image is exported by the node, then the path will be used verbatim. Otherwise, the path will be used as a prefix, and _#####.png will be appended
to ensure uniqueness. Note that files will be clobbered if only one image is exported.
If the path is a directory, the SaveImage node's filename_prefix will be used.
If - is selected as the output path, normal ComfyUI output will be piped to stderr and the resultant image will be piped to stdout, allowing one to use the script
like:
python3 script.py --text5 "A painting of outer space" --output - --queue-size 1 > image.png
This works with SaveImage, SaveImageAdvanced, SaveAudio, SaveAudioMP3, SaveAudioOpus, SaveAudioAdvanced, SaveVideo, and SaveWEBM nodes. Other save nodes (e.g. from custom node packs) will not be recognized and will save to their default location.
Usage (Web)
Upon installation, there will be a button labeled "Save as Script" on the interface, pictured below:

Click that button and enter your preferred name for the downloaded script (extension added automatically), and your file will be downloaded.
Note that if you use the script this way, you do not need to enable developer mode. You will if you use the CLI (to get the API JSON).
Usage (CLI)
Navigating to the extension directory, you can also use the basic CLI included in the script to save your script without changing the Python file.
usage: comfyui_to_python.py [-h] [--output OUTPUT] [--queue-size QUEUE_SIZE] [--yes] workflow

Converts a ComfyUI-style workflow.json file to a Python file. Must have been exported with API calls

positional arguments:
  workflow              The workflow.json file to convert

options:
  -h, --help            show this help message and exit
  --output OUTPUT, -o OUTPUT
                        The output file (defaults to [input file].py)
  --queue-size QUEUE_SIZE, -q QUEUE_SIZE
                        The queue size per run
  --yes, --overwrite, -y
                        Overwrite the output file if it exists
Arguments
Every single input that takes a simple primitive (float, int, string, etc.) will be added as an optional argument to the resultant script. If any input is not specified, then whatever was present in the workflow widget is taken as the default value. This means if you have a workflow like:
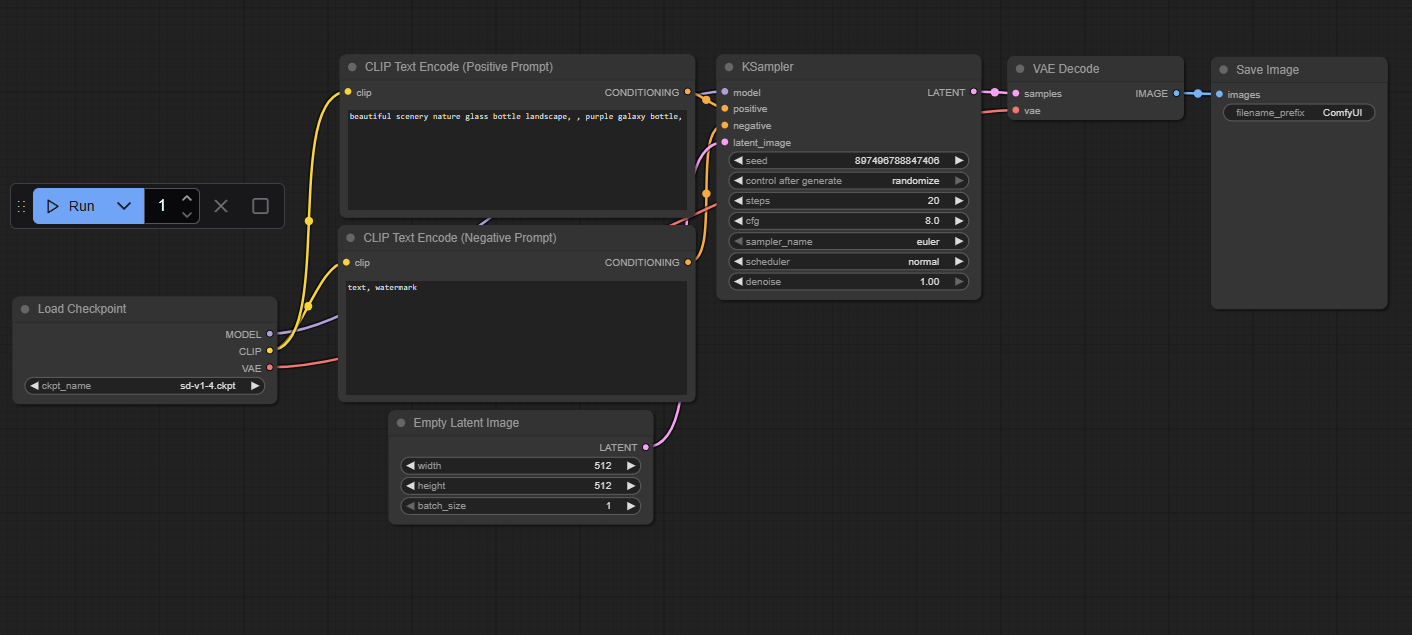
Then every node's string/number inputs will be available:
usage: bottle.py [-h] [--ckpt_name1 CKPT_NAME1] [--width2 WIDTH2] [--height3 HEIGHT3] [--batch_size4 BATCH_SIZE4] [--text5 TEXT5]
                 [--text6 TEXT6] [--seed7 SEED7] [--steps8 STEPS8] [--cfg9 CFG9] [--sampler_name10 SAMPLER_NAME10]
                 [--scheduler11 SCHEDULER11] [--denoise12 DENOISE12] [--filename_prefix13 FILENAME_PREFIX13]
                 [--queue-size QUEUE_SIZE] [--comfyui-directory COMFYUI_DIRECTORY] [--output OUTPUT] [--disable-metadata]

A converted ComfyUI workflow. Node inputs listed below. Values passed should be valid JSON (assumes string if not valid JSON).

options:
  -h, --help            show this help message and exit
  --ckpt_name1 CKPT_NAME1
                        Argument 0, input `ckpt_name` for node "Load Checkpoint" id 4 (autogenerated)
  --width2 WIDTH2       Argument 0, input `width` for node "Empty Latent Image" id 5 (autogenerated)
  --height3 HEIGHT3     Argument 1, input `height` for node "Empty Latent Image" id 5 (autogenerated)
  --batch_size4 BATCH_SIZE4
                        Argument 2, input `batch_size` for node "Empty Latent Image" id 5 (autogenerated)
  --text5 TEXT5         Argument 0, input `text` for node "CLIP Text Encode (Positive Prompt)" id 6 (autogenerated)
  --text6 TEXT6         Argument 0, input `text` for node "CLIP Text Encode (Negative Prompt)" id 7 (autogenerated)
  --seed7 SEED7         Argument 1, input `seed` for node "KSampler" id 3 (autogenerated)
  --steps8 STEPS8       Argument 2, input `steps` for node "KSampler" id 3 (autogenerated)
  --cfg9 CFG9           Argument 3, input `cfg` for node "KSampler" id 3 (autogenerated)
  --sampler_name10 SAMPLER_NAME10
                        Argument 4, input `sampler_name` for node "KSampler" id 3 (autogenerated)
  --scheduler11 SCHEDULER11
                        Argument 5, input `scheduler` for node "KSampler" id 3 (autogenerated)
  --denoise12 DENOISE12
                        Argument 9, input `denoise` for node "KSampler" id 3 (autogenerated)
  --filename_prefix13 FILENAME_PREFIX13
                        Argument 1, input `filename_prefix` for node "Save Image" id 9 (autogenerated)
  --queue-size QUEUE_SIZE, -q QUEUE_SIZE
                        How many times the workflow will be executed (default: 1)
  --comfyui-directory COMFYUI_DIRECTORY, -c COMFYUI_DIRECTORY
                        Where to look for ComfyUI (default: current directory)
  --output OUTPUT, -o OUTPUT
                        The location to save the output image. Either a file path, a directory, or - for stdout (default: the
                        ComfyUI output directory)
  --disable-metadata    Disables writing workflow metadata to the outputs
   --random-seed-type {random,fixed,increment,decement}
                        How to handle the random seed (default: random)
Passing Arguments to ComfyUI
In case you want to pass anything to the ComfyUI server as an argument, you can use -- to indicate you're done with SaS arguments and are now passing ComfyUI arguments.
For instance:
python3 script.py --text5 "A painting of outer space" --queue-size 1 --out image.png -- --cpu
Other Changes
Bugfixes
- Windows paths are now properly escaped.
- I also fixed what seemed to be a minor bug with exporting certain Crystools nodes, possibly due to their unusual name.
TODO
- Improve compatibility with module API
Old Description of ComfyUI-to-Python-Extension (usage altered)
The ComfyUI-to-Python-Extension is a powerful tool that translates ComfyUI workflows into executable Python code. Designed to bridge the gap between ComfyUI's visual interface and Python's programming environment, this script facilitates the seamless transition from design to code execution. Whether you're a data scientist, a software developer, or an AI enthusiast, this tool streamlines the process of implementing ComfyUI workflows in Python.
Convert this:
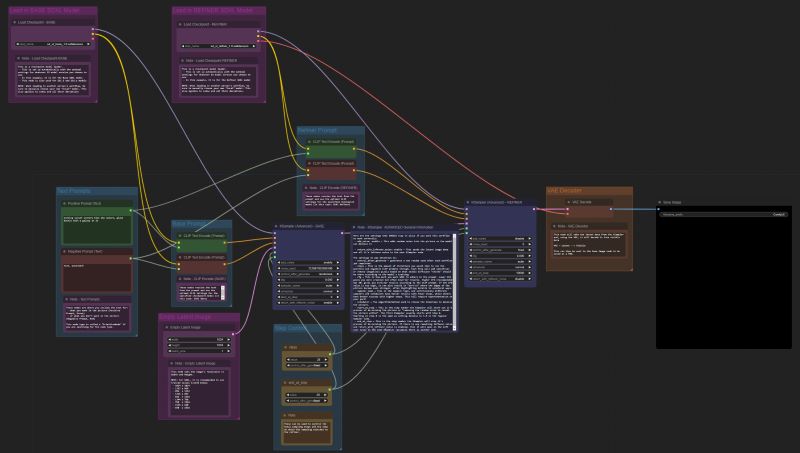
To this:
import random
import torch
import sys

sys.path.append("../")
from nodes import (
    VAEDecode,
    KSamplerAdvanced,
    EmptyLatentImage,
    SaveImage,
    CheckpointLoaderSimple,
    CLIPTextEncode,
)


def main():
    with torch.inference_mode():
        checkpointloadersimple = CheckpointLoaderSimple()
        checkpointloadersimple_4 = checkpointloadersimple.load_checkpoint(
            ckpt_name="sd_xl_base_1.0.safetensors"
        )

        emptylatentimage = EmptyLatentImage()
        emptylatentimage_5 = emptylatentimage.generate(
            width=1024, height=1024, batch_size=1
        )

        cliptextencode = CLIPTextEncode()
        cliptextencode_6 = cliptextencode.encode(
            text="evening sunset scenery blue sky nature, glass bottle with a galaxy in it",
            clip=checkpointloadersimple_4[1],
        )

        cliptextencode_7 = cliptextencode.encode(
            text="text, watermark", clip=checkpointloadersimple_4[1]
        )

        checkpointloadersimple_12 = checkpointloadersimple.load_checkpoint(
            ckpt_name="sd_xl_refiner_1.0.safetensors"
        )

        cliptextencode_15 = cliptextencode.encode(
            text="evening sunset scenery blue sky nature, glass bottle with a galaxy in it",
            clip=checkpointloadersimple_12[1],
        )

        cliptextencode_16 = cliptextencode.encode(
            text="text, watermark", clip=checkpointloadersimple_12[1]
        )

        ksampleradvanced = KSamplerAdvanced()
        vaedecode = VAEDecode()
        saveimage = SaveImage()

        for q in range(10):
            ksampleradvanced_10 = ksampleradvanced.sample(
                add_noise="enable",
                noise_seed=random.randint(1, 2**64),
                steps=25,
                cfg=8,
                sampler_name="euler",
                scheduler="normal",
                start_at_step=0,
                end_at_step=20,
                return_with_leftover_noise="enable",
                model=checkpointloadersimple_4[0],
                positive=cliptextencode_6[0],
                negative=cliptextencode_7[0],
                latent_image=emptylatentimage_5[0],
            )

            ksampleradvanced_11 = ksampleradvanced.sample(
                add_noise="disable",
                noise_seed=random.randint(1, 2**64),
                steps=25,
                cfg=8,
                sampler_name="euler",
                scheduler="normal",
                start_at_step=20,
                end_at_step=10000,
                return_with_leftover_noise="disable",
                model=checkpointloadersimple_12[0],
                positive=cliptextencode_15[0],
                negative=cliptextencode_16[0],
                latent_image=ksampleradvanced_10[0],
            )

            vaedecode_17 = vaedecode.decode(
                samples=ksampleradvanced_11[0], vae=checkpointloadersimple_12[2]
            )

            saveimage_19 = saveimage.save_images(
                filename_prefix="ComfyUI", images=vaedecode_17[0]
            )


if __name__ == "__main__":
    main()
Potential Use Cases
- Streamlining the process for creating a lean app or pipeline deployment that uses a ComfyUI workflow
- Creating programmatic experiments for various prompt/parameter values
- Creating large queues for image generation (For example, you could adjust the script to generate 1000 images without clicking ctrl+enter 1000 times)
- Easily expanding or iterating on your architecture in Python once a foundational workflow is in place in the GUI
V1.0.0 Release Notes
- Use all the custom nodes!
- Custom nodes are now supported. If you run into any issues with code execution, first ensure that the each node works as expected in the GUI. If it works in the GUI, but not in the generated script, please submit an issue.
Usage
-
Install the custom_node (via git cloning or the Manager)
-
Click the button in the web UI OR run the CLI
-
Move the created .py file to your
ComfyUIfolder -
Run the generated script!
Run ComfyUI workflows without the setup
No installs, no CUDA version roulette, no GPU sitting idle on your bill. Bring a workflow and run it in the browser.