
ComfyUI-HPSv3
Local HPSv3 and HPSv3++ NF4 image scoring and prompt generation for ComfyUI
Nodes (6)
It writes you a prompt from a picture, and it isn't cheating
HPSv3 Model Loader is a download manager wearing a loader's name
The write-the-prompt-for-me node, ++ edition
The 6.5 GB the example workflow assumes you have
The flavor of scoring node the example workflows use
Grade your own images locally, no API key, no upload
ComfyUI-HPSv3
English | 日本語版はこちら
A ComfyUI extension that scores images against prompts and generates prompts from images locally, using the NF4 models of HPSv3 and HPSv3++.
| Node | Inputs | Outputs | | --- | --- | --- | | HPSv3++ Model Loader / HPSv3 Model Loader | Model folder | Model configuration for Score and Caption. Downloads the standard model if it is missing. | | HPSv3++ Score / HPSv3 Score | Model, images, prompt | Saves PNGs with the score and outputs IMAGE and FLOAT lists | | HPSv3++ Caption / HPSv3 Caption | Model, images | STRING list with one generated prompt per image |
HPSv3 and HPSv3++ models are not interchangeable. Connect a Model Loader to the Score and Caption nodes of the same series.
Requirements
- An NVIDIA CUDA GPU with BF16 support and a driver that matches ComfyUI's PyTorch. 12 GB of VRAM is a guideline (8 GB may work, but this is untested). CPU, AMD, and Apple GPUs are not supported.
- Python 3.12 or later and Transformers 5.17.x. Dependencies are added to ComfyUI's environment; its PyTorch and torchvision are not replaced.
- Free disk space for the model: about 5.9 GB for HPSv3 and about 6.5 GB for HPSv3++.
Installation
ComfyUI-Manager
- Open Manager, search for
ComfyUI-HPSv3, and confirm the repository isStella2211/ComfyUI-HPSv3. - Click Install (choose a numbered version if asked). The first installation adds dependencies and may take some time; check the ComfyUI terminal if an error appears.
- Restart ComfyUI and reload the browser.
If the extension cannot be found, update ComfyUI and Manager, or check the Registry page. If dependencies are missing in an existing installation, repair it in Manager and restart.
Git
Run the following in ComfyUI/custom_nodes. The last command fetches the HPSv3++ compatibility source and is not needed when Manager installed the extension.
git clone https://github.com/Stella2211/ComfyUI-HPSv3.git
cd ComfyUI-HPSv3
uv pip install --python <ComfyUI Python> -r requirements.txt
uv run --no-project --python <ComfyUI Python> python install.py
Models
Select the standard model in Model Loader and run the workflow. If it is missing, it is downloaded from Hugging Face on the first run; progress appears in the ComfyUI terminal. Score and Caption then run offline using local files only.
| Series | Model name | Source | Location |
| --- | --- | --- | --- |
| HPSv3 | HPSv3-bnb-NF4 | stella221125/HPSv3-bnb-NF4 | ComfyUI/models/hpsv3/ |
| HPSv3++ | HPSv3-PlusPlus-bnb-NF4 | stella221125/HPSv3-PlusPlus-bnb-NF4 | ComfyUI/models/hpsv3pp/ |
- These are merged NF4 models; no base model or original checkpoint is needed.
- Only the standard model is downloaded automatically. If a download is cancelled or fails, run the workflow again to resume. The model is not used until the download is verified.
- An existing model is never updated automatically. To get a newer version, move the existing model folder elsewhere and run the workflow again.
- For offline use, download the complete model folder from Hugging Face and place it in the location above. Weights alone are not enough:
config.json,reward_config.json, the tokenizer and processor files, and all safetensors files are required. - Scores can change when the model or dependencies are updated, so use the same environment when comparing results.
Usage
Load an example workflow, select an image in Load Image, and run it. No sample image is included.
| Example | Description | | --- | --- | | caption_and_score.json | HPSv3++: Caption generates a prompt that is passed to Score | | hpsv3_caption_and_score.json | HPSv3: the same workflow | | hpsv3_score.json | HPSv3: Score with a prompt you enter |
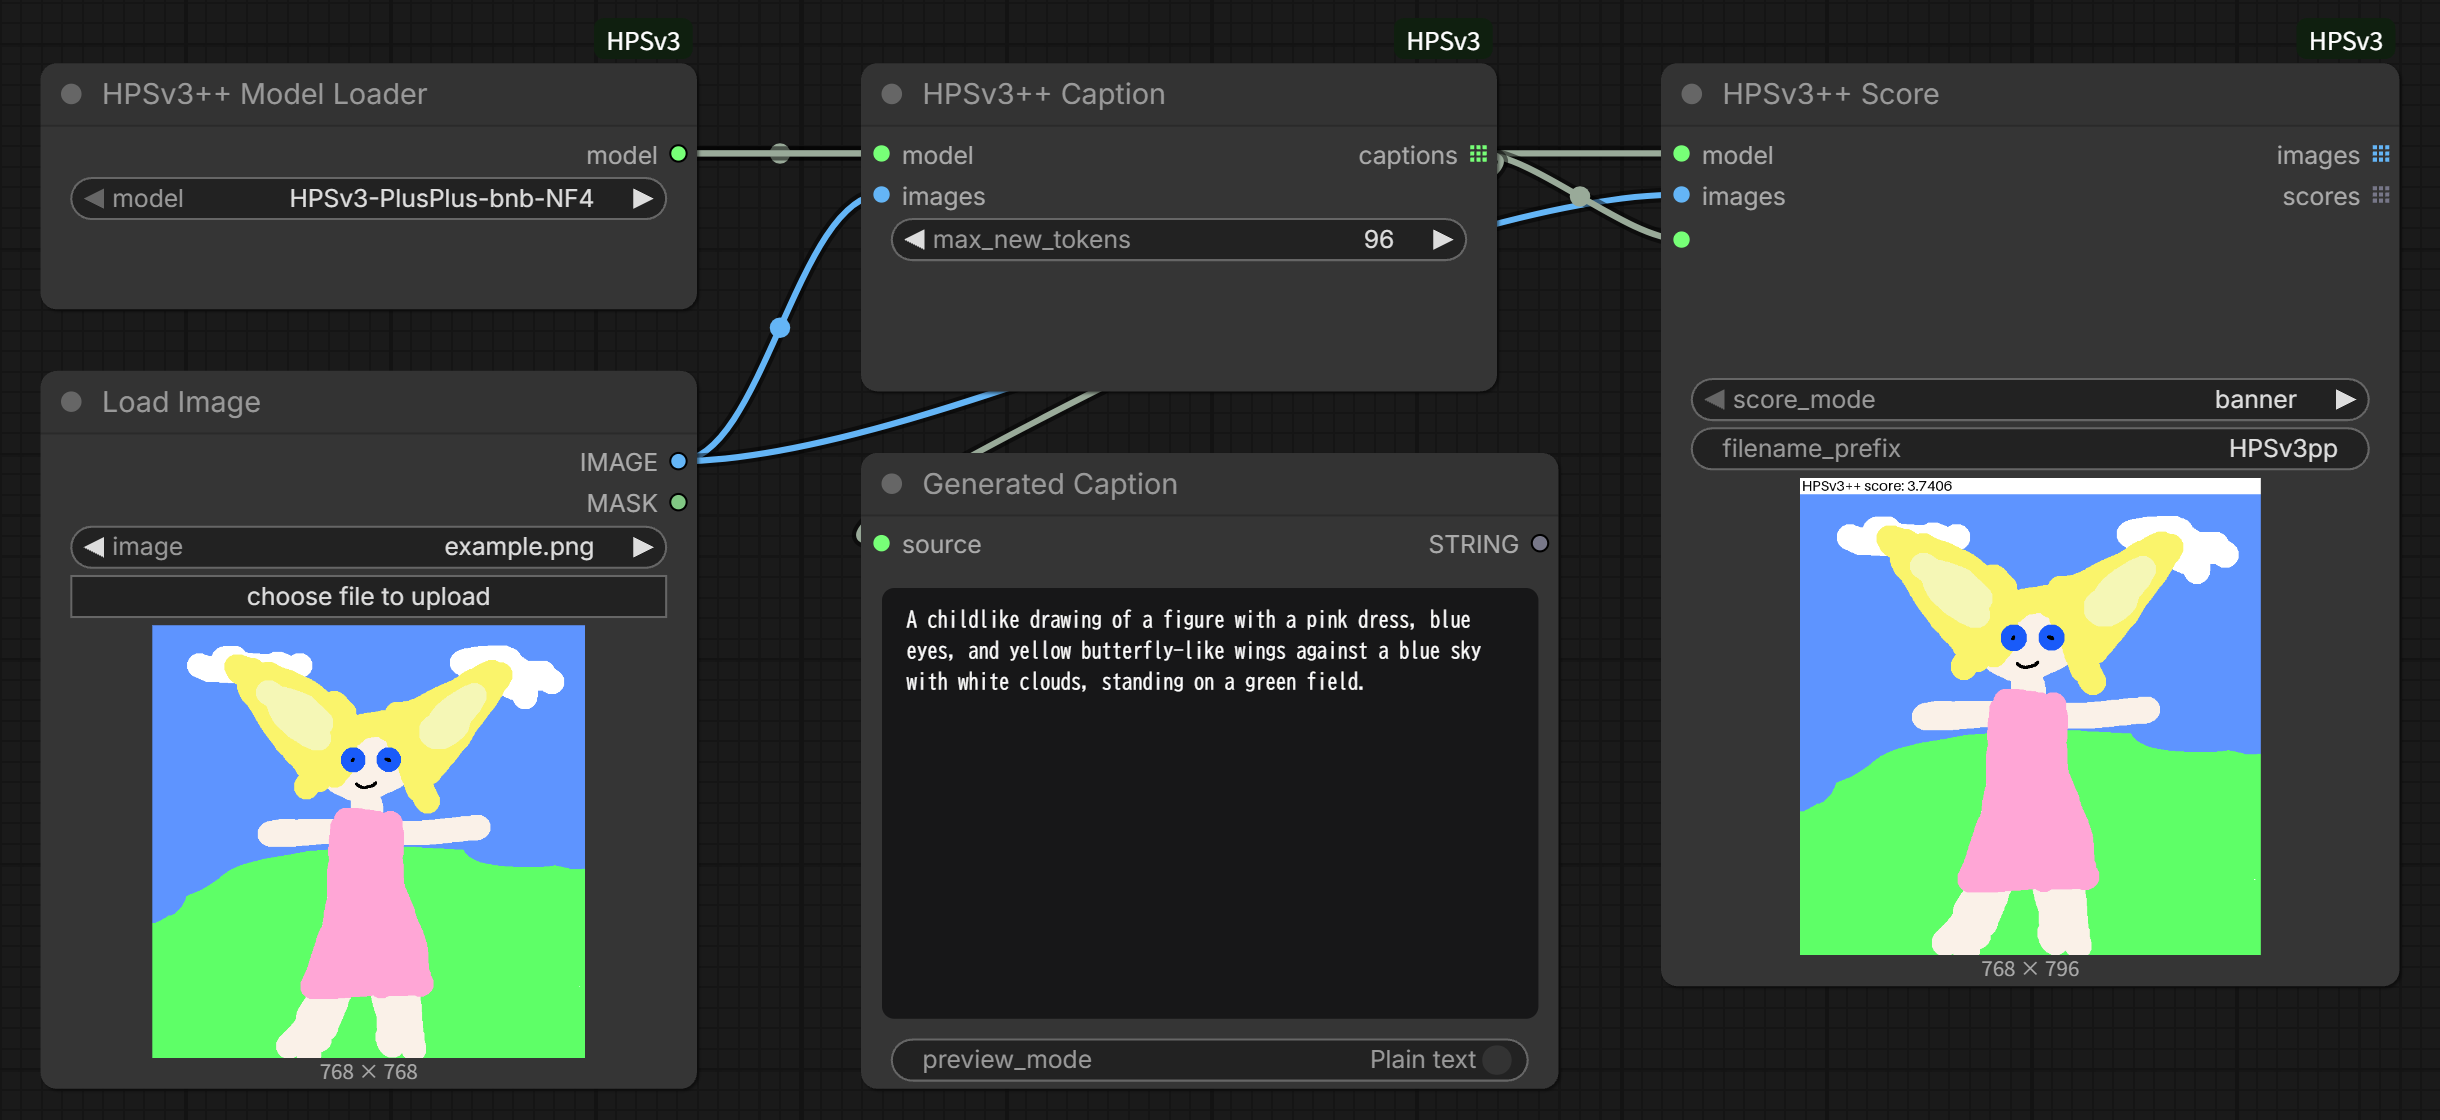
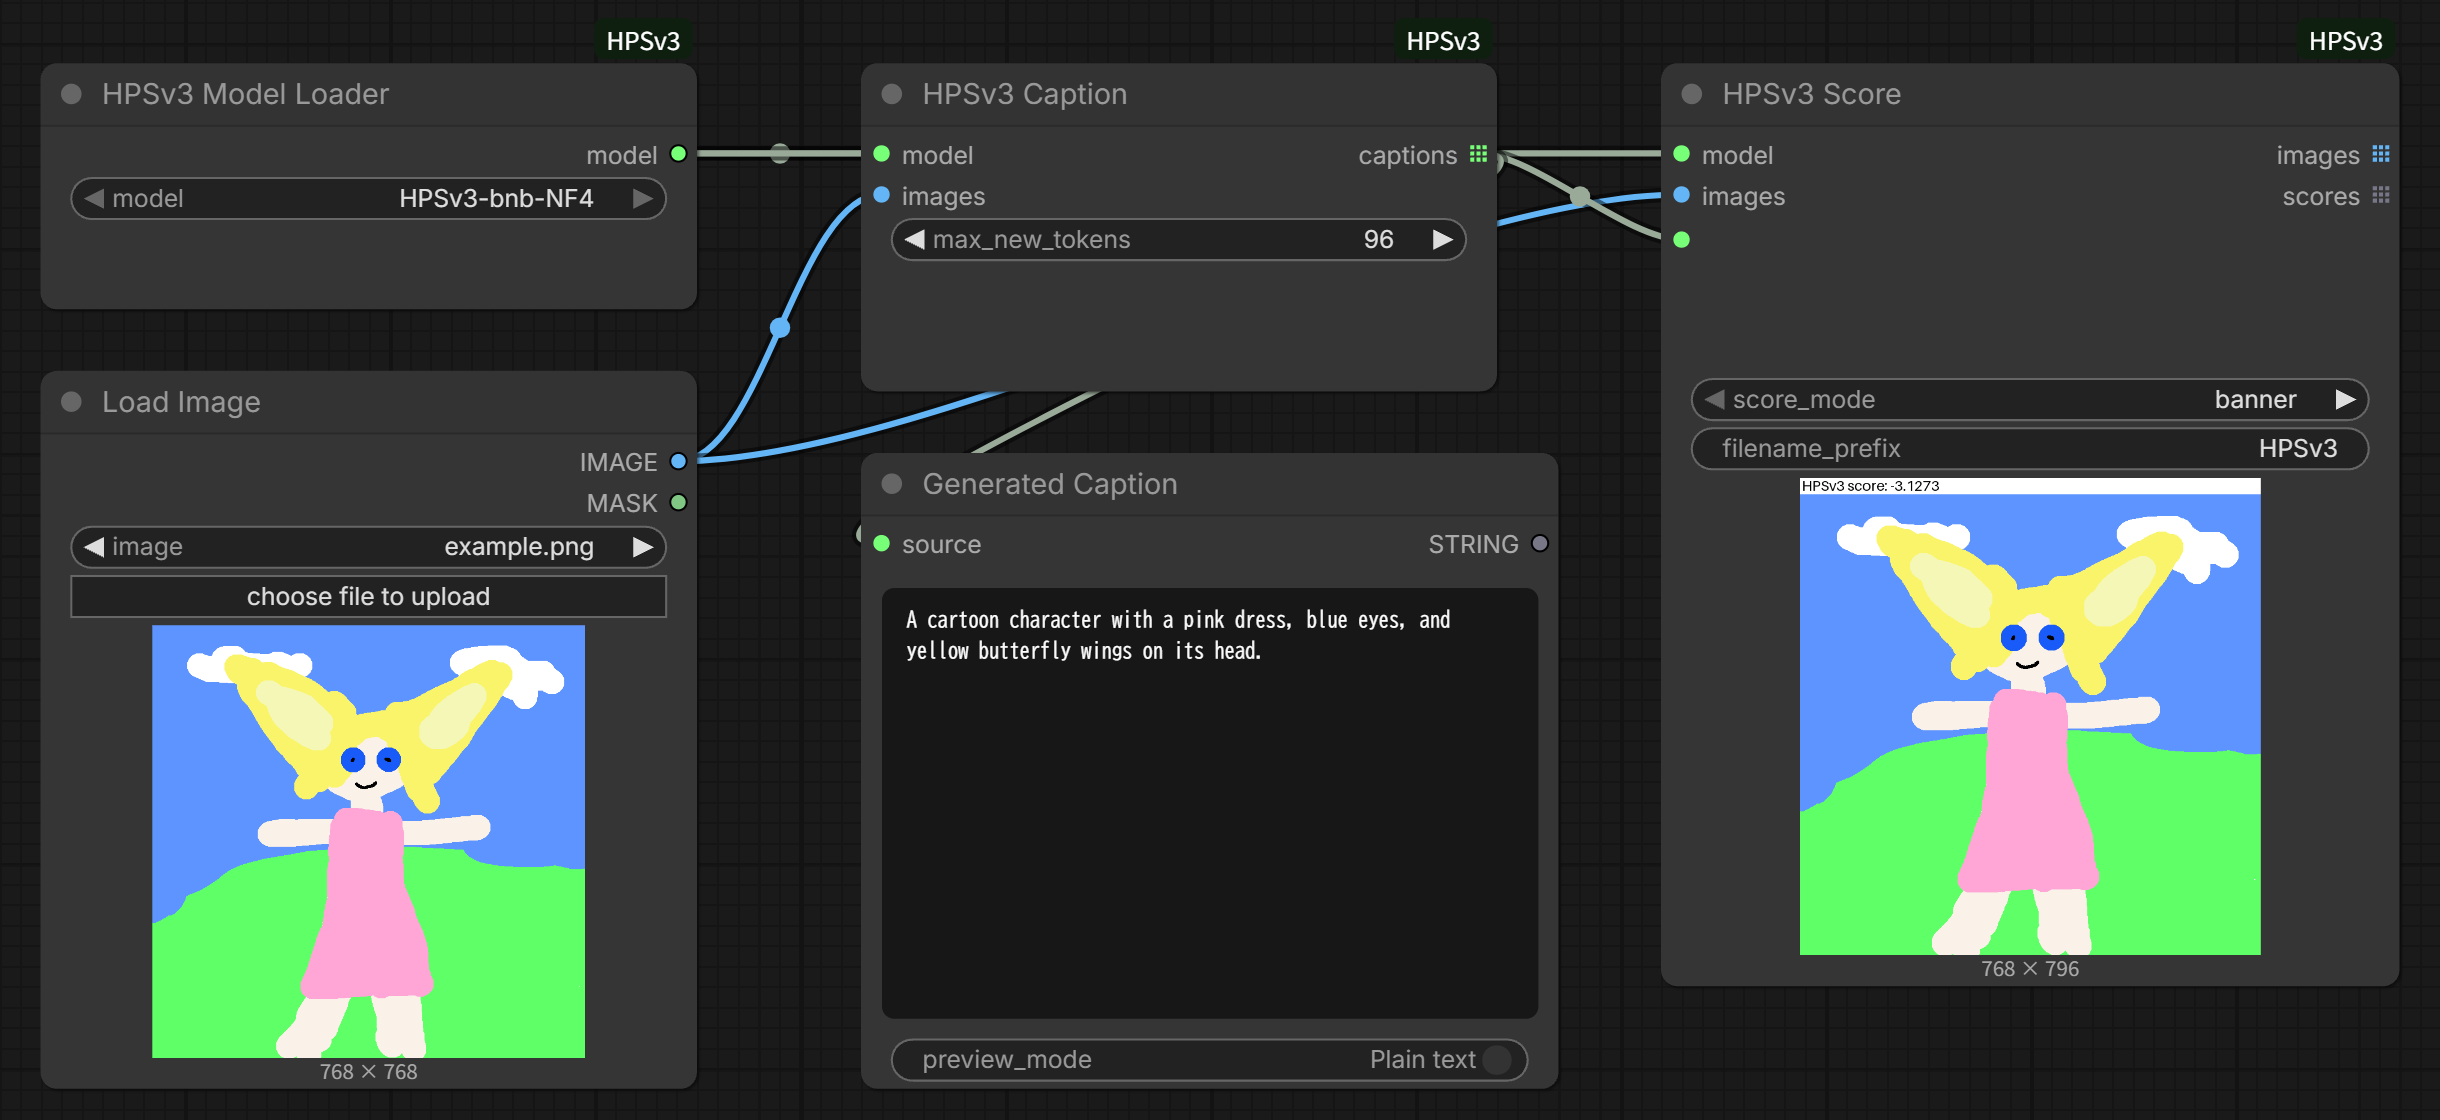
The generated caption is shown in the Generated Caption node (Preview as Text), and the scored image is previewed and saved by Score.
Score
Connect Model Loader to model and an IMAGE to images, and enter the evaluation prompt in prompt. Choose score_mode:
banner: Adds a white bar above the image and draws the score in it. The original image is not covered.metadata: Draws nothing and stores the model name, score, and prompt as JSON in the PNG text itemhpsv3pp(hpsv3for HPSv3). The IMAGE output is the input image unchanged.both: Does both.
The result is saved as a PNG in the ComfyUI output folder. filename_prefix supports the same date and node-value substitutions as Save Image, for example %date:yyyy%/%date:MM%/%date:dd%/HPSv3pp. These are applied in the browser, so they do not work when a workflow is run through the API. The score metadata belongs to the PNG saved by this node; connecting the IMAGE output to another Save Image node does not carry it over.
A single prompt is applied to all images; otherwise provide one prompt per image. Each image is scored on its own, and the IMAGE and FLOAT outputs are per-image lists in input order.
Caption
Connect Model Loader and images. max_new_tokens (16 to 512, default 96) limits the length. Caption writes a short description of the image; it does not recover the original generation prompt, so review the result before using it. To score an image with its own description, connect Caption's output to Score's prompt and pass the same images to both nodes.
Troubleshooting
| Symptom | Check |
| --- | --- |
| Nodes are missing after restart or a load error appears | Confirm the extension is enabled in Manager and check the ComfyUI startup log. |
| transformers or bitsandbytes cannot be found | Repair or reinstall the extension's dependencies in Manager and restart. Do not replace PyTorch or torchvision. |
| The automatic download fails | Check the internet connection, access to Hugging Face, free space, and write permission, then run the workflow again. |
| The model is reported as incomplete or invalid | Check the files listed under Models. Existing folders are not overwritten; add the missing files, or move the folder elsewhere to download it again. |
| "requires an NVIDIA CUDA GPU", or a CUDA or out-of-memory error | See the requirements above, close other applications using the GPU, and try again. |
| "Metadata is disabled" | ComfyUI was started with --disable-metadata. Use banner or remove the option. |
| "got N images but M prompts" | Provide one prompt, or one prompt per image. |
License
The extension is MIT licensed. Model weights have their own terms; follow the license of each model repository. See THIRD_PARTY_NOTICES.md for third-party code and model notices.