
Pseudocomfy
A package designed to enable multi-regional prompting for architectural rendering, integrated with the Rhino Pseudorandom plugin.
Nodes (27)
The Dense Diffusion node that gives every material its own masked prompt
Give each masked region its own reference image with IPAdapter conditioning
The two-input text joiner that stops you hand-typing
Rounding, flooring, ceiling — one widget instead of a script
One preset, zero guesswork, cubiq's logic
The JSON reader that feeds the whole Pseudocomfy graph
Fold a whole list of region masks into one, five ways
Feather those hard edges before they hit the sampler
Stop out-of-range values from sneaking into your conditioning
Flip it, because you always need the other side eventually
Stretch a mask's contrast instead of just clamping it
Erode and dilate your regions like a pro
Actually see the prompts your data-driven graph is using
The pass-through node with a preview built in
The depth-map preprocessor that keeps resolutions legal
Normalize your material lists before they hit the Apply nodes
Turn a 0–1 value into any range you actually need
Render once, keep the masks alive in the PNG
The Seed node that exists to be pushed around by something else
Turns one JSON file into a whole graph's worth of wires
A named float you can wire to five places at once
Pass a whole number around without losing it in a widget
The one Pseudocomfy variable you'll actually use
A curated model shortlist with a hidden catch
The CLIP Vision loader hiding in the wrong folder
Depth control, curated to one option per generation
Seven style LoRAs, one strength slider, zero guesswork
A ComfyUI custom nodes package designed to enable multi-regional prompting for architectural rendering, integrated with the Rhino Pseudorandom plugin.
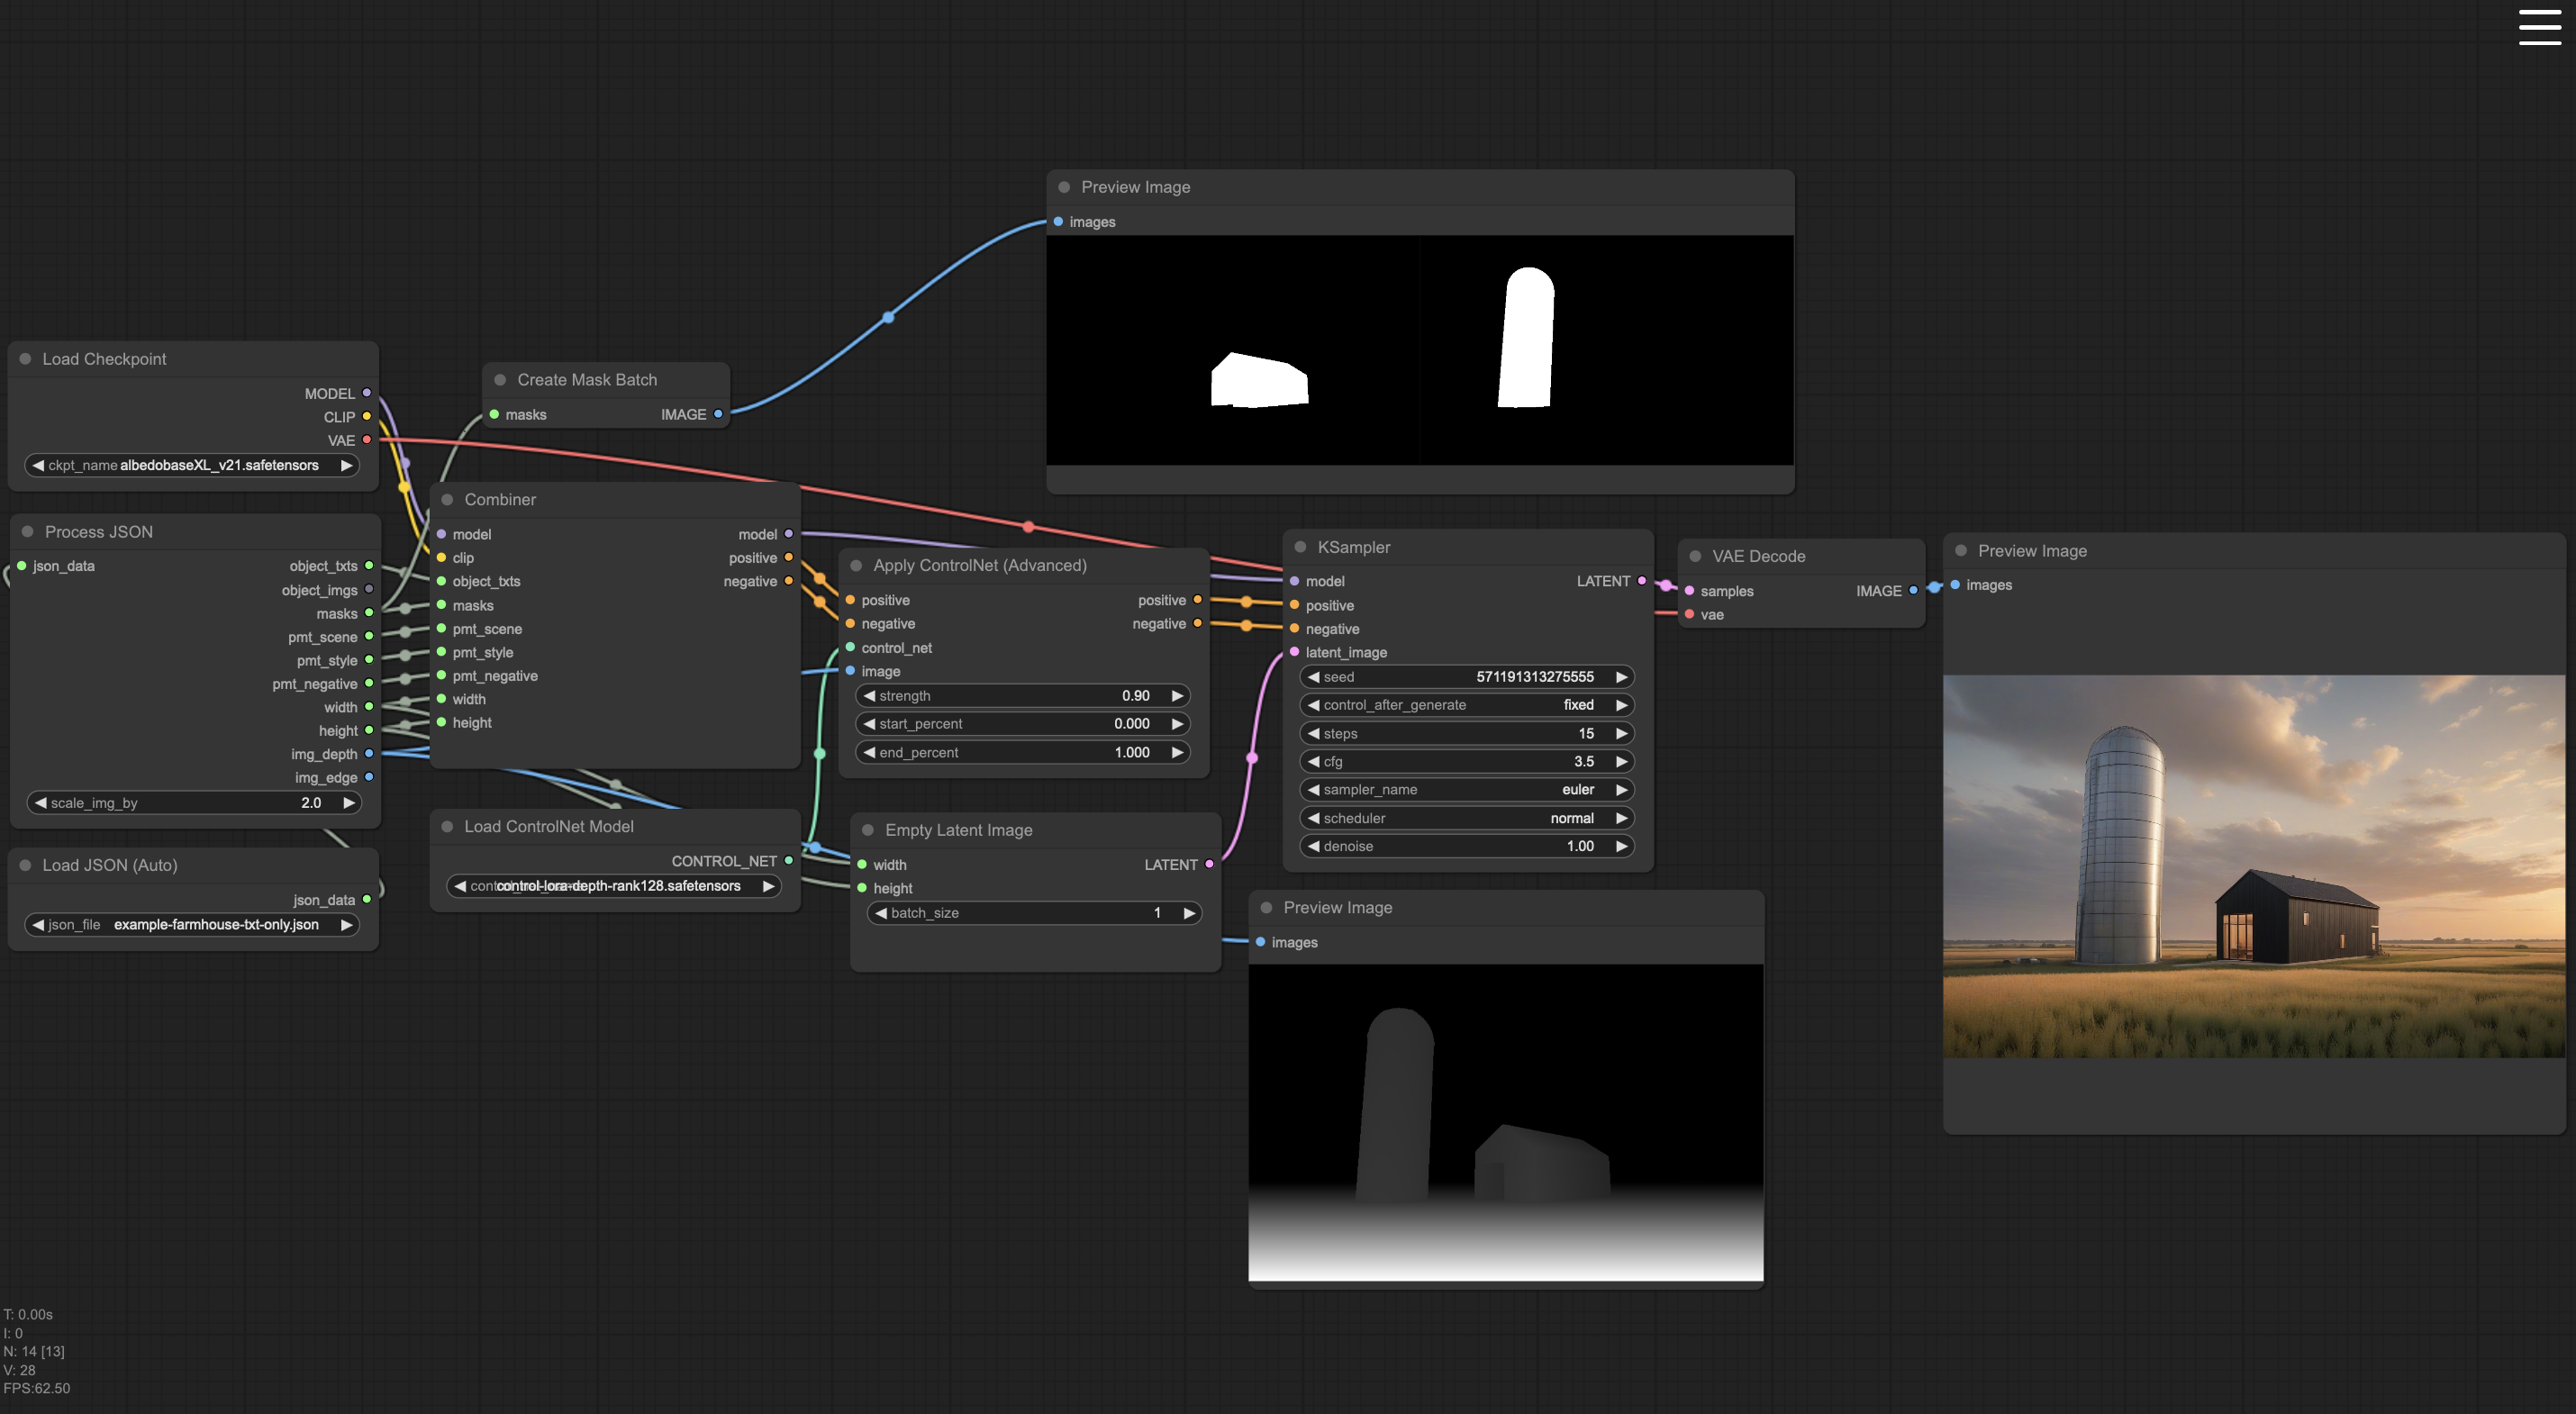
Snapshot (input JSON) format examples:
Version 0.1 (Legacy format - still supported):
   {
      "width": 832,
      "height": 512,
      "pmts_environment":
      {
         "pmt_scene" : "a farm in the grasslands of Iowa at golden hour",
         "pmt_style" : "high-quality architectural rendering",
         "pmt_negative" : "low-res, watermark, ugly",
      },
      "map_semantic":
      [
         {
            "pmt_txt": "mid-century modern farmhouse with Shou Sugi Ban siding",
            "pmt_img": null,
            "mask": "BASE 64 ENCODED BITMAP",
            "pct": 0.75
         },
         {
            "pmt_txt": "an text prompt for the object, MAY BE NULL or EMPTY",
            "pmt_img": "BASE 64 ENCODED BITMAP of a guidence image, MAY BE NULL OR EMPTY",
            "mask": "BASE 64 ENCODED BITMAP",
            "pct": 0.00
         },
        ...
      ],
      "img_depth": "BASE 64 ENCODED IMAGE",
      "img_edge": "optional BASE 64 ENCODED IMAGE",
      "img_style": "optional BASE 64 ENCODED IMAGE",
      "pseudorandom_snapshot_version": 0.1
   }
Version 0.4 (Current recommended format):
   {
      "pseudorandom_snapshot_version": 0.4,
      "width": 1600,
      "height": 900,
      "global_guidance": {
         "txt_scene": "Two-story timber atrium with mezzanine ring and clerestory.",
         "txt_style": "Soft daylight, neutral white balance, editorial photo.",
         "txt_negative": "No text, no watermark, no warped structure.",
         "img_style": "data:image/jpeg;base64,/9j/4AAQSkZJRgABAQ..."
      },
      "regional_guidance": [
         {
            "txt": "white oak planks, matte finish, tight grain",
            "img": null,
            "mask": "data:image/png;base64,iVBORw0KGgoAAA...",
            "pct": 38.2
         },
         {
            "txt": null,
            "img": "data:image/png;base64,iVBORw0KGgoAAA...",
            "mask": "data:image/png;base64,iVBORw0KGgoAAA...",
            "pct": 12.7
         }
      ],
      "spatial_guidance": {
         "depth": "data:image/png;base64,iVBORw0KGgoAAA...",
         "edge": "data:image/png;base64,iVBORw0KGgoAAA..."
      }
   }
Note: The PseudoUnpackModelSnapshot node supports both v0.1 and v0.4 formats with automatic detection and backwards compatibility. The v0.4 format provides a cleaner structure with three guidance categories: global_guidance, regional_guidance, and spatial_guidance.
--Manual installation instructions--
IMPORTANT: If you're using the Windows portable version of ComfyUI, which includes an embedded Python environment, you will first need to install the diffusers module:
1. Install the diffusers library for ComfyUI (Windows Portable Version)
-
Locate your main
ComfyUI_windows_portabledirectory.- It might be named differently, but this is the main directory where you extracted the ComfyUI portable version. It contains folders like ComfyUI, python_embeded, and others.
-
Navigate to the
ComfyUI Windows PortableDirectory via a Command Prompt:- Open a Command Prompt by pressing
Win + R, or typingcmd, and pressingEnter. - Use the
cdcommand to change the current directory to theComfyUI_windows_portabledirectory. For example:cd C:\path\to\your\ComfyUI_windows_portable
- Open a Command Prompt by pressing
-
Install the library using the embedded Python interpreter:
- While in the
ComfyUI_windows_portabledirectory, run the following command:
it should look like this:.\python_embeded\python.exe -m pip install diffusers\ComfyUI_windows_portable>.\python_embeded\python.exe -m pip install diffusers
- While in the
-
NOT Windows Portable Version:
- if you are using your system Python, virtual environment (or Conda environment), run:
pip install diffusers
- if you are using your system Python, virtual environment (or Conda environment), run:
These steps will ensure that the diffusers module is installed within the embedded Python environment used by ComfyUI.
2. Install a ControlNet model
There are many places you can download depth ControlNet models, but the one we recommend is diffusion_pytorch_model.safetensors from Hugging Face.
To do this:
-
Download the model:
- Download the
diffusion_pytorch_model.safetensorsfile from the link above (https://huggingface.co/lllyasviel/sd-controlnet-depth/tree/main).
- Download the
-
Move the model to the controlnet folder:
- After download is comlpete, move the file to the
controlnetsubfolder inside themodelsfolder of your ComfyUI directory:C:\path\to\your\ComfyUI_windows_portable\ComfyUI\models\controlnet
- After download is comlpete, move the file to the
- OPTIONAL
- --Additional Sources for ControlNet Models--
- SD-1.5: You can find depth models here: https://huggingface.co/lllyasviel/ControlNet-v1-1/tree/main. Look for files labeled as
depth. - SD-XL: Control-Lora models can be found here: https://huggingface.co/stabilityai/control-lora/tree/main.
- You can also install models directly from Comfy Manager:
- Open Comfy
- Go to
Manager > Model Manager (Install Models) - Search using keywords like "controlnet" or "depth" to find and install the desired models
- SD-1.5: You can find depth models here: https://huggingface.co/lllyasviel/ControlNet-v1-1/tree/main. Look for files labeled as
- --Additional Sources for ControlNet Models--
3. Install IPAdapter:
- Install IPAdapter Plus custom nodes in ComfyUI
- Open Comfy
- Go to
Manager > Custom Nodes Manager (Install Custom Nodes) - Search using the keyword "ipadapter"
- Click
Installon the one calledComfyUI_IPAdapter_plusbycubiq
- Install CLIP Vision models
- go to https://github.com/cubiq/ComfyUI_IPAdapter_plus?tab=readme-ov-file#installation
- follow the instructions for
/ComfyUI/models/clip_visionpart:- download only the first two CLIP Vision models and rename (the file name gets changed when downloading)
- make sure to move CLIP Vision models to
...\models\clip_vision
- Install IPAdapter models
- navigate to
C:\path\to\your\ComfyUI_windows_portable\ComfyUI\models - inside
models, create a new folder calledipadapter - go to https://github.com/cubiq/ComfyUI_IPAdapter_plus?tab=readme-ov-file#installation
- download the
.safetensorsfiles of your choice depending on the preferred SD version- IMPORTANT: We recommend at least downloading:
- SD-1.5:
ip-adapter-plus_sd15.safetensors, "Plus model, very strong" version - SD-XL:
ip-adapter-plus_sdxl_vit-h.safetensors, "SDXL plus model" version
- SD-1.5:
- IMPORTANT: We recommend at least downloading:
- move the downloaded files to newly created ipadapter folder
...\models\ipadapter
- navigate to
4. Make sure you have the SD models (checkpoints)
We recommend:
- For SD-1.5: https://civitai.com/models/104608/ai-angel-mix
- For SD-XL-1.0: https://civitai.com/models/140737/albedobase-xl
5. Last, clone the Pseudorandom repository:
Clone this repo inside your custom_nodes folder by:
- Navigate to:
C:\path\to\your\ComfyUI_windows_portable\ComfyUI\custom_nodes - Open the folder inside a Command Prompt and type:
git clone https://github.com/Pseudotools/Pseudocomfy.git
Acknowledgments
This project incorporates code that has been adapted or directly copied from the following open-source packages:
-
ComfyUI_densediffusion package by Chenlei Hu ("huchenlei")
Original source: https://github.com/huchenlei/ComfyUI_densediffusion -
ComfyUI_IPAdapter_plus package by Matteo Spinelli ("Matt3o/Cubiq")
Original source: https://github.com/cubiq/ComfyUI_IPAdapter_plus -
ComfyUI-Impact-Pack package by Dr.Lt.Data ("ltdrdata")
Original source: https://github.com/ltdrdata/ComfyUI-Impact-Pack
The code from these packages is used under the terms of their respective licenses, with modifications made to fit the specific requirements of this project. The contributions of these developers are greatly appreciated, and their work has been instrumental in the development of this project.