
Neriss ComfyNodes
A handful of ComfyUI nodes to fill in the gaps left by other node pack.
Neriss ComfyNodes
Install
ComfyUI Manager:
- Open
Manager->Custom Nodes Manager. - Search for
Neriss ComfyNodes. - Install it.
- then restart ComfyUI and refresh the browser.
comfy-cli:
comfy node install Neriss_ComfyNodes
Manual:
With manual install, you will need to pull the repo to update the nodepack.
cd /path/to/ComfyUI/custom_nodes
git clone https://github.com/NerissG/Neriss_ComfyNodes.git
The frontend is prebuilt. You do not need Node.js, pnpm or Nix. Restart ComfyUI and refresh the browser.
Nodes
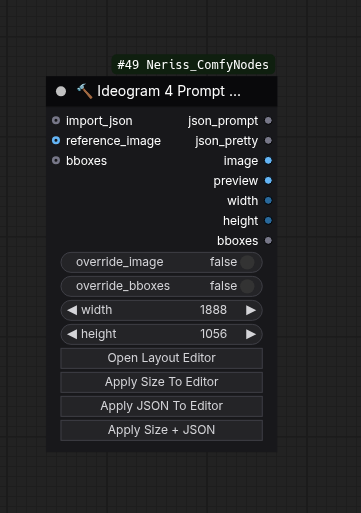
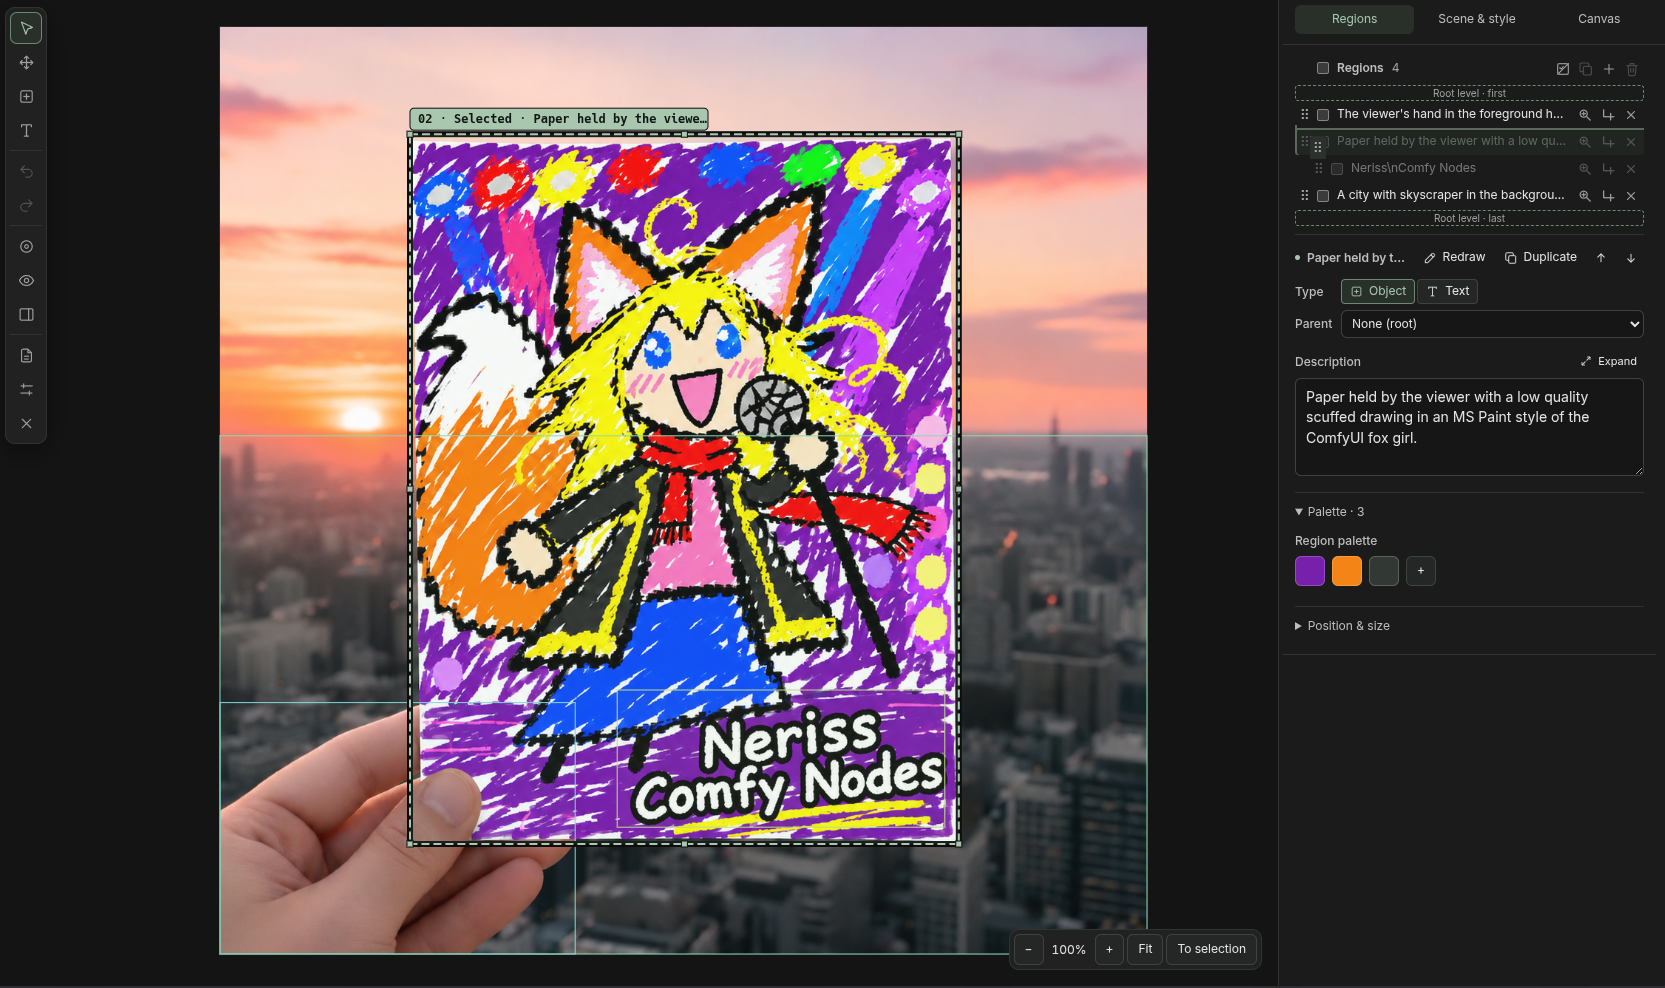
🔨 Ideogram 4 Prompt Editor
A visual layout editor that builds Ideogram 4 structured JSON prompts.
<details> <summary>ℹ️ <i>See More Information</i></summary>
- Click Open Layout Editor, draw regions on the canvas, then describe the scene and each region.
- Reusable style presets and an optional reference image to trace over.
- Connect
json_promptto your model's prompt input and use the node'swidthandheightto create the latent.- Also outputs a reference/grid image, an annotated preview and pixel bounding boxes.
- Paste an existing prompt with Import JSON to edit it visually, or connect one to
import_jsonto apply it on execution.</details>
🔨 MOSS Layout Prompt Editor
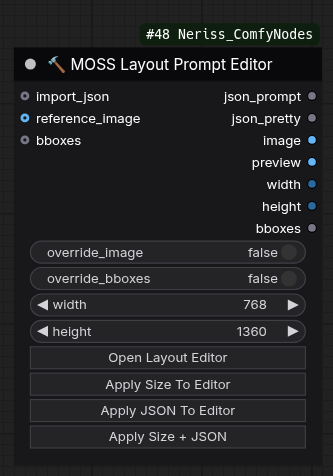
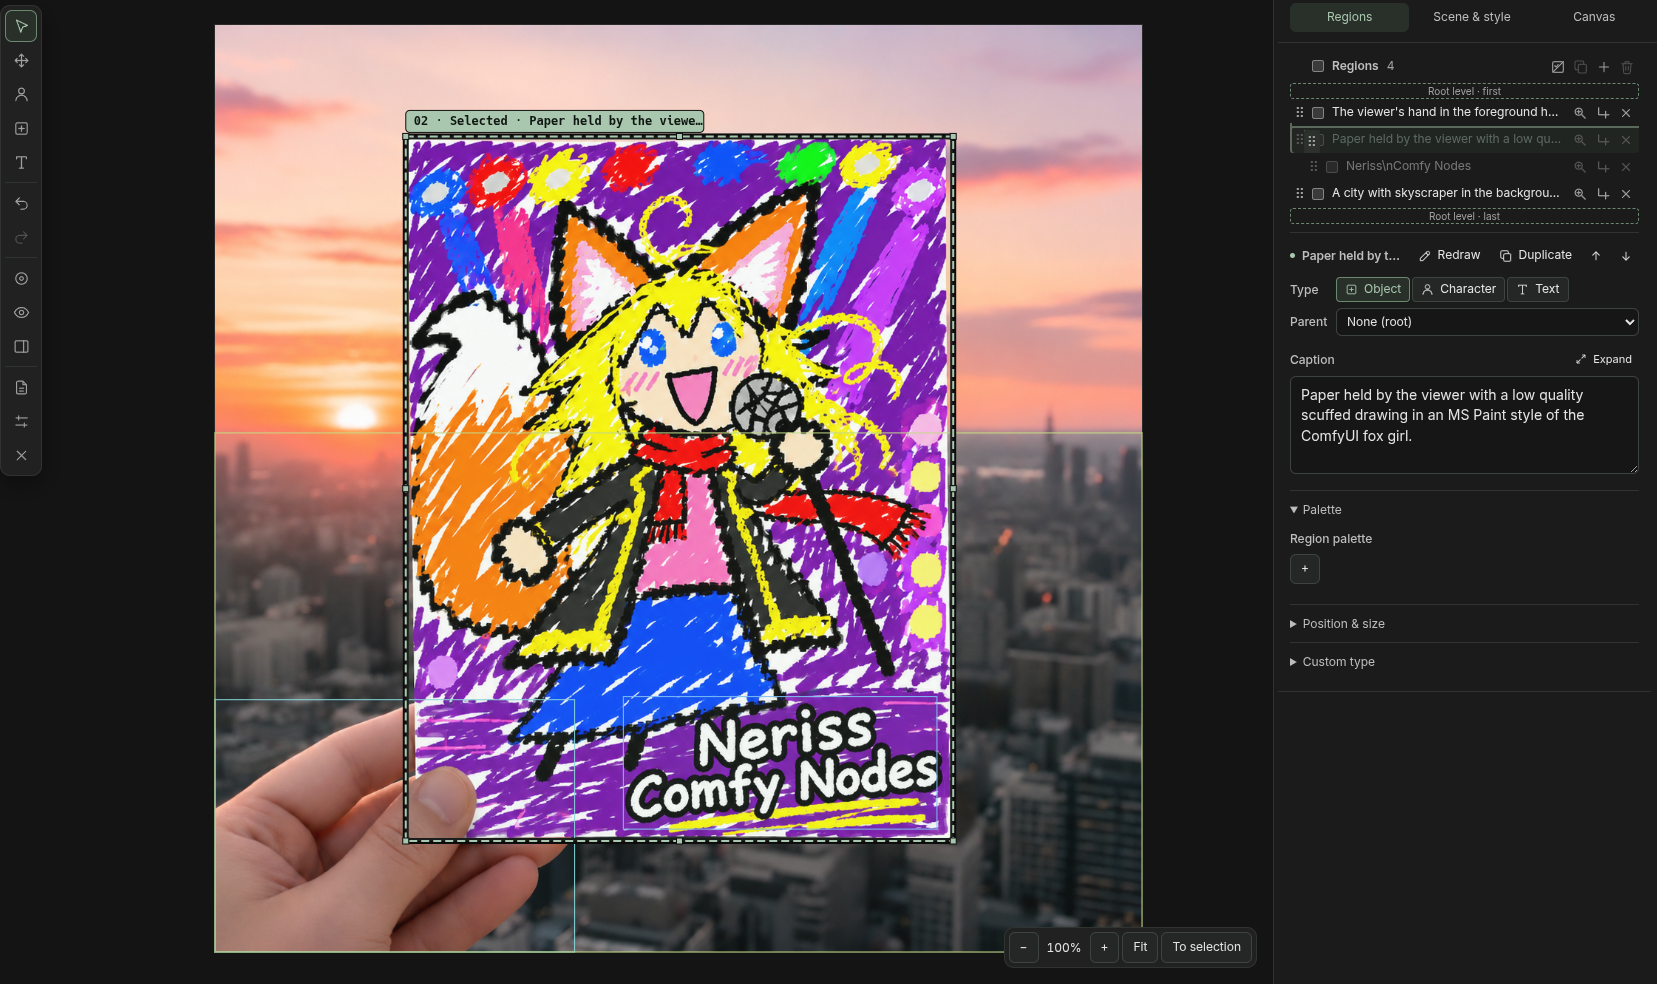
The same visual editor, for MOSS-Image layout prompts.
<details> <summary>ℹ️ <i>See More Information</i></summary>
- Click Open Layout Editor to draw regions.
- Add and sort the summary tags alongside the scene caption.
- Connect
json_promptto your model's prompt input and use the node'swidthandheightto create the latent.- Also outputs a reference/grid image, an annotated preview and pixel bounding boxes.
- Paste an existing prompt with Import JSON to edit it visually, or connect one to
import_jsonto apply it on execution.</details>
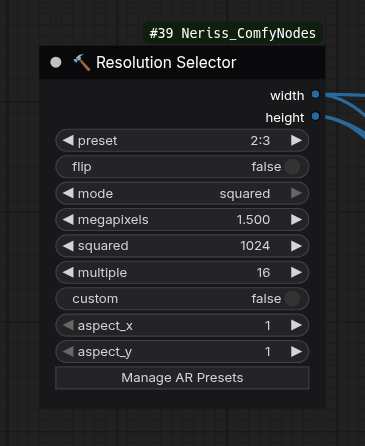
🔨 Resolution Selector
Pick a generation size from an aspect ratio and a pixel budget.
<details> <summary>ℹ️ <i>See More Information</i></summary>
- Choose an aspect-ratio preset or enter a custom ratio, and flip it to swap portrait and landscape.
- Size by total megapixels or by a squared side length.
- Width and height are rounded to the chosen multiple (16 by default).
- Presets are editable and shared across workflows.
</details>
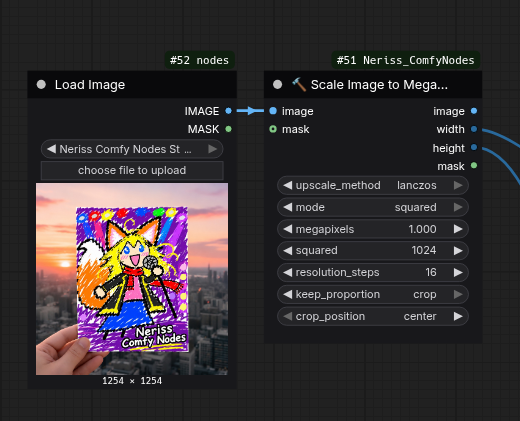
🔨 Scale Image to Megapixels
Resize an image batch to a megapixel or square-side target.
<details> <summary>ℹ️ <i>See More Information</i></summary>
- Same sizing modes as the Resolution Selector, with output sides rounded to
resolution_steps.- Choose the interpolation: nearest-exact, bilinear, area, bicubic or lanczos.
- stretch resizes directly; crop trims to the target aspect first, anchored at the center or an edge.
- An optional mask is cropped and resized with the image. Without one, an empty mask is returned.
- Outputs the image, its
widthandheight, and the mask.</details>
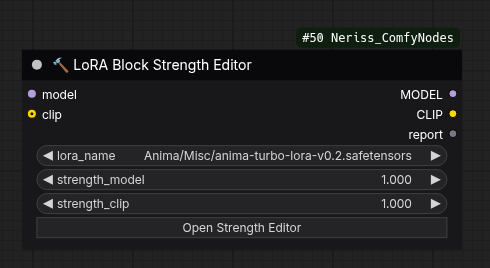
🔨 LoRA Block Strength Editor
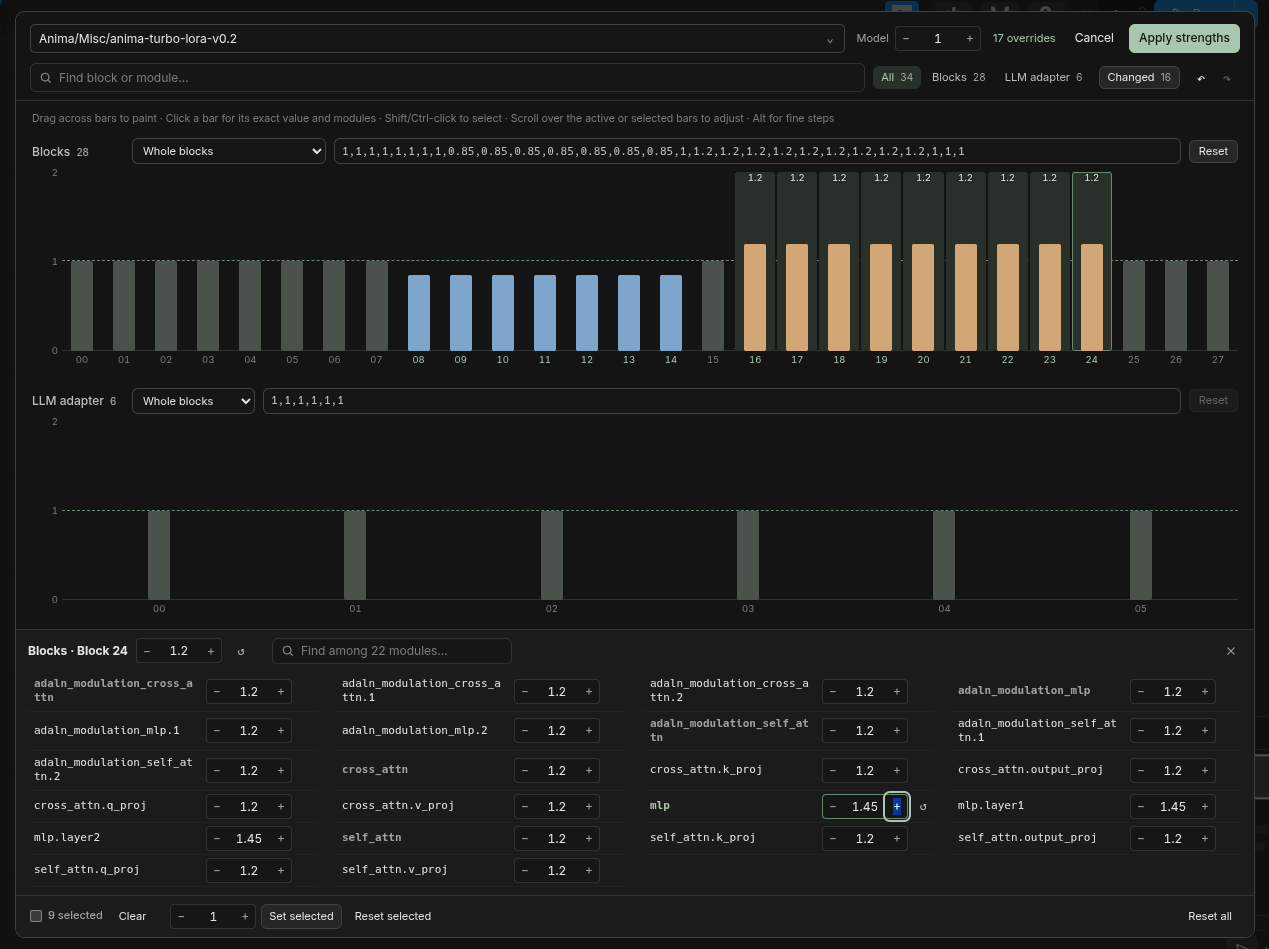
Load a LoRA and set strengths per block or per module, for any model family.
<details> <summary>ℹ️ <i>See More Information</i></summary>
- Connect a MODEL (and optionally a TE), pick a LoRA, then click Open Strength Editor.
- Blocks are read from the LoRA itself, so it works with any model family.
- Each multiplier scales the global MODEL/TE strength.
0turns a block off; negative values are allowed.- Changes take effect when you click Apply strengths.
- If a LoRA doesn't seem to apply, check the
reportoutput.</details>
Development
Clone the repository into ComfyUI/custom_nodes. You need Node.js 24 and pnpm; corepack enable installs the pinned pnpm version.
Install the Python check tools into the environment you run ComfyUI with:
python -m pip install ruff ty
Start Vite from web/:
cd web
pnpm install --frozen-lockfile
pnpm dev
Then start ComfyUI with WEB_DEV=1 so it loads the frontend from Vite:
WEB_DEV=1 python main.py
Frontend edits hot-reload; Python changes need a ComfyUI restart. If ComfyUI isn't at http://127.0.0.1:8188, pass its URL to Vite, for example COMFY_ORIGIN=http://localhost:8000 pnpm dev.
To work on the editor without ComfyUI, run pnpm run preview:editor and open http://127.0.0.1:4179/preview/index.html. It uses a mock node, so uploads and saved libraries don't work there.
Checks
Python, from the repository root:
python -m ruff format .
python -m ruff check .
python -m ty check
python -m unittest discover -s tests
Frontend, from web/:
pnpm run lint
pnpm run typecheck
pnpm test
Browser tests run with pnpm run test:e2e and need Nix installed (until I stop being lazy and make it less rigid).
Building
The built frontend in web/dist is committed, so users don't need Node.js. After frontend changes, run pnpm run build from web/ and commit web/dist and THIRD_PARTY_NOTICES.md with your changes. CI fails if they are out of date.
Releasing
- Bump the version from
web/withpnpm run version:bump patch(orminor,major, or an exact version). - Commit the changes and push a matching
vX.Y.Ztag. - Run the Publish tagged registry release workflow on that tag.
License
MPL-2.0. Licenses for bundled frontend dependencies are in THIRD_PARTY_NOTICES.md.