
Context-Anchored Tile Refine
Seamless tiled refinement and upscaling. Refine an image tile by tile with no visible seams, or refine only a masked region of a large image without processing the rest. Each tile is conditioned on its already-refined neighbors held as frozen context. The VL nodes (Krea 2) need no prompt at all: each tile's conditioning is vision tokens of its own crop plus its slice of a vision encode of the entire image, so prompt objects never reappear in the wrong tile. Works with any guider, including NAG (Normalized Attention Guidance).
Nodes (8)
Tile refine that hides seams by conditioning, not by guessing
The tile refine node that doesn't need a prompt — for Krea 2
Captions — Read the Tags Before You Spend the Render
Layout — See the Grid Before You Burn the Hour
Render — Re-Roll One Tile, Not the Whole 8K Canvas
Settings — Every Setting in the File, as a Wire
Upscale — The Node That Exists So You Never Pay for the Upscale Twice
4K from a 1024px image in one node — for Krea 2
Context-Anchored Tile Refine
ComfyUI nodes for tiled refining and upscaling. An already upscaled image is refined a tile at a time with no visible seams. On the VL nodes, a global prompt is replaced by vision conditioning.
Sample results from Krea 2 and the Tile Upscale (VL) node. Each image was upscaled in two passes. Click to view the full-sized image.
<table> <tr> <td align="center"><a href="samples/cyberpunks-couple.webp"><img src="samples/cyberpunks-couple.webp" alt="Cyberpunks couple, original" width="100%"></a><br><sub>v1.8.0, Original, 1024x576</sub></td> <td align="center"><a href="samples/cyberpunks-couple-4k.webp"><img src="samples/cyberpunks-couple-4k-preview.jpg" alt="Cyberpunks couple, 4x Tile Upscale (VL)" width="100%"></a><br><sub>4x, denoise 0.35, 6 tiles, 4096x2304</sub></td> <td align="center"><a href="samples/cyberpunks-couple-8k.webp"><img src="samples/cyberpunks-couple-8k-preview.jpg" alt="Cyberpunks couple, 8K Tile Upscale (VL)" width="100%"></a><br><sub>then 2x, denoise 0.35, 24 tiles, 8192x4608</sub></td> </tr> <tr> <td align="center"><a href="samples/dark-city.webp"><img src="samples/dark-city.webp" alt="Dark city, original" width="100%"></a><br><sub>v1.8.0, Original, 1024x576</sub></td> <td align="center"><a href="samples/dark-city-4k.webp"><img src="samples/dark-city-4k-preview.jpg" alt="Dark city, 4x Tile Upscale (VL)" width="100%"></a><br><sub>4x, denoise 0.35, 6 tiles, 4096x2304</sub></td> <td align="center"><a href="samples/dark-city-8k.webp"><img src="samples/dark-city-8k-preview.jpg" alt="Dark city, 8K Tile Upscale (VL)" width="100%"></a><br><sub>then 2x, denoise 0.35, 24 tiles, 8192x4608</sub></td> </tr> <tr> <td align="center"><a href="samples/cyberpunk-city.webp"><img src="samples/cyberpunk-city.webp" alt="Cyberpunk city, original" width="100%"></a><br><sub>v1.6.0, Original, 1024x576</sub></td> <td align="center"><a href="samples/cyberpunk-city-4k.webp"><img src="samples/cyberpunk-city-4k-preview.jpg" alt="Cyberpunk city, 4x Tile Upscale (VL)" width="100%"></a><br><sub>4x, denoise 0.5, 6 tiles, 4096x2304</sub></td> <td align="center"><a href="samples/cyberpunk-city-8k.webp"><img src="samples/cyberpunk-city-8k-preview.jpg" alt="Cyberpunk city, 8K Tile Upscale (VL)" width="100%"></a><br><sub>then 2x, denoise 0.35, 30 tiles, 8192x4608</sub></td> </tr> <tr> <td align="center"><a href="samples/orbital-shipyard-hangar.webp"><img src="samples/orbital-shipyard-hangar.webp" alt="Orbital shipyard hangar, original" width="100%"></a><br><sub>v1.6.0, Original, 1024x576</sub></td> <td align="center"><a href="samples/orbital-shipyard-hangar-4k.webp"><img src="samples/orbital-shipyard-hangar-4k-preview.jpg" alt="Orbital shipyard hangar, 4x Tile Upscale (VL)" width="100%"></a><br><sub>4x, denoise 0.5, 6 tiles, 4096x2304</sub></td> <td align="center"><a href="samples/orbital-shipyard-hangar-8k.webp"><img src="samples/orbital-shipyard-hangar-8k-preview.jpg" alt="Orbital shipyard hangar, 8K Tile Upscale (VL)" width="100%"></a><br><sub>then 2x, denoise 0.35, 30 tiles, 8192x4608</sub></td> </tr> </table>Contents
Installation
The pack needs Python 3.12 or newer. Search for "Context-Anchored Tile Refine" in ComfyUI Manager, or clone into your custom_nodes folder:
git clone https://github.com/blakeem/ComfyUI-ContextAnchoredTileRefine
A clone also needs the one Python dependency, logit-classifier. ComfyUI Manager installs it for you. After a clone, run this in ComfyUI's Python environment from the node's folder:
pip install -r requirements.txt
The nodes
The example workflows linked below sit in the workflows folder, and ComfyUI lists them in its template browser. Some of them use third-party nodes. They load the author's own model, LoRA and upscale model files, so point each loader at your own files.
Tile Refine
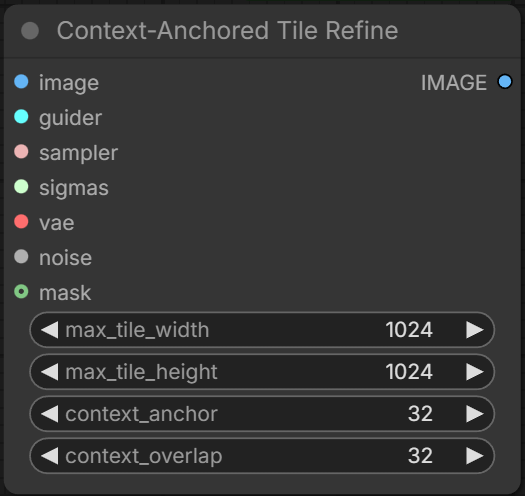
The base node works with most diffusion models. Upscale the image first and feed it in. The sampling inputs are wired as for SamplerCustomAdvanced. Since the image is already upscaled, a mask is supported.
Example workflow: Chroma + Z-Image hybrid
VL nodes
The VL nodes were built for and tested with Krea 2. Other Qwen3-VL based models, including Krea 2 Turbo, are untested.
Both nodes take clip, anchor_source, vlm_method and prompt. clip is the Qwen3-VL text encoder Krea 2 uses, such as qwen3vl_4b_fp8_scaled.safetensors in models/text_encoders. Load it with Load CLIP set to type krea2. Encoders without a vision path (SD/SDXL CLIP, T5, plain Qwen3) are rejected with a clear error. Connect the positive prompt's text to prompt so that each tile can confirm the things the prompt names (see Tile tags).
Tile Refine (VL)
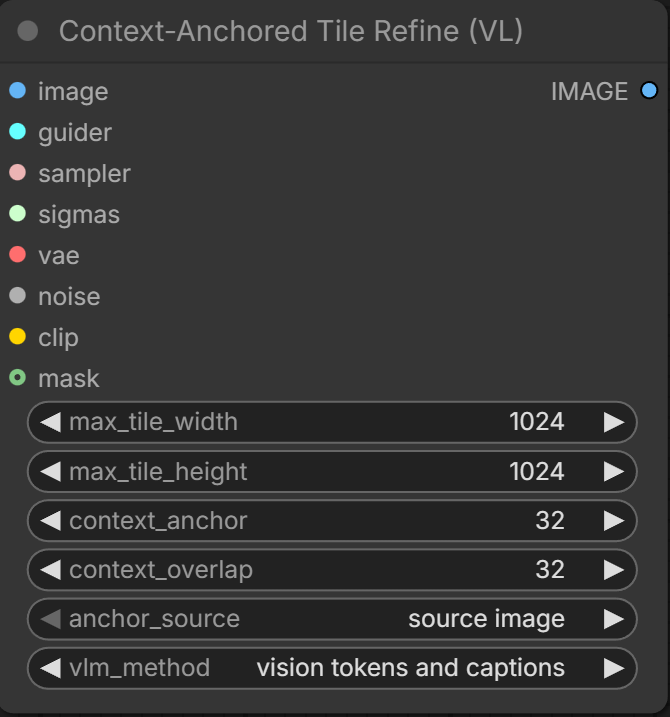
Tile Refine (VL) takes the same wiring as the base node. The guider's positive prompt is ignored, since each tile's conditioning is built from the image itself. Its negative still applies. A mask is supported and keeps the global view (see Masked refine).
Example workflow: Krea 2 refine
Tile Upscale (VL)
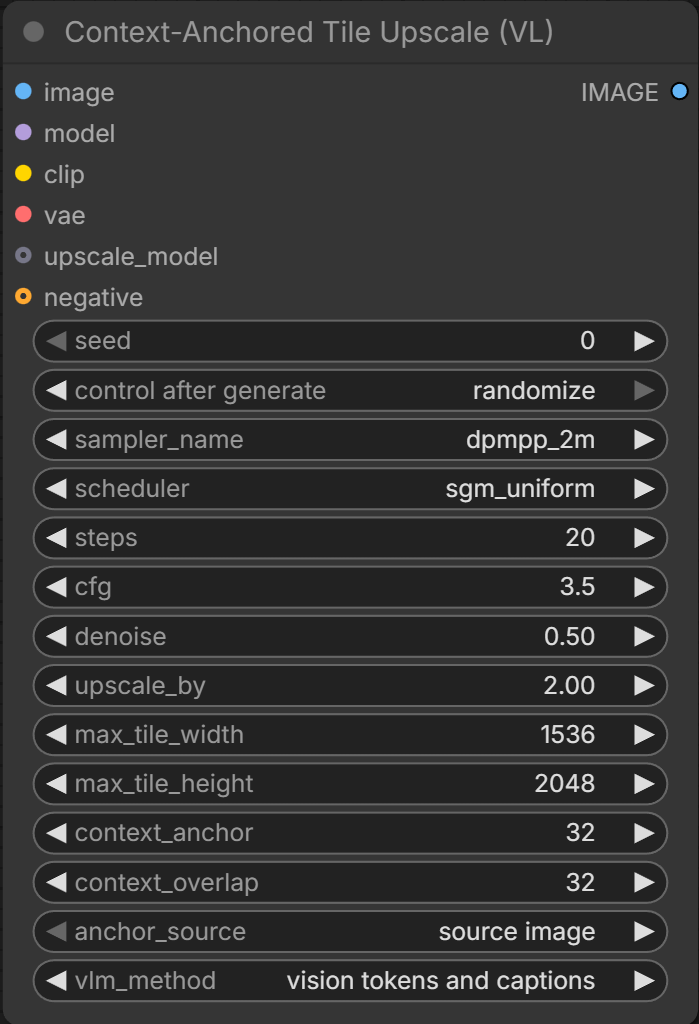
Tile Upscale (VL) upscales and refines in one node. The image is upscaled first, through the optional upscale_model when connected, and a single lanczos pass brings it to input size x upscale_by. It then runs the same tile refine as Tile Refine (VL). Widgets replace the sampling inputs, and the optional negative still applies.
Example workflow: Krea 2 8K upscale (the two-pass 4x then 2x chain the v1.8.0 sample images were made with)
Supported samplers
The VL nodes step every tile against one schedule, so they must time each sampler's model evaluations. The supported samplers are euler, heun, dpm_2, dpmpp_2m, dpmpp_2m_sde (all variants), exp_heun_2_x0, and exp_heun_2_x0_sde. Anything else is rejected before sampling starts. dpm_fast, dpm_adaptive, and uni_pc run their own schedule and cannot be supported. The base node accepts every sampler.
Node Inputs and Parameters
| Input | Nodes | What it does |
|---|---|---|
| max_tile_width / max_tile_height | all | Largest pixel size the model sees per tile, context rings included. Set to the largest size your model handles well. |
| context_anchor | all | Width of the context ring each tile conditions on. The ring holds neighboring tiles together and a masked region to its surroundings. |
| context_overlap | all | Width of the band neighboring tiles share. 0 gives hard seams. Smooth gradients need more and detailed scenes need less. |
| anchor_source | VL | The context ring shows either the unmodified input for maximum fidelity, or the in-progress result so that flawed content can be repaired. |
| vlm_method | VL | What the model is told about each tile. Adding captions repairs flawed content during upscale. |
| prompt | VL | The prompt the image was made from. The VL model reads it to name each tile's contents, and the diffusion model never reads it. |
| mask | Refine, Refine (VL) | Refines only the masked region and leaves everything outside it untouched. An inverted mask on a second pass refines the rest with other settings. |
| clip | VL | The vision-language encoder that builds all tile conditioning. |
Preview any layout with the tile simulator.
Features
| Feature | Tile Refine | Tile Refine (VL) | Tile Upscale (VL) | |---|:-:|:-:|:-:| | Dynamic tile layout | ✓ | ✓ | ✓ | | Context rings | ✓ | ✓ | ✓ | | Shared noise | ✓ | ✓ | ✓ | | Anchor conditioning | ✓ | | | | Directional feather | ✓ | ✓ | ✓ | | Minimum error boundary cut | ✓ | | | | Brightness and color match | ✓ | | | | Synchronized latent tiling | | ✓ | ✓ | | Anchor source | | ✓ | ✓ | | Vision tokens | | ✓ | ✓ | | Captions | | ✓ | ✓ | | Vision tokens and captions | | ✓ | ✓ | | Tile tags | | ✓ | ✓ | | Masked refine | ✓ | ✓ | | | Batches | ✓ | ✓ | ✓ | | Guider input | ✓ | ✓ | | | ControlNet | ✓ | | |
Tiling geometry
Dynamic tile layout
The grid is solved from the image size and max_tile_width / max_tile_height. Every crop is aligned to an 8 pixel boundary. Tiles are extracted, sampled, and pasted back at their native pixel size, so no quality is lost to resizing.
Context rings
Each tile is sampled with two extra rings that are cropped away after. context_overlap is the band shared with the neighboring tiles. context_anchor is pure context beyond that. The tile conditions on the anchor ring, so it continues its neighbors instead of drifting away from them. On the VL nodes, anchor_source picks what the ring shows.
Shared noise
Each tile starts from its part of one noise pattern over the entire image. Samplers such as dpmpp_2m_sde add fresh noise at every step, and each step's noise comes from one pattern in the same way. This way both tiles that diffuse a shared band add the same noise there, so the feather blends two similar textures. On the base node, a sampler draws its step noise per tile when its draws cannot follow the shared pattern. dpmpp_sde (both variants) is one, since its draws within a step depend on each other. The SamplerDPMAdaptative node with eta above 0 is another, since its step count adapts to each tile's content. A sampler that makes its own draws also draws per tile, such as the SamplerLCMUpscale node or a sampler implemented in another node pack.
Seams on the base node
The base node refines tiles one after another in raster order, so a tile's top and left neighbors are finished before it is sampled. Seams are hidden by conditioning first and then a narrow blend.
Anchor conditioning
The anchor ring shows each tile its already refined neighbors and holds that content frozen. This is the main seam mechanism, and the blending below only smooths the small differences left in the band.
Directional feather
Both tiles diffuse the shared band from the same raw pixels and the results are cross dissolved. The first 10 percent of the band stays with the new tile, then a squared ramp fades it to zero so that the two tiles connect at zero slope. A linear ramp meets the neighbor at an angle and appears as a visible line.
Minimum error boundary cut
Dynamic programming finds the path through the overlap band where the two refinements already agree, from Efros and Freeman, Image Quilting for Texture Synthesis and Transfer (SIGGRAPH 2001). The paper makes a hard cut on that path. With our method, the feather's midpoint bends along it, so the blend follows image content rather than a straight line.
Brightness and color match
Tiles diffused separately land at slightly different brightness and color levels. The fix is an additive, per channel, and sequential variant of gain compensation from Brown and Lowe, Automatic Panoramic Image Stitching (IJCV 2007). The shared band is the only place both tiles refined the same raw pixels, so the median of the difference there comes from the color shift and not from the content. Subtracting that median puts each tile on its neighbor's level. It runs only at tile seams, not at mask edges.
Seams on the VL nodes
The VL nodes diffuse every tile together, so there is nothing to correct afterwards.
Synchronized latent tiling
The entire image is within one shared canvas latent and every tile is diffused one step at a time. Between steps the tiles are consolidated back into that canvas, with the overlap bands cross dissolved by the same directional feather in latent space. This requires no boundary cut or color match.
MultiDiffusion (Bar-Tal et al., ICML 2023) and Mixture of Diffusers (Jiménez, 2023) also process tiles at every step. Those methods overlap tiles and use an average of the two predictions, so where the tiles disagree the result is a soft image. With our method, the tiles are joined together at the boundary so that the tile body is direct model output. Only the thin band is predicted twice, and the feather blends the seam toward the later tile. The anchor ring is context that the tiles use to be aware of their surroundings. Those methods fuse inside one sampler pass over the entire canvas. With ours, each tile runs its own sampler and all the tiles are held to the same step.
Anchor source
source image (default) shows the ring the unmodified input. This keeps placement, style, and objects locked to the input, including its flaws. The live canvas shows the ring the neighbors' in-progress result instead, so the refine can repair flawed content. Expect more invention and slightly brighter output.
Conditioning on the VL nodes
A global prompt describes the entire image while each tile holds only part of it. The diffusion model then recreates prompt objects inside tiles that should not contain them. The VL nodes replace the prompt with conditioning that is true for each tile, built by the same Qwen3-VL encoder wired to clip. Two operations are involved. One encodes the image into vision tokens. The other writes a caption from the tile's own crop. vlm_method picks which ones fill each tile's conditioning.
Vision tokens
Each tile is assigned vision tokens from two encodes of the image. The tokens are loosely aware of their position and carry their area's tone, palette, and objects.
- Crop tokens come from an encode of the tile's own crop, sampled small. They hold the tile to what it contains, so an empty tile does not grow a copy of an object from elsewhere in the image.
- Canvas tokens come from one encode of the entire image. The tile is assigned its own slice of that grid, the tile plus its context rings. Those tokens carry the tile's place in the image and keep a person or a building at the right scale.
No global text prompt is used, so nothing phantom is introduced. The slicing selects tokens by region of interest, the analogue of RoIAlign (He et al., Mask R-CNN, ICCV 2017) in conditioning space. This is the fastest method, since one small encode per tile costs far less than one caption.
Captions
Each tile's text is used alone as that tile's prompt. The default preset writes the text as tile tags. A caption preset has the same VL model write a short description of each tile from that tile's crop alone (see Presets). Naming content removes ambiguity, so artifacts and mushy areas in the source are repaired toward the named thing. The cost scales with tile count and no vision encode is built. Tile texts are stored for the session, keyed by the crop and the preset, so a run at a new seed skips the text pass while the same CLIP stays loaded.
Vision tokens and captions
The default method combines the tile's vision tokens and its own text in a single conditioning. The vision tokens keep the tile faithful to the picture and at the right scale. The text names what is there and adds detail. The cost is one small encode plus one text pass per tile.
Tile tags
The default preset writes each tile's text as tags with their positions, such as red car bottom-left.
- List. The VL model lists the things it sees in the tile. When
promptis connected, the VL model also lists the physical things the prompt names, once per image, and every tile checks them. A prompt in another language is translated to English first. - Verify. Each candidate is scored with a true or false statement on the tile, and only the tags with a near certain score are kept.
- Locate. Six strips of the tile, three rows and three columns, give each tag its position, and a tag that no strip holds is dropped.
The scoring reads the VL model's answer probabilities through logit-classifier. A long prompt adds one pass per image and never lengthens a tile's own listing.
Regions, batches, and control
Masked refine
With a mask, the node crops to the masked region plus a context_anchor border, refines only that region against the frozen surrounding pixels, and composites it back with a 1px anti-aliased edge. The rest of the image is untouched. On the VL node the canvas tokens come from the full image, so the region is refined aware of its surroundings.
Batches
Each picture in a batch is refined on its own, so peak VRAM does not scale with batch size. Every picture gets its own conditioning, its own seam placement and color match on the base node, and its own synchronized run on the VL nodes.
Guider and ControlNet
The guider input takes any guider, including NAG for models without negative prompt support. ControlNet works on the base node. The control hint is cropped to each tile, so depth, canny, or pose guidance lands on the right pixels. The hint must be the same size as the input image. The VL nodes ignore ControlNet and log a warning, since every tile's positive is replaced by its own conditioning and there is nothing for a hint to attach to. GLIGEN, area masks, and reference latents pass through unchanged.
Settings file
The VL nodes read their settings from settings.toml in the node's folder. Copy it to settings.user.toml and edit the copy. The nodes read settings.user.toml whenever it exists, and a node update never replaces it. The header of each settings file documents every key. The Tile Test: Settings node shows the keys as its outputs.
- An edit applies on the next run, and the VL nodes re-run when the file changes even when no widget changed.
- The
vlm_methodoptions are built when ComfyUI starts, so adding, removing, renaming or moving a preset needs a restart. - A mistake in the file stops the run with an error that names the file. If ComfyUI starts with the mistake, the nodes that read the file are missing from the menu and the console prints the reason.
Vision table
The [vision] table sets how much of the image each tile's conditioning reads, for every vlm_method option.
canvas_tokensis the number of canvas tokens each tile takes from the encode of the entire image.crop_tokensis the number of crop tokens from the encode of the tile's own crop.caption_megapixelsis the size of the picture the VL model reads when it writes a tile caption or the style caption. A tags preset reads it for the style caption only.
Set one token count to 0 to turn that encode off.
Presets
Each [presets.<label>] block adds one option per text method to vlm_method. The first block is the default, and its options carry no label. Every other block's options carry its label in parentheses. settings.toml ships one preset, tags. settings.user.example.toml carries presets that write captions instead, such as prompted, standard and artwork. Copy a block from it into your own settings.user.toml to use one.
tile_textpicks whether each tile's text is written astagsor as acaption.tile_tags_instructionandprompt_tags_instructionask the VL model to list the things in the tile and the things the prompt names.- The three threshold keys set the score a tag needs to be kept and to name its position.
tile_caption_instructionis what the VL model is asked about each tile in a caption preset.global_style_instructionis asked about the entire image once per picture. The answer is placed on top of every tile's text so that all tiles follow one style description. Set it to""to skip the style caption.
An instruction may hold {PROMPT}. The VL nodes and the Tile Test: Captions node write their prompt input in its place before the VL model reads the instruction. A preset without {PROMPT} ignores the prompt input. The tags preset skips its prompt question when prompt is empty. Any other instruction with {PROMPT} stops the run with an error when prompt is not connected or is empty.
Test nodes
Five test nodes ship for tuning tiles and presets. They are not production nodes. Tile Test: Layout, Upscale, Captions and Render chain in that order and run the engine the VL nodes run. Tile Test: Settings feeds one preset's values into the Captions node and the token counts into the Render node.
Example workflow: Tile test chain
Tile Test: Layout
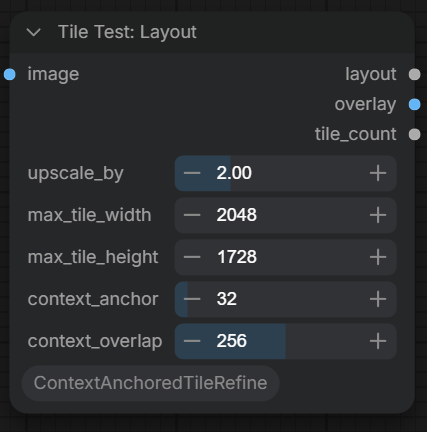
The Layout node solves the tile grid for the size the image has after upscale_by. Its overlay draws every tile's crop, overlap and core, labeled with the tile's number. The Captions and Render nodes take tiles by that number.
Tile Test: Upscale
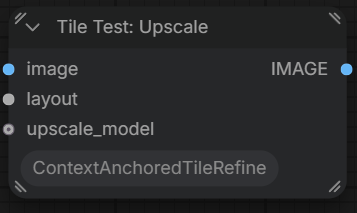
The Upscale node runs the upscale stage of Tile Upscale (VL) as a node of its own, so ComfyUI keeps the upscaled image cached. An image that is already upscaled skips it, with upscale_by at 1.0 on the Layout node.
Tile Test: Settings
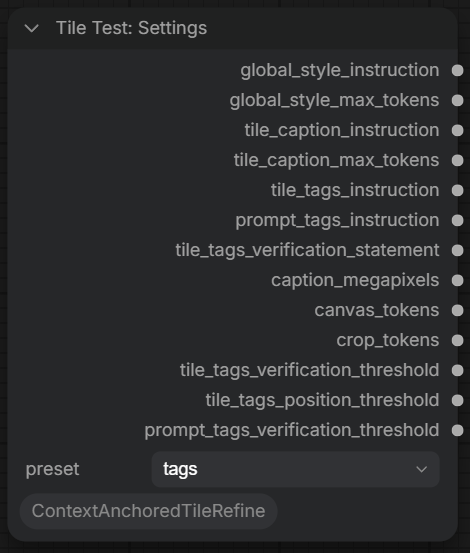
The Settings node outputs the values of one preset and the [vision] table, one output per key.
Tile Test: Captions
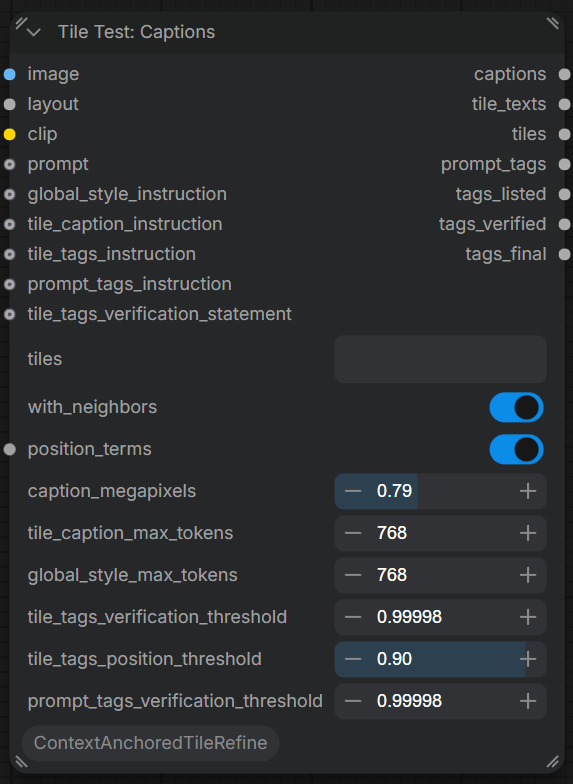
The Captions node runs the caption or tags pass of the VL nodes on every tile, or only on the tiles you name, with or without their neighbors. Each instruction is a text input, so a trial wording wired from a text node needs no file edit. The text outputs show every stage of the tags pass for each tile. They are Markdown for the Markdown mode of Preview as Text, which needs Nodes 2.0 turned on.
Tile Test: Render
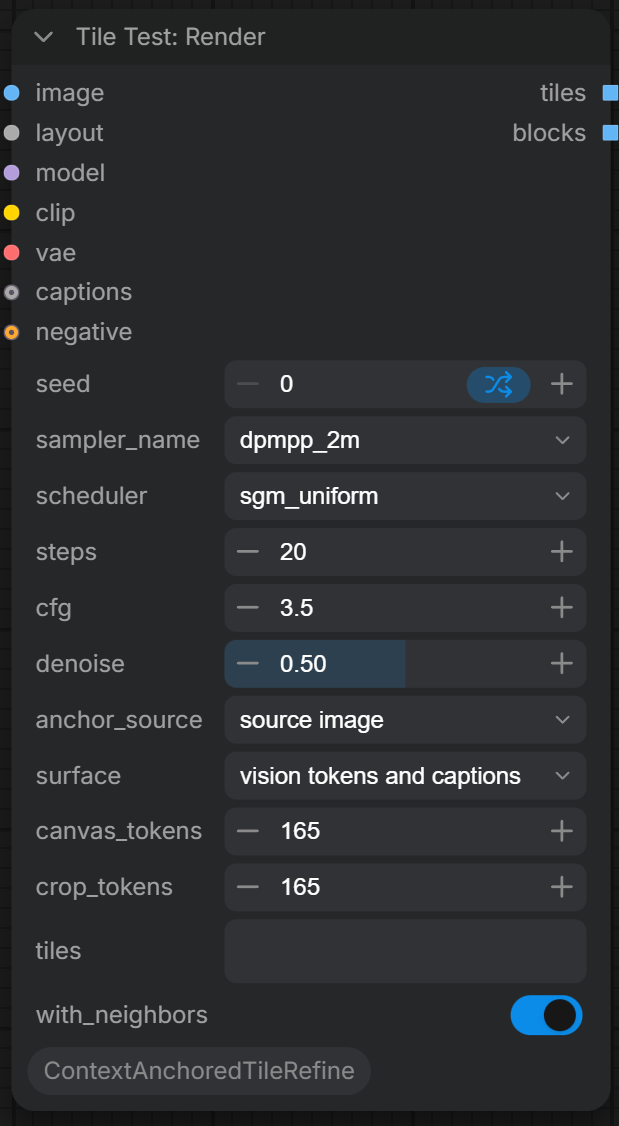
The Render node refines the entire canvas, or only the tiles you name, with or without their neighbors. It holds the seed, so a new seed never upscales or captions the image again.