ComfyUI Extension: ComfyUI-ZeroShot-MTrans
Run ComfyUI workflows without the setup
No installs, no CUDA version roulette, no GPU sitting idle on your bill. Bring a workflow and run it in the browser.
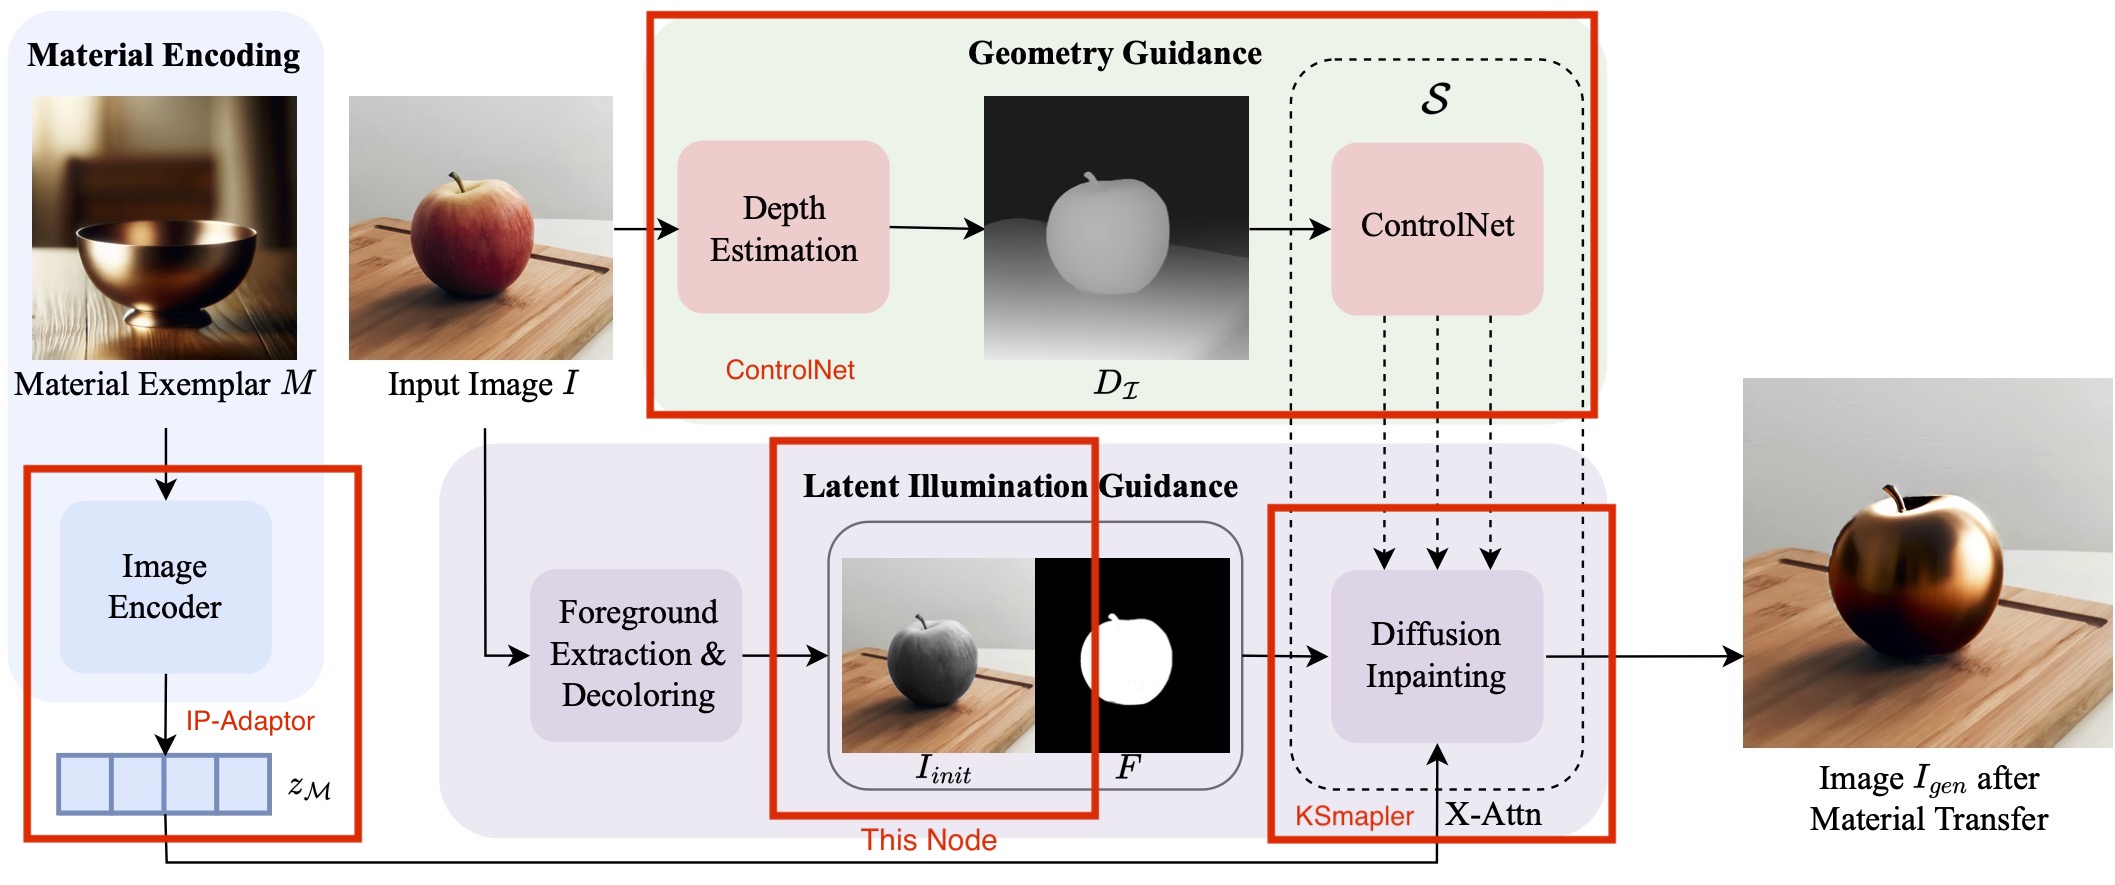
An unofficial ComfyUI custom node for a/Zero-Shot Material Transfer from a Single Image, Given an input image (e.g., a photo of an apple) and a single material exemplar image (e.g., a golden bowl), ZeST can transfer the gold material from the exemplar onto the apple with accurate lighting cues while making everything else consistent.
README
ComfyUI-ZeroShot-MTrans: Zero-Shot Material Transfer from a Single Image
An unofficial ComfyUI custom node for ZeST(Zero-Shot Material Transfer from a Single Image)
Given an input image (e.g., a photo of an apple) and a single material exemplar image (e.g., a golden bowl), ZeST can transfer the gold material from the exemplar onto the apple with accurate lighting cues while making everything else consistent.
Explains
Refer to zest_workflow.json in this repo for quick start.
This node implenment the red rect area of paper figure. the illumination transfer, and make it an ComfyUI node. You can use any IPA and controlnet node as your wish.
The original ZeST demo code use IPA to extract the style of material, and control for depth information. Then, change the original image with illumination informaion of subject for better lighting style.
install
in ComfyUI Manager or git clone to ComfyUI/custom_nodes
After restart ComfyUI, the following custom node will be available.

dependences
- ControlNet
- IP-Adaptor
- Segment Anything Model
Input/Output
-
INPUT:
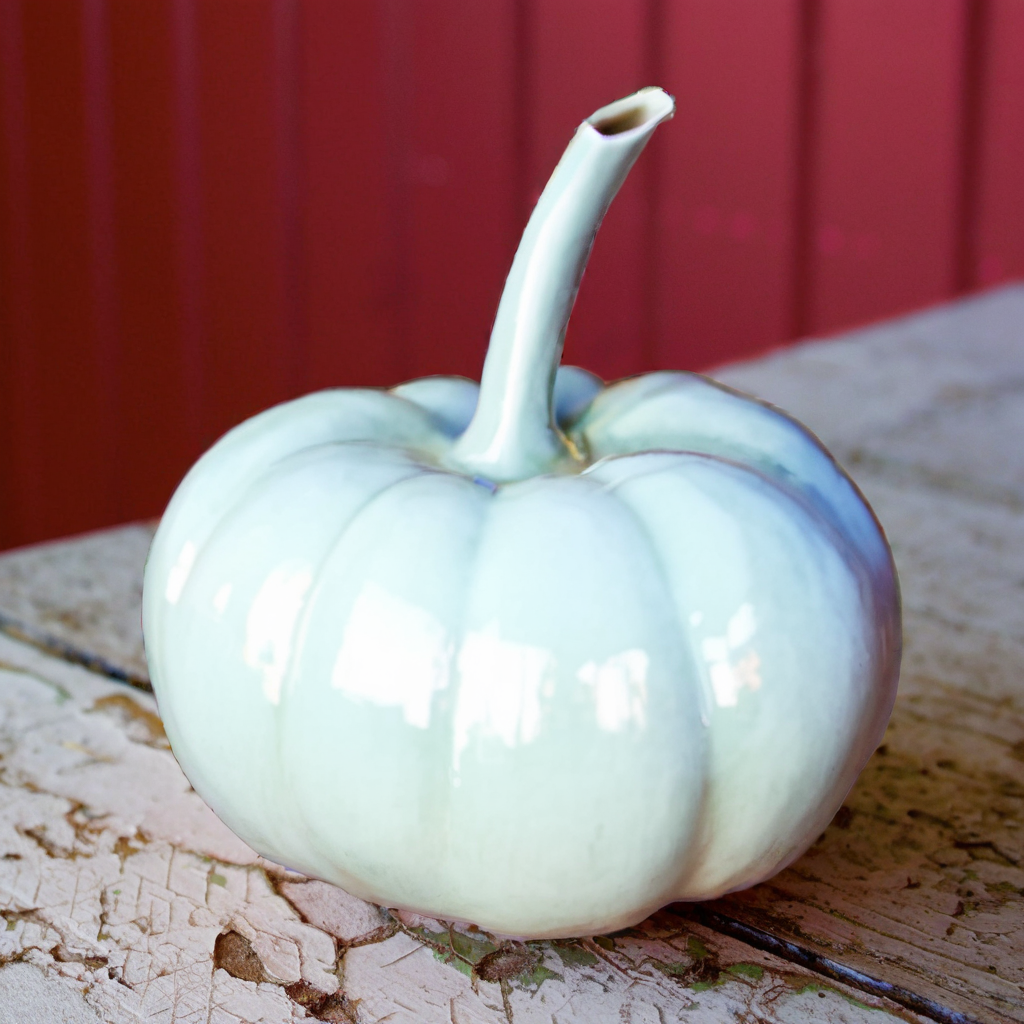
target_image: the original image for inpaintsubject_mask: themaskfor inpaint, thismaskwill be also used as input ofinpaintnodebrighter: default is 1, means no change- value < 1 , means darker the subject, useful when subject in high light
- value > 1, means brighter the subject, useful when subject in dark light
-
OUTPUT:
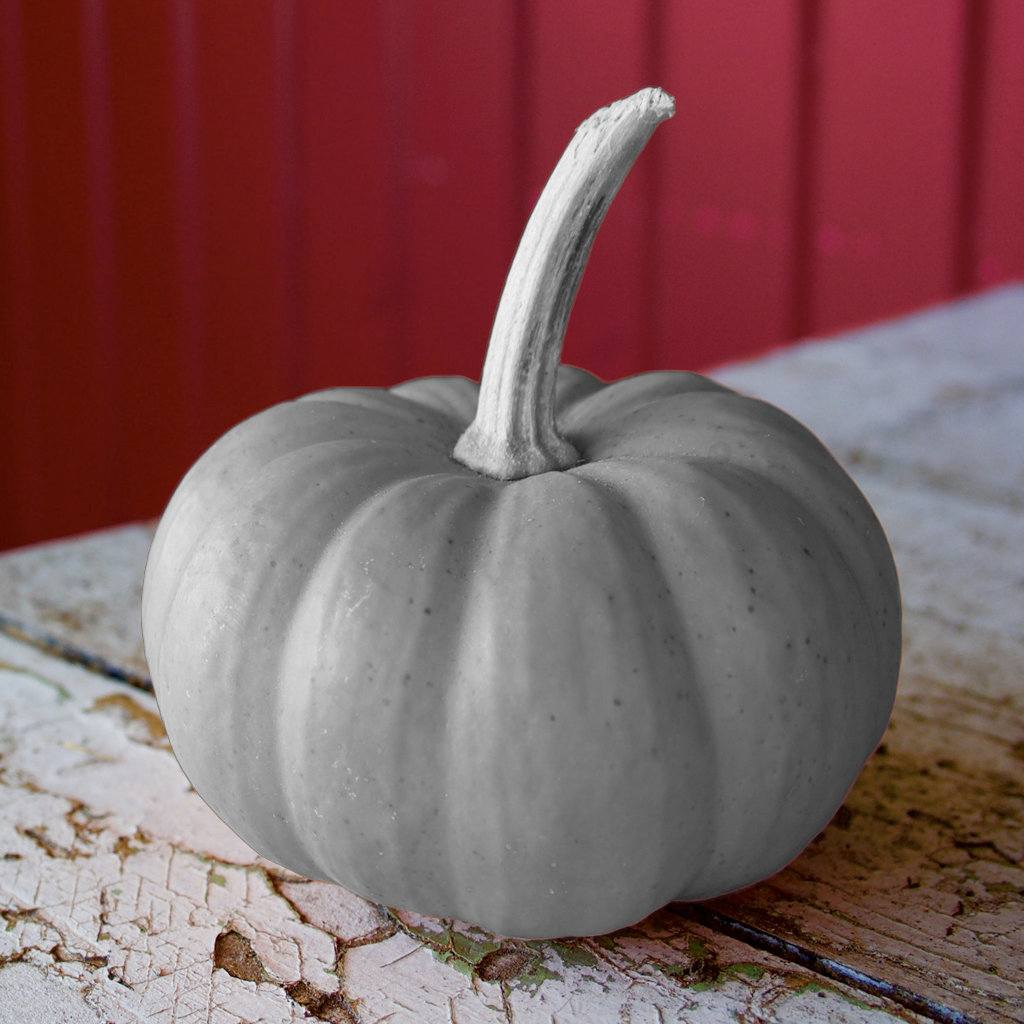
IMAGE: image withsubjectin luminosity(grey) mode. used as input forinpaintnode
Tips
- for output, the subject in
middle greyis prefered. for high light material, dark it; otherwise, brighter it. - for
materialimage, suggest remove all backgroup, just keep the material you want. - use
IP-Adaptorstrength,controlnetstrength,brighterto control the output 1st.
Workflow
You can download the zest_workflow.json from this repo for quickly start.
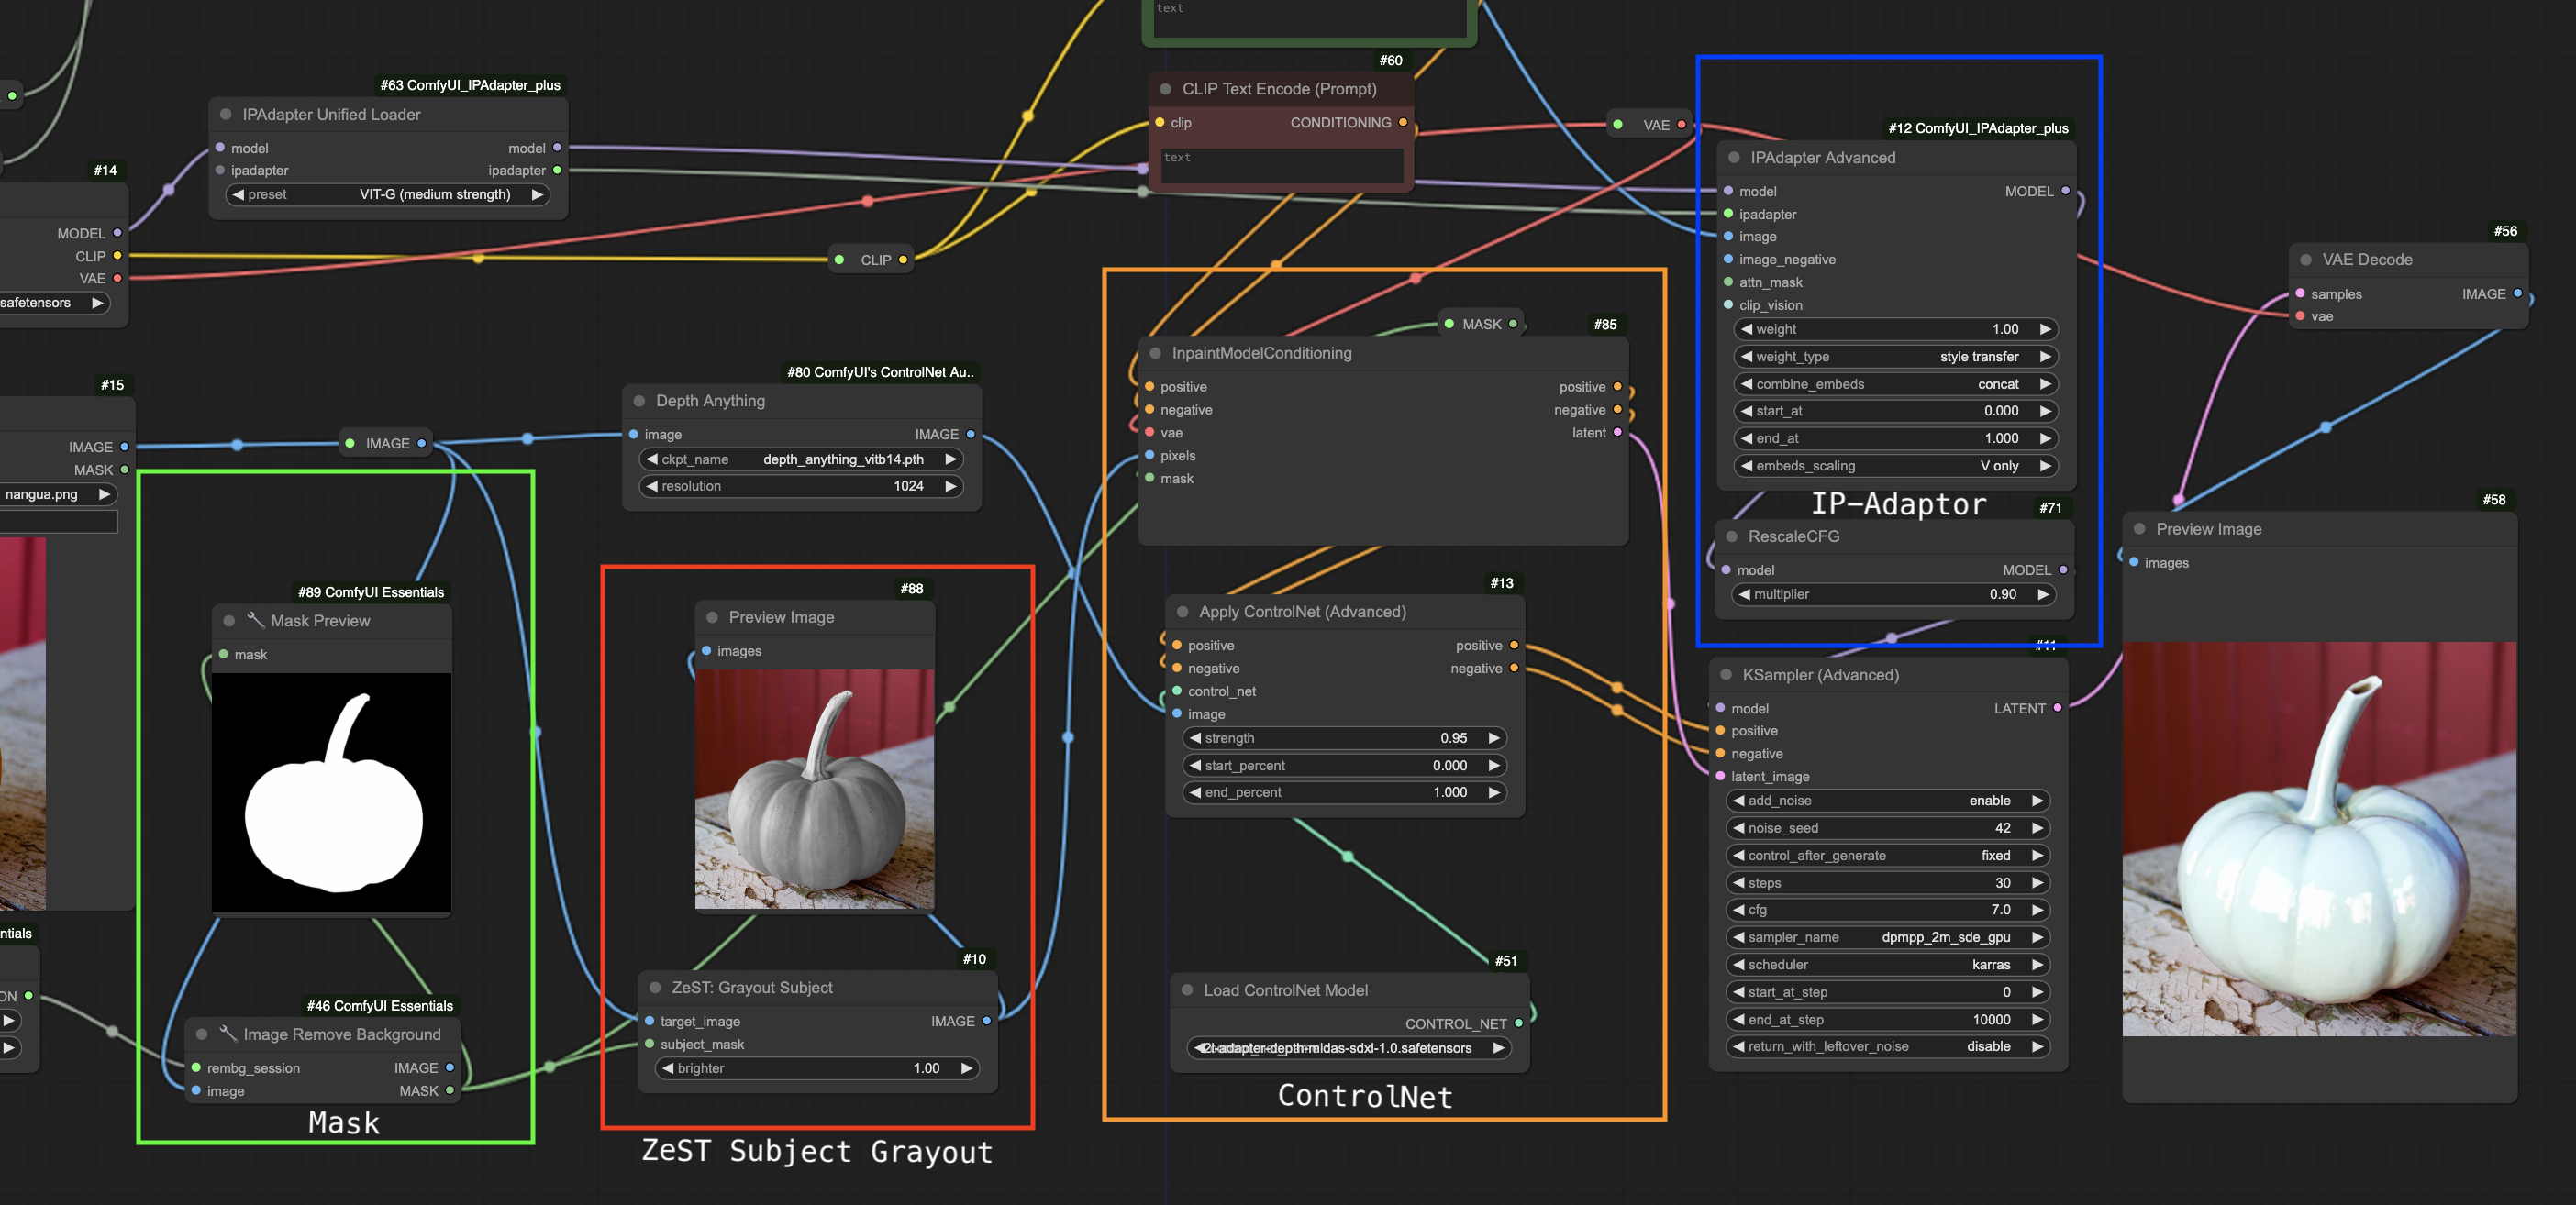
sample workflow
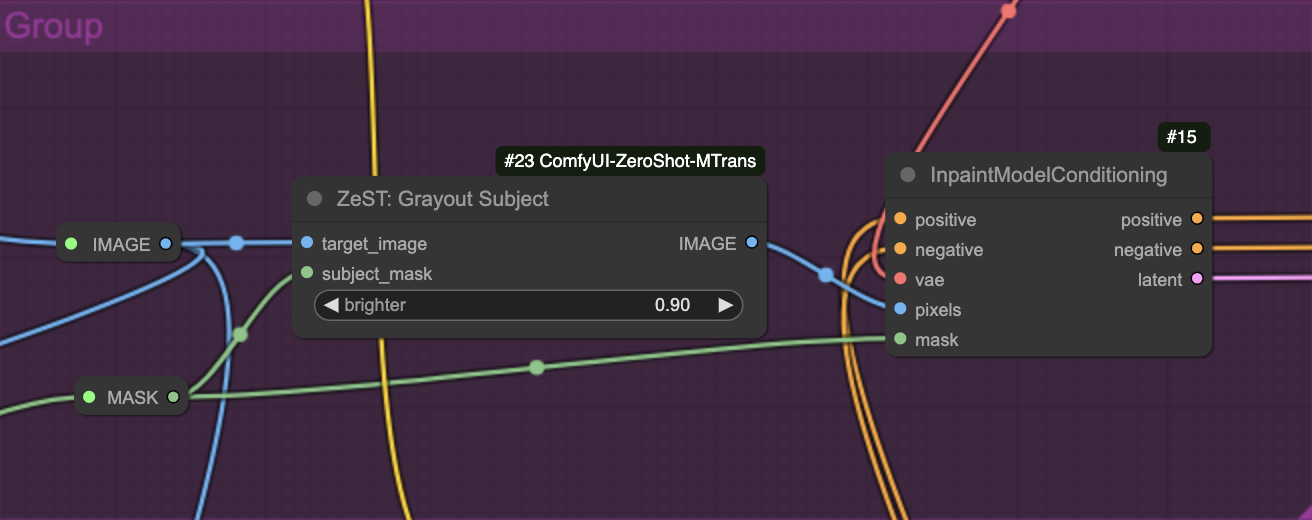
Image Input

Material Input
Temp Images
Mask

Subject Grayout
Output
Thanks to
- ZeST: Zero-Shot Material Transfer from a Single Image Paper
- ZeST official DEMO
- ZeST site
- ZeST official video
@article{cheng2024zest,
  title={ZeST: Zero-Shot Material Transfer from a Single Image},
  author={Cheng, Ta-Ying and Sharma, Prafull and Markham, Andrew and Trigoni, Niki and Jampani, Varun},
  journal={arXiv preprint arXiv:2404.06425},
  year={2024}
}
Run ComfyUI workflows without the setup
No installs, no CUDA version roulette, no GPU sitting idle on your bill. Bring a workflow and run it in the browser.