ComfyUI Extension: Canvas Tab
This extension provides a full page image editor with mask support. There are two nodes, one to receive images from the editor and one to send images to the editor.
Custom Nodes (2)
README
canvas_tab
ComfyUI canvas editor page
Updates
- 2024-1-24 Added multi canvas node support.
- 2024-1-11 Added CSS for prefers-color-scheme:dark
- 2023-12-23 Added tool to scale and rotate layers (Hotkey is T, doubleClick on image to toggle between Rotate and Scale mode)
- 2023-12-4 Added hotkeys for Brush Radius, Added Duplicate Layer button. Ctrl-Click duplicates the target layer.
- 2023-12-2 Added Trigger Queue on change toggle.
- 2023-11-30 Added "Replace Targeted Layer" as an input mode, right click on a layer to set it as target to be replaced
This plugin provides two nodes to provide a full page editor that runs in another tab.
There is an input node Edit in another Tab and an output node Send to Editor Tab.
Both are stored in the images submenu.
The can be set to trigger a queue on change. if there is something in the queue already it will wait until the queue empties before triggering a new Queue. This should result in only one queued entry triggered by this node at a time.
Installation
You can install either though comfy manager or by cloning this repository into the custom nodes directory.
User Interface
You can edit multiple images at once.
Drag images around with the middle mouse button and scale them with the mouse wheel.
There is a green Tab on the side of images in the editor, click on that tab to highlight it. The image with the highlighted tab is sent through to the comfyUI node.
Multiple Canvas Tab nodes are supported, If the title of the node and the title of the image in the editor are set to the same name The output of the canvas editor will be sent to that node.
You can have multiple image layers and you can select generated images to be added as a new layer, replace an existing layers, or as a new image.
You can delete layers by clicking on the layer widget with Ctrl-LeftClick. The layer must be visible for this to work as a protection against unwittingly deleting something important.
Ctrl-click on palette entries reassigns the palette color tho the current color. Middle-click on palette entries sets the palette color to the current foreground color.
Both nodes provided by this extension support receiving files by drag and drop to send images directly to the editor.
Hotkeys
- B for Brush tool
- E for Erase tool
- Z for pixel editing tool
- P for color Picker
- T for layer transformation
- [ and ] to decrease and increase bush radius
- BackSpace to clear a layer
- ALT_BackSpace to fill the layer with the foreground color
- CTRL_Backspace to fill the layer with the background color
- CTRL_Z undo
- CTRL_SHIFT_Z redo
Why would you do such a thing?
My main motivation for making this was to develop an inpainting workflow, but I have also found it quite useful for scribble based images,
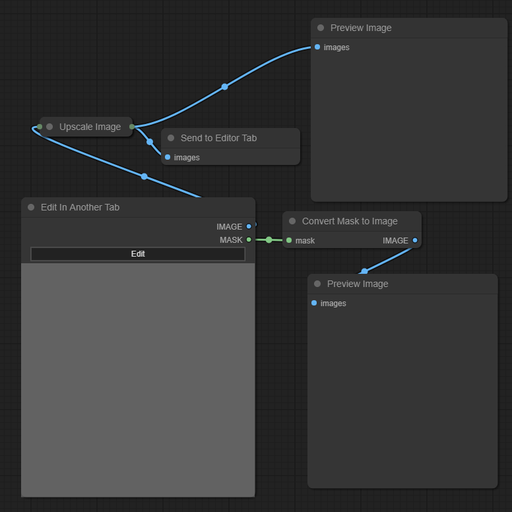
This image shows a basic workflow where it simply sends the image back to itself and shows previews of the image and mask. The workflow is also embedded in this image.

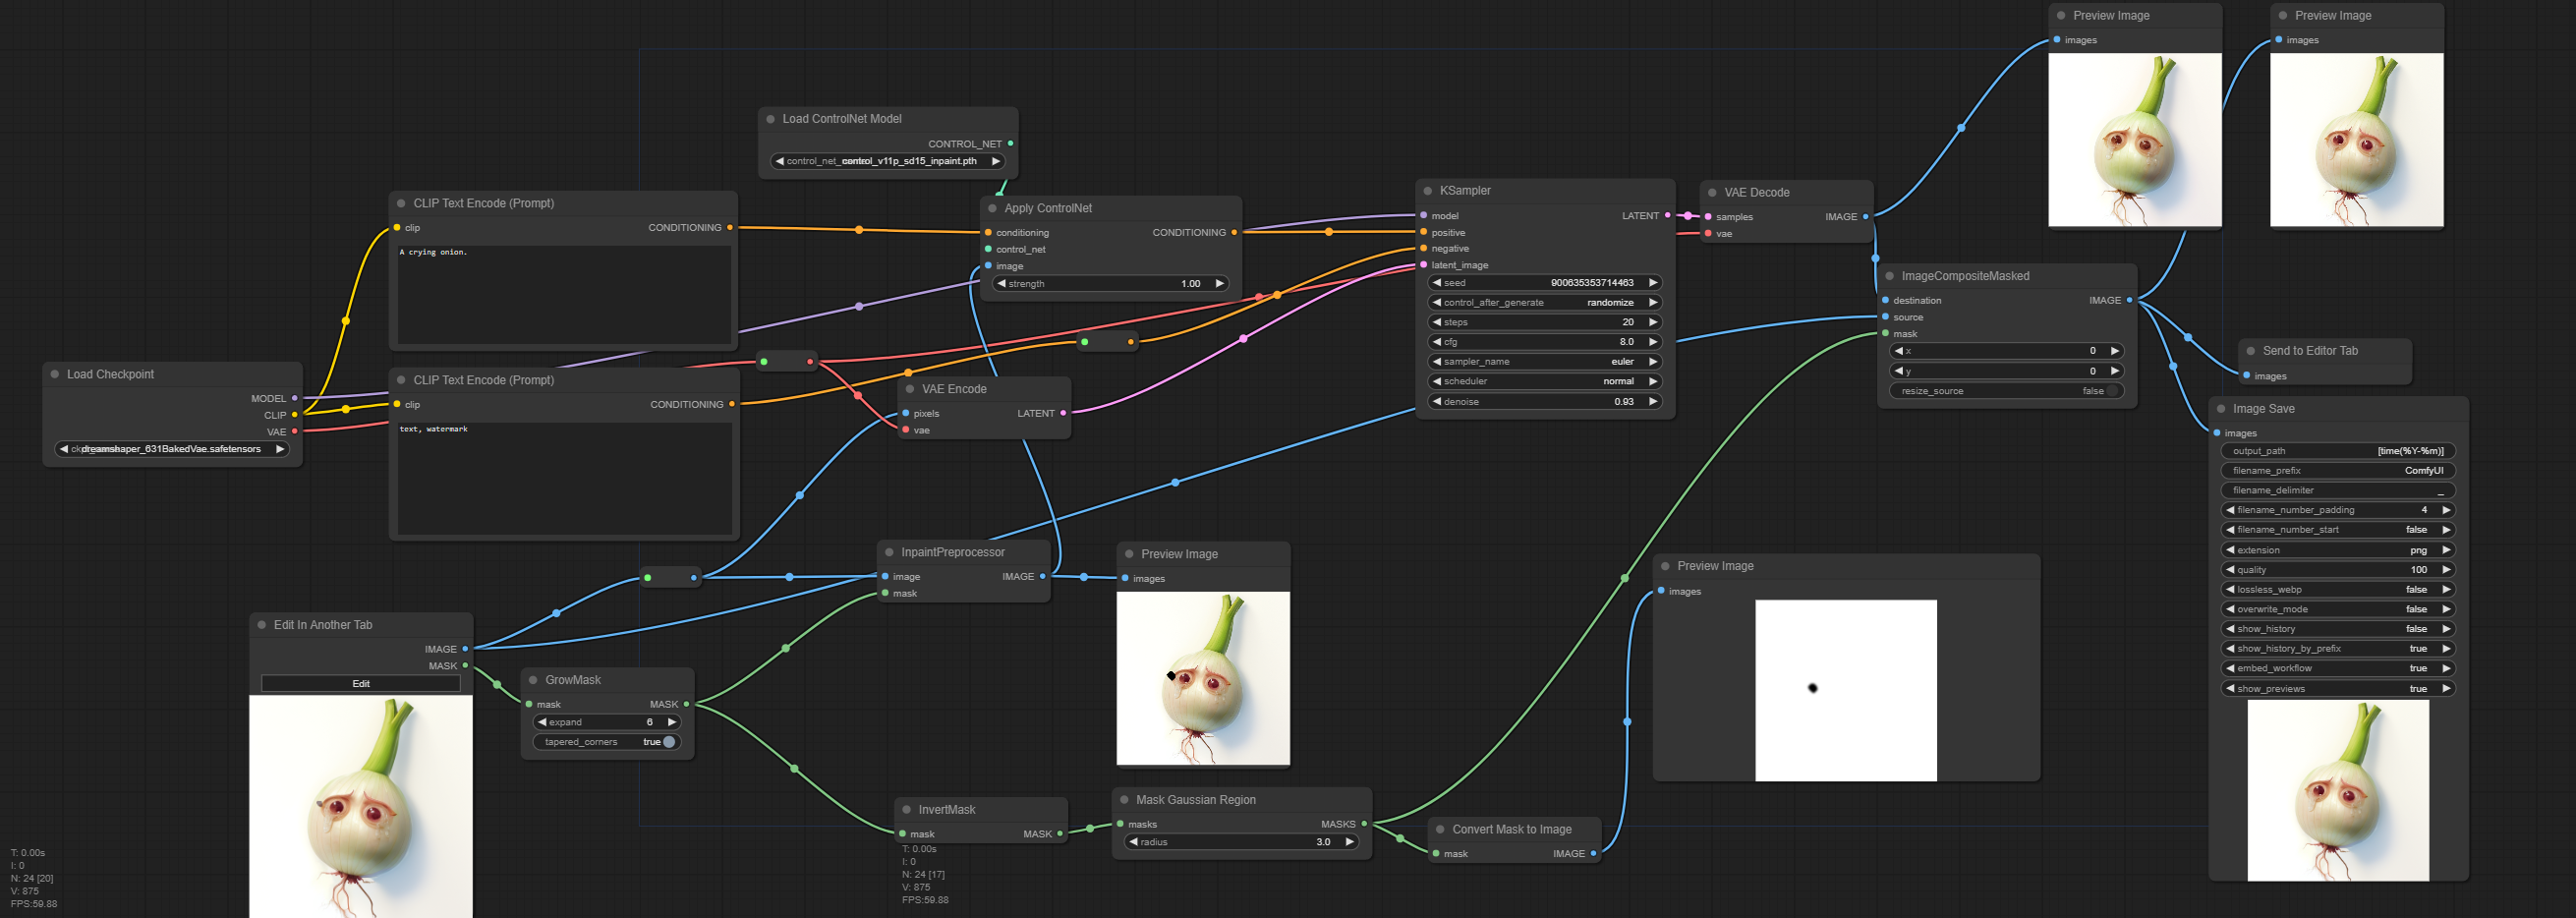
I have been using the controlnet inpaint with a workflow like this.

That workflow should be embedded in this image.
